|
|
PBP Commentary |
Coming up we have a welterweight MMA rules bout between James Basher (ranked 0 p4p, 0 weight class) and Tyler Durden (ranked 0 p4p, 0 weight class). Basher comes to the cage accompanied by Hunt You Down- Saliva. Durden has chosen This is your life as his entrance music. I'm sure you'll be fascinated to know that I was talking to some pointless Z list celebrity before the fight and he thought that Tyler Durden was going to win. Let's see if he was right.
 |
|
 |
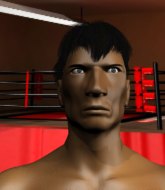
| 176 cm
21
171 lbs
4 - 5 - 0 |
|
178 cm
29
165 lbs
5 - 2 - 0 |
BJJ White Belt
Excellent boxer
Very quick |
|
BJJ White Belt
Excellent boxer
Heavy handed |
|
| |
|
Ladies and gentlemen. This fight is 3 rounds, in the welterweight division.
Introducing the fighter to my left, fighting out of the red corner.
With a record of
4 - 5 - 0, fighting out of Sydney, James Basher!
And introducing the fighter to my right, fighting out of the blue corner.
With a record of
5 - 2 - 0, fighting out of Sydney, Tyler Durden!
The judges for this bout are Skip Squint, Winston Howard and Summer Carpenter.

The bell rings for round one and we are underway!
Durden dives in and grabs Basher's left leg, looking for a takedown. Basher pushes down on Durden's head and hops out.
Durden is trying hard to land a takedown here. Basher sprawls well and keeps this one on the feet.
Durden throws an uppercut from half a mile away. Basher sees it coming and avoids it easily.
Basher misses with a wild combination.
Durden looks frustrated there after his takedown attempt is stuffed easily.
James Basher has stuffed three takedown attempts in the round now. That's going to take a lot out of Tyler Durden.
Durden looks to land a right hand but Basher moved out of range.
Durden digs a good body shot into Basher's ribs.
Basher tries a head kick but it misses.
Basher throws a leg kick which misses Durden's front leg but catches the back leg as Durden tries to avoid it.
Durden shoots in with a takedown attempt and he has Basher pinned against the cage. Basher gets the underhooks and manages to circle away.
Basher throws a wild combination but nothing lands.
Durden stuns Basher with a nice body shot, before stepping back out of range.
Durden fails miserably with a takedown attempt.
Basher tries to bum rush Durden with a series of wild strikes but Durden uses good footwork to avoid the assault.
Durden lands a jab to the nose.
James Basher seems to be the more aggressive standup fighter in this bout.

That's one minute gone in the round.
A head kick from Basher lands but Durden takes it in his stride.
Durden shoots in looking for a takedown but Basher manages to keep the fight standing, pushing Durden's face into the canvas for good measure before circling away.
Basher swings away but doesn't land with a series of punches.
Durden will need to tighten up his combinations if he doesn't want to gas himself out, swinging at thin air.
Basher looks to score with a combo but nothing lands.
Durden tries to shoot in for a takedown. He's got hold of a leg but Basher swivels and escapes.
Durden lands a jab. Then a cross. Then finally a nice hook to the body. Good work there by Durden.
Durden avoids a punch combination nicely.
Durden misses with a takedown attempt. He shot from a bit too far out.
Basher scores with a one two! Durden had his feet all tangled up there and couldn't avoid the strikes.
Durden dodges the punch combination from Basher.
Durden swings and misses with a hook to the body.

That's two minutes gone in the round.
Durden fails with a takedown attempt.
This has been an exciting period of action!
Durden takes a step back and watches a body kick go sailing past his mid section.
Durden throws a hard body shot but it just misses.
No joy there for Basher, who threw a few shots but didn't land.
Basher misses with a jab, cross combination.
Durden lands a slapping body shot.
Basher stuffs the takedown attempt from Durden. Durden gets slowly back to his feet.
Basher rushes forward with a series of wild hooks but Durden moves out of range and avoids them all easily.
Basher is breathing heavily.
Durden fails with a rather predictable takedown attempt.
Durden fails to land the takedown.
Sloppy strikes from Basher. Those never looked like landing.
James Basher is looking to keep the fight on the feet at all costs.
Durden fails with a takedown attempt.

That's three minutes gone in the round.
Basher misses with a combination
and Durden cracks him with a counter punch right on the button.
Durden scores with a one two! Basher had his feet all tangled up there and couldn't avoid the strikes.
Basher swings away but doesn't land with a series of punches.
Durden misses with a takedown attempt. He shot from a bit too far out.
Basher falls off balance throwing a combination
and Durden counters with a three punch combo that has Basher backing up. Basher nods at Durden to acknowledge the strikes.
Basher throws a right and a left that Durden avoids nicely.
Basher misses with a jab, cross combination.
Durden fakes high and shoots in for a takedown but Basher avoids it really well and circles away.
Basher misses with a series of wild punches.
Basher misses with a jab, cross combination.
Basher tries to bum rush Durden with a series of wild strikes but Durden uses good footwork to avoid the assault.

That's four minutes gone in the round.
Durden works over Basher's head and body with a nice combination.
Basher misses with the combination.
Durden shoots in with a takedown attempt and he has Basher pinned against the cage. Basher gets the underhooks and manages to circle away.
No joy there for Basher, who threw a few shots but didn't land.
Durden throws a combination but comes up with nothing but fresh air.
Basher avoids a lazy jab quite easily.
Horrible takedown by Durden or perhaps it was just good defense by Basher which made him look bad.
Basher throws a right and a left that Durden avoids nicely.
As the round comes to an end the crowd are showing their appreciation for a great round of action.
Basher tries a head kick but it misses.
The crowd are loving this. Great action here.
Basher takes a shot right to the bread basket.
Durden shoots in for a double leg but Basher sprawls well. That's going to sap some energy.
A slow jab from Durden misses its intended target.
And thats the end of the round the fighters go back to their corners.
That was a close round but I would say that James Basher will probably get the nod.
The fighters' corners scream their final instructions, as the referee calls time. Here we go, back to the action!

Basher misses with a double jab
letting Durden counter with a right hand.
A nice combination there by Basher.
Basher fails to land with the punch combination there - jab, cross, hook, miss, miss, miss.
A punch combination from Basher misses.
Durden lands with a nice body punch.
Basher keeping a good distance there, avoiding the body shot.
Basher misses with a few strikes there.
Durden thows a body shot but no joy.
Durden showing good head movement there, avoiding the strikes from Basher.
Durden looks to land a combination. Basher sees it coming but can only parry a couple of the shots.

Basher is rocked!
Durden wobbles Basher with a right hand and the left hook that follows puts him on his rear! Durden dives in with a huge flying punch that connects right on the button and puts Basher to sleep! - What a violent and spectacular finish!
Ladies and gentlemen, after 0:48 of round 2, we have a winner by way of KO (Punches). Tyler Durden!
|
|
|
|
|
|
|
|
|
|
|
|
|
|
|
|
|
|
|
|
|
|
|
| S |
C
A |
G |
S |
C
B |
G |
|
S |
C |
G |
|
energy
A | B |
|
hype
A | B |
|
pop
A | B |
|
mgr
A | B |
|
FIGHT
RATING
100% |
|
|
|
|
|
|
