|
|
PBP Commentary |
Coming up we have a light heavyweight MMA rules bout between Johnny Fairtex (ranked 0 p4p, 0 weight class) and Jay The Killer (ranked 0 p4p, 0 weight class). Both fighters really staring eachother down here, as Jay The Killer enters the cage!
 |
|
 |
| 188 cm
20
213 lbs
4 - 3 - 0 |
|
200 cm
22
215 lbs
0 - 0 - 0 |
BJJ Blue Belt
Good kicks
Experienced |
|
Good takedowns
Basic striking
Granite chin |
|
| |
|
Ladies and gentlemen. This fight is 3 rounds, in the light heavyweight division.
Introducing the fighter to my left, fighting out of the red corner.
With a record of
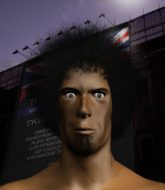
4 - 3 - 0, fighting out of London, Johnny Fairtex!
And introducing the fighter to my right, fighting out of the blue corner.
With a record of
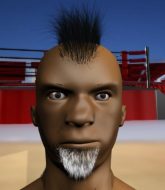
0 - 0 - 0, fighting out of London, Jay The Killer!
The judges for this bout are Steven Brown, William Gold and James Glass.

The bell rings for round one and we are underway!
Fairtex throws a nice inside leg kick.
Fairtex misses with an attempted mid kick.
The Killer shoots in but Fairtex avoids the takedown attempt easily.
The Killer shoots in and drives through. Fairtex sprawls well.
Fairtex pulls out of a head kick attempt.

Fairtex moves into the clinch.
Fairtex is pressed up against the cage. The Killer has hold of a leg and is looking to drag Fairtex down to the mat. Fairtex avoids the attempt though and has circled away. We're back to striking at a distance.
Johnny Fairtex has stuffed three takedown attempts in the round now. That's going to take a lot out of Jay The Killer.
The Killer shoots in for a takedown but Fairtex shows good takedown defense.
The Killer shoots in looking for a takedown. Fairtex tries to sprawl out of it but The Killer keeps driving through. The fighters are pinned against the cage. Fairtex manages to get underhooks and after a bit of a struggle, circles away and we're back to standing.
The Killer moves out of range as Fairtex strikes.
Fairtex misses with a jab, cross combination.
Fairtex sets himself and throws a head kick that knocks The Killer to the ground! Fairtex dives into full mount looking to finish!

It looks like Jay The Killer has been cut.
Fairtex knows he needs to get back to his feet asap. He's simply no match for The Killer on the ground.
This is a great period of action - very entertaining stuff!
The Killer working to try and regain half guard.
Fairtex thowing strikes but they're hitting the gloves, not doing any damage.
Fairtex controlling the pace for now.

Fairtex is in full mount, looking to secure a guillotine but The Killer is surviving well by controlling Fairtex's body position as best he can.

That's one minute gone in the round.
Fairtex throwing shots from mount but they're not landing.
The Killer really trying hard to get back to half guard here.
The Killer is persisting with the attempt to improve his position.
Fairtex controlling his opponent.
Fairtex throws an elbow from mount that misses. Lucky escape for The Killer because Fairtex loaded up on that one.
Fairtex prevents The Killer from getting the reversal.

That's two minutes gone in the round.
The crowd are hurling abuse towards the fighters... You can hardly blame them though because there isn't a lot going on in the fight.
Fairtex can't quite control the action as he would like just now, as The Killer is looking to escape.
The Killer is trying to escape the mount.
Fairtex sitting in mount, just looking to control for the moment.
Fairtex looking to control but The Killer is working nicely, looking to advance position himself.
The ref warns both fighters not to hold the cage as they work up against the meshing.

That's three minutes gone in the round.
The Killer is working to get back to half guard.
Fairtex looking to ground and pound his opponent to a finish here.
The Killer is desperately trying to improve his position but Fairtex has a good base and remains in mount.
Fairtex is landing with some decent strikes but The Killer is trying to advance his position so the referee is letting the fight continue.
Fairtex punching from mount but The Killer doing a good job of avoiding damage.

That's four minutes gone in the round.
Neither fighter has done anything of merit for a good minute or two here and the crowd are not happy about it.
The Killer is wriggling around trying to escape.
Fairtex controlling the position easily from mount.
The Killer really trying hard to get back to half guard here.
Fairtex takes a little breather and maintains the position. The referee will be looking for him to stay active from such a dominant position though.
The Killer can't escape the position.
Fairtex raining down shots from the mount!
And thats the end of the round the fighters go back to their corners.
Johnny Fairtex dominated that round.
The cut man is working on Jay The Killer's cut.
The minute break is over - no more time for sponges and pep talks - back to the action!

Fairtex tries a switch kick but it misses it's target.
The Killer closes the distance and clinches up with Fairtex, looking for a takedown. The Killer pushes Fairtex against the cage but Fairtex circles to the side and manages to break the clinch.
Johnny Fairtex is looking to throw some combinations by the looks of things.
Nice sprawl there from Fairtex as The Killer shoots in.
Fairtex lands a nice looking body kick.
Fairtex misses with a jab and misses with a cross straight after too.
The Killer shoots for a double leg takedown but Fairtex sprawls well. He's pushed The Killer's face into the mat and manages to get back to his feet relatively easily.
Johnny Fairtex has stuffed three takedown attempts in the round now. That's going to take a lot out of Jay The Killer.
The Killer shoots in with a takedown attempt and he has Fairtex pinned against the cage. Fairtex gets the underhooks and manages to circle away.
Fairtex misses with a half-hearted attempt at a head kick.
Fairtex avoids the head kick by The Killer.
Fairtex throws a head kick but The Killer moves out of range.
Fairtex throws a head kick that misses.
Fairtex tries a head kick but it misses.
The Killer shoots in for a takedown. "I don't think so" says Fairtex as he avoids it easily.
Fairtex stuffs the takedown.
Horrible takedown by The Killer or perhaps it was just good defense by Fairtex which made him look bad.
Fairtex pushes The Killer away with a front kick.
Both fighters are absolutely exhausted here.
That's one minute gone in the round.
The Killer looks for a takedown here. Will he get it? Fairtex is fending him off so far but The Killer persists. Nope, Fairtex circles away and we're back to standing.
The Killer fails to land the takedown.

The Killer bobs and weaves into range and then changes levels and scores with a nice takedown into side control.
The Killer tries for an arm triangle. That looks pretty tight to me. Is this one over!?! Possibly, maybe, no The Killer has let go of the choke. Obviously it wasn't as tight as we thought!
The Killer moves into full mount!
The Killer has control of Fairtex's right arm, working for a kimura. It's a bit of a token attempt though and Fairtex regains control of the situation pretty easily.
The Killer swings around for an armbar but it's a sloppy attempt and Fairtex is now in The Killer's guard. A big mistake from The Killer there, giving up the dominant position!
The Killer looking to hit a scissor sweep but Fairtex is one step ahead there.
That's two minutes gone in the round.
Fairtex postures up in The Killer's guard and throws a big left but The Killer blocks it.
Fairtex slips nicely into half guard.
Well, if Fairtex is going to just lie there, perhaps we should talk about what we're having for dinner tonight
I'm having a ham and pineapple pizza
Yum. Can't wait.
Fairtex thows a huge punch but The Killer dodges it nicely.
Fairtex wants to free his trapped foot but The Killer is holding on for dear life with his legs.

Fairtex stands up and beckons The Killer to join him on the feet.
The Killer shoots for a double leg takedown but Fairtex sprawls well. He's pushed The Killer's face into the mat and manages to get back to his feet relatively easily.
That's three minutes gone in the round.
Fairtex chopping away at his opponent's legs.
Fairtex throws a head kick but The Killer moves out of range.
Fairtex pivots as if he's going to throw a leg kick but stops half way.
Some wild striking there from Fairtex.
Fairtex keeps the fight standing with a nice sprawl.
Fairtex scores with a nice right hand.
Fairtex throws a wild combination but nothing lands.
Johnny Fairtex is looking to keep the fight on the feet at all costs.
The Killer fails with a takedown attempt from distance.
No luck for The Killer with that takedown attempt.
The Killer looks frustrated there after his takedown attempt is stuffed easily.
A head kick misses from Fairtex.
Horrible takedown by The Killer or perhaps it was just good defense by Fairtex which made him look bad.
The Killer fails with a takedown attempt.
The Killer gets the takedown into side control.
That's four minutes gone in the round.
Fairtex gives up the full mount - oops, sloppy defensive grappling there!
The Killer is working on an americana here. Ooh, that looks pretty nasty! Nope, Fairtex has managed to escape the submission attempt.
Fairtex tries to reverse the position but The Killer maintains control.
Fairtex might be looking to lock onto one of his opponent's long limbs for a submission, whilst we're on the ground.
The Killer is looking to secure an arm. He's managed it! He's pivoting for an armbar - that looks tight! But Fairtex has managed to get out of it and now he's in a dominant position. Nice work from Fairtex!
The Killer looking for a sweep. Not yet The Killer, not yet.
The crowd applaud the fighters efforts here as the round comes to an end.
The Killer being controlled here, momentarily.
Fairtex stopping the sweep attempt from The Killer.
And thats the end of the round the fighters go back to their corners.
Johnny Fairtex dominated that second round.
The cut man is working on Jay The Killer's cut.
That's the end of the round. The referee orders the cornermen out of the cage so we can get back down to business. The crowd applaud as we get ready to start the final round!

Fairtex lands a nice shot that snaps The Killer's head back.
A really sloppy takedown attempt there from The Killer.
Fairtex misses with an attempted mid kick.
A head kick misses from Fairtex.
Fairtex is looking to slow The Killer down with leg kicks.
The Killer avoids the head kick by Fairtex.
The Killer fails miserably with a takedown attempt.
The Killer shoots in with a takedown attempt and he has Fairtex pinned against the cage. Fairtex gets the underhooks and manages to circle away.
Johnny Fairtex has stuffed three takedown attempts in the round now. That's going to take a lot out of Jay The Killer.
Fairtex lands with a head kick! That's gotta hurt.
Fairtex lands a beauty of a right hand that gets the crowd cheering.
Fairtex throws a head kick that misses.
The Killer will have to do better than that with his takedown attempts.
Both fighters are breathing heavily.
The Killer avoids the head kick by Fairtex.
Fairtex tries to bum rush The Killer with a series of wild strikes but The Killer uses good footwork to avoid the assault.
That's one minute gone in the round.
Fairtex stuffs the takedown.
Fairtex throws a head kick but The Killer moves out of range.
Jay The Killer seems to be the more aggressive standup fighter in this bout.
The Killer fails to land the takedown.
The Killer on the receiving end of a decent leg kick there by Fairtex. Fairtex obviously looking to wear him down.
Fairtex pulls out of a head kick attempt.
Fairtex lands with a thumping leg kick.
Fairtex throws a head kick that misses and slips in the process. He scrambles back to his feet and the fighters circle.
The Killer throws a looping left and ducks down for a takedown. He's got his arms around Fairtex's waist but Fairtex gets an underhook and avoids the takedown by throwing The Killer off to one side.
The Killer shoots in for a takedown and gets it. Oh and he's advanced to full mount straight away.
Fairtex is desperately trying to improve his position but The Killer has a good base and remains in mount.
Fairtex wriggling around on the bottom manages to avoid the strikes thrown by The Killer.
Fairtex tries to lock up and control but The Killer gives him a forearm to the face and pushes him away.
The Killer goes for an armbar but Fairtex turns quickly into his guard - lovely anticipation from Fairtex.
The Killer looking to sweep using the butterfly guard but Fairtex puts pay to that idea as he passes nicely into half guard.
That's two minutes gone in the round.
Fairtex escapes and gets back to his feet.
Fairtex looks to score with a combo but nothing lands.
Fairtex stuffs the takedown.
Fairtex keeps the fight standing with a nice sprawl.
Fairtex misses with a half-hearted attempt at a head kick.
Fairtex tests The Killer's chin there with a solid looking shot.
The crowd are loving this. Great action here.
The Killer shoots in with a takedown attempt and he has Fairtex pinned against the cage. Fairtex gets the underhooks and manages to circle away.
Fairtex moves into the clinch successfully.
The Killer is trying to work for a single leg takedown but Fairtex pulls him back up using the underhooks.
Fairtex lands a nice knee to the body.
Fairtex prevents the takedown attempt.

Fairtex manages to break the clinch.
Fairtex throws a head kick that misses and slips in the process. He scrambles back to his feet and the fighters circle.
Fairtex looking to throw a kick but he's pulled out of it.
Fairtex uses good footwork to get in and out, landing a nice hook.
That's three minutes gone in the round.
Fairtex throws a wild body kick that The Killer sees coming a mile off.
Fairtex misses with a half-hearted attempt at a head kick.
The Killer tries a switch kick but it misses it's target.
The Killer shoots in for a double leg but Fairtex sprawls well. That's going to sap some energy.
The Killer avoids the head kick by Fairtex.
Fairtex doesn't manage to clinch there - The Killer circles away.
The Killer closes the distance and clinches up with Fairtex, looking for a takedown. The Killer pushes Fairtex against the cage but Fairtex circles to the side and manages to break the clinch.
Fairtex throws a combination but comes up with nothing but fresh air.
The Killer fails with a takedown attempt.
The Killer changes levels and looks for a double leg takedown. Fairtex tries to avoid it but The Killer manages to keep hold of a leg and drag Fairtex to the ground. Fairtex escapes though and pops straight back up to his feet.
The Killer fails to land the takedown.
The Killer shoots in with a takedown attempt and he has Fairtex pinned against the cage. Fairtex gets the underhooks and manages to circle away.
Fairtex tries a head kick but it misses.
A big left from The Killer misses.
The Killer fails with a takedown attempt.
Fairtex is using his height advantage well here, landing a good percentage of his punches.
That's four minutes gone in the round.
A lull in the action here being met with boos from the crowd.
The Killer looks frustrated there after his takedown attempt is stuffed easily.
The Killer shoots in with a takedown attempt and he has Fairtex pinned against the cage. Fairtex gets the underhooks and manages to circle away.
Johnny Fairtex is winning the standup battle so far.
Fairtex misses with a head kick.
The Killer closes the distance and looks for a trip takedown... aaaand he's got it - The Killer lands in his opponent's guard.
The Killer advances to half guard.
As the round comes to an end the crowd are showing their appreciation for a great round of action.
Fairtex manages to escape and get back to his feet!
Jay The Killer has stepped it up - he knows he needs a finish here!
Fairtex throws a head kick that half lands.
Fairtex lands a monster head kick that reverborates around the arena! The crowd goes wild as The Killer crumples to the floor! Fairtex milks the crowd's applause and if that isn't knockout of the night, I will be very surprised!
Ladies and gentlemen, after 4:58 of round 3, we have a winner by way of KO (Head Kick). Johnny Fairtex!
|
|
|
|
|
|
|
|
|
|
|
|
|
|
|
|
|
|
|
|
|
|
|
| S |
C
A |
G |
S |
C
B |
G |
|
S |
C |
G |
|
energy
A | B |
|
hype
A | B |
|
pop
A | B |
|
mgr
A | B |
|
FIGHT
RATING
59% |
|
|
|
|
|
|
