|
|
PBP Commentary |
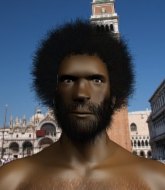
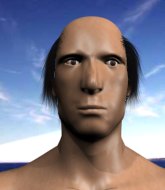
Coming up we have a welterweight MMA rules bout between Jon Jo (ranked 0 p4p, 0 weight class) and Angus Dickinson (ranked 0 p4p, 0 weight class). Over to our ring announcer for the fighter introductions!
 |
|
 |
| 185 cm
25
180 lbs
0 - 1 - 0 |
|
180 cm
23
170 lbs
1 - 0 - 0 |
BJJ White Belt
Solid boxing
Prefers standup |
|
Decent wrestler
Brawler
Determined |
|
| |
|
Ladies and gentlemen. This fight is 3 rounds, in the welterweight division.
Introducing the fighter to my left, fighting out of the red corner.
With a record of
0 - 1 - 0, fighting out of Los Angeles, Jon Jo!
And introducing the fighter to my right, fighting out of the blue corner.
With a record of
1 - 0 - 0, fighting out of Los Angeles, Angus Dickinson!
The judges for this bout are , Frank Antenori and Jack Bonds.

The bell rings for round one and we are underway!
Dickinson uses good footwork to avoid the strikes from Jo.
Dickinson will have to do better than that with his takedown attempts.

Dickinson shoots in and gets a takedown into Jo's guard.
The referee is asking the fighters to pick up the pace.
Jo wants to get back to his feet but Dickinson is in a dominant position and won't allow it.
Dickinson trying to control but Jo is working from the bottom.
Jo is trying to keep Dickinson in close.
Dickinson wants to pass the guard but Jo is keeping the position.

Jo pushes Dickinson off and gets back to his feet.

That's one minute gone in the round.
Dickinson fails to land the takedown.
Jo throws a combination but it was largely blocked by Dickinson.
Dickinson shoots and misses
and Jo counters with a three punch combo that has Dickinson backing up. Dickinson nods at Jo to acknowledge the strikes.
Jon Jo has stuffed three takedown attempts in the round now. That's going to take a lot out of Angus Dickinson.
Jo fails to land with a series of punches.
Jo tries to bum rush Dickinson with a series of wild strikes but Dickinson uses good footwork to avoid the assault.
Jo tries to grapple but his opponent circles
and Dickinson counters with a nice double leg into guard.

That's two minutes gone in the round.
Dickinson throwing shots from guard but he's hitting more mat than opponent.
Jo on his back here. We all know that wrestlers don't like being on their back so let's see if Jo tries to get out of the position.
Dickinson trying to control the position from guard on top but Jo is wriggling around, looking for whatever he can.
Jo working the defensive guard well to avoid strikes from Dickinson.
Dickinson has the superior BJJ but he's also working some ground strikes into his gameplan.
This is a great period of action - very entertaining stuff!
Dickinson stays in close to Jo's body and controls the position.

OK we're going to have a standup here. Angus Dickinson hasn't been effective enough on the ground and the referee wants a restart.
Dickinson needs to keep his hands up - Jo had a free shot at his head there.

That's three minutes gone in the round.
Jo tries to close the distance and clinch up but Dickinson swats him away and circles back towards the center.
Jo doesn't manage to clinch there - Dickinson circles away.
Dickinson throws a loose over hand right and dives in with a double leg takedown. Jo tries to sprawl but it's too late and the fighters hit the mat. Dickinson is in Jo's guard.
Dickinson prevents Jo from getting back to his feet.

Dickinson is holding a leg here, probably looking for an ankle lock - he drops back and goes for it! Jo is in trouble! Is it all over??? No! Jo has escaped and now he's on top!
Jo knows he needs to get back to his feet asap. He's simply no match for Dickinson on the ground.
Dickinson is looking for a triangle but Jo pushes his legs off easily.
Jo has to be careful here, sitting in the guard of a superior BJJ player.

That's four minutes gone in the round.
Dickinson looking for submissions from the bottom here. Moving his hips around, possibly looking for an armbar.
Dickinson has Jo pulled in close to control his posture.
Dickinson is throwing his legs up, looking for submissions. Jo is aware though and is defending well.
As the round comes to an end the crowd are showing their appreciation for a great round of action.
Dickinson with a couple of shots from the bottom there - nothing Jo can't handle though.
And thats the end of the round the fighters go back to their corners.
Angus Dickinson dominated that round.
The fighters' corners scream their final instructions, as the referee calls time. Here we go, back to the action!

Jo blocks a head kick by Dickinson.
Jon Jo is looking to throw some combinations by the looks of things.
Dickinson gets his takedown attempt stuffed easily
and Jo counters with a one-two to the body.
Angus Dickinson seems to be the more aggressive standup fighter in this bout.
Dickinson looking for a takedown here - he's got it.
Dickinson lands a nice shot whilst sitting in his opponent's guard.
Dickinson won't allow Jo to get back to his feet.
Angus Dickinson has got the better of the ground game so far.
Dickinson trying to control the position from guard on top but Jo is wriggling around, looking for whatever he can.
Dickinson loading up with the ground and pound but he's missing more than he's landing in this flurry.
That's one minute gone in the round.
Jo lands a beautiful switch and he's in full mount! That could spell trouble for Dickinson!
The ref warns both fighters not to hold the cage as they work up against the meshing.
Dickinson flailing away with punches but nothing is landing.
Dickinson slips a leg in and gets back to half guard.
Jo tries to stand but can't do so whilst Dickinson controls his leg.
Dickinson gets full guard.
That's two minutes gone in the round.
Jo gets to his feet. Dickinson looking to butt scoot but the ref puts an end to that. On your feet son!
Jo tries to bum rush Dickinson with a series of wild strikes but Dickinson uses good footwork to avoid the assault.
Dickinson misses with a body shot
and Jo counters with a one-two to the body.
Both fighters are absolutely exhausted here.
Jo doesn't manage to clinch there - Dickinson circles away.
Jo misses with a double jab.
Dickinson needs to keep his hands up - Jo had a free shot at his head there.
Wooooo! Give it up for these two warriors! They are putting on a show!
Dickinson shoots in with a takedown attempt and he has Jo pinned against the cage. Jo gets the underhooks and manages to circle away.
Jo fails with an attempt to clinch.
That's three minutes gone in the round.
Dickinson misses with a takedown
and Jo counters with a lovely shot to the body.
Jon Jo has stuffed three takedown attempts in the round now. That's going to take a lot out of Angus Dickinson.
Dickinson shoots in for a double leg but Jo sprawls well. That's going to sap some energy.
Jo lunges at Dickinson with a hook that half lands and is half blocked by Dickinson's hand.
Dickinson takes an uppercut right on the button but keeps his composure.
Jo blocks the body kick.
Jo uses good footwork to get in and out, landing a nice hook.
Dickinson dives in and grabs Jo's left leg, looking for a takedown. Jo pushes down on Dickinson's head and hops out.

Jo clinches.
Some stalling of biblical proportions here from Jo.

Dickinson manages to break the clinch.
That's four minutes gone in the round.
Some wild striking there from Dickinson.
Jo tries to close the distance and clinch up against the cage but Dickinson paws at him with a jab and circles away.
Jo scores with a crisp jab that stopped Dickinson in his tracks.
Dickinson on the wrong end of a nice jab.
This has been an exciting period of action!
Jo will need to tighten up his combinations if he doesn't want to gas himself out, swinging at thin air.
Some wild striking there from Jo.
As the round comes to an end the crowd are showing their appreciation for a great round of action.
Jo swings wildly with a right hand that was never going to find it's target.
And thats the end of the round the fighters go back to their corners.
Jon Jo dominated that second round.
That's time! Back to the action! This is the final round!

Jo misses with a series of wild punches.
Dickinson shoots in and drives through. Jo sprawls well.
Dickinson takes a jab on the nose. He smiles like he loves it and keeps coming.
A shot to the body from Dickinson misses
and Jo counters with a one-two to the body.
Dickinson fails to land the takedown.
Jo is looking to take this fight into the clinch.
Some bone on bone action there as Jo checks a low kick. Luckily it wasn't a particularly hard one.

Dickinson moves into the clinch.
That's one minute gone in the round.
A real battle for position is taking place between these two warriors.
Dickinson prevents Jo from breaking the clinch.
Dickinson tries to pull guard but can't drag his opponent to the mat. Jo just stands there and leans against the cage.
Jon Jo has stuffed three takedown attempts in the round now. That's going to take a lot out of Angus Dickinson.
Dickinson takes a big intake of breath there - he's definitely tired.
Jo is trying to force a seperation but Dickinson has the dominant position.
Jo is trying to work out of this bad position, with his back against the cage.

Jo breaks the clinch.
Nice defenses there by Jo.
Dickinson dodges the punch combination from Jo.
Jo circles away from the clinch attempt.
Dickinson showing good head movement there, avoiding the strikes from Jo.
Dickinson tries to clinch up.
That's two minutes gone in the round.
Dickinson looking to shoot here. He's gone for it and he's landed a takedown into mount! Oh, that's bad for Jo!
Jo tries to get back to half guard but can't.
Dickinson landing shots from mount.
Jo reaches up to try and control the position but Dickinson seems to have an arm triangle now! Uh oh! Jo rolls and tries to escape and now Dickinson has his back!
Can Jo hold on?! Dickinson is landing more strikes to his hapless foe.
This has been an exciting period of action!
Dickinson has the hooks in. Jo is trying to push off one leg but he has to do so cautiously to avoid being submitted.
That's three minutes gone in the round.
Good control from Dickinson.
Dickinson working for a choke but Jo is defending well.
Jo is trying to get back to his feet but he's not managed it yet.
Can Jo hold on?! Dickinson is landing more strikes to his hapless foe.
That's four minutes gone in the round.
Jo fending off the submission attempt from Dickinson.
Jo is very frustrated here, being controlled quite effectively by Dickinson.
The crowd applaud the fighters efforts here as the round comes to an end.
Jo is displaying good submission defense - not really looking in danger of submitting to the rear naked choke at the moment. That could change in an instant of course if Dickinson gets his way!
And that's the end of the fight!
Angus Dickinson comfortably won the final round on my scorecard.
I think Dickinson has won this one but let's see whether the judges agree with me. Over to the ring announcer for the scorecards.
Ladies and gentlemen, after 3 rounds of action, we go to the scorecards for a decision.
Judge Percy O'Donnell scores the fight 28:29
Judge Frank Antenori scores the fight 28:29
Judge Jack Bonds scores the fight 28:29
In favor of your winner, by unanimous decision... Angus Dickinson!
|
|
|
|
|
|
|
|
|
|
|
|
|
|
|
|
|
|
|
|
|
|
|
| S |
C
A |
G |
S |
C
B |
G |
|
S |
C |
G |
|
energy
A | B |
|
hype
A | B |
|
pop
A | B |
|
mgr
A | B |
|
FIGHT
RATING
55% |
|
|
|
|
|
|
