|
|
PBP Commentary |
Coming up we have a featherweight MMA rules bout between Josey Wales (ranked 0 p4p, 0 weight class) and Sirius Bidness (ranked 0 p4p, 0 weight class). Bidness is bobbing his head along to his entrance song: GRRRRR!!. Both fighters look fresh as a daisy as they make their way towards the ring.
 |
|
 |
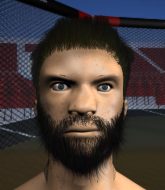
| 170 cm
23
148 lbs
4 - 2 - 0 |
|
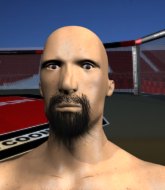
177 cm
20
155 lbs
4 - 2 - 0 |
Good wrestling
Basic striking
KO power |
|
Decent wrestler
Decent boxing
Granite chin |
|
| |
|
Ladies and gentlemen. This fight is 3 rounds, in the featherweight division.
Introducing the fighter to my left, fighting out of the red corner.
With a record of
4 - 2 - 0, fighting out of Tokyo, Josey Wales!
And introducing the fighter to my right, fighting out of the blue corner.
With a record of
4 - 2 - 0, fighting out of Tokyo, Sirius Bidness!
The judges for this bout are Yukihiro Shimada, Yukihiro Yamamoto and Hirohito Nitta.

The bell rings for round one and we are underway!

Bidness tries to keep at a distance but Wales has taken the fight into the clinch.
Bidness blocks a couple of punches on the inside.
Bidness wants to break free but Wales has control.
Bidness is trying to work out of this bad position, with his back against the ropes.
Bidness stops a takedown attempt from Wales.
A short right hand to the side of the head by Bidness.
Bidness is looking to break free of the clinch but Wales has double underhooks.
Bidness works on Wales's body with a couple of short punches.
Bidness lands a hook to the body. It's hard to tell if that hurt Wales or not.
Wales tries to pull guard but Bidness holds him up against the ropes and eventually Wales drops back down to his feet.
Bidness is trying to break the clinch but Wales has him pressed against the ropes.
Bidness wants to strike at distance but he can't break free of the clinch.
The two fighters are working to gain dominance in the clinch.
Bidness wants to push off and get back to the center of the mat but Wales has him pressed against the ropes.
Bidness is pressed up against the ropes. Wales has hold of a leg and is looking to drag Bidness down to the mat. Bidness avoids the attempt though and has circled away. We're back to striking at a distance.
That's three failed takedown attempts in the round for Josey Wales. That's going to take a lot out of him.
Bidness avoids the clinch attempt nicely.
Wales showing good head movement there, avoiding the strikes from Bidness.

That's one minute gone in the round.
Wales shoots in and drives through. Bidness sprawls well.

Excellent takedown into side control there by Wales.
The fighters are trapped in the ropes so we're going to have a reposition here. The ref calls for a break and repositions the fighters in the center of the ring.
Wales tries to get to his feet but Bidness is in the middle of advancing position himself and ends up with Wales in his guard.
Bidness is looking to get back to his feet but can't, whilst Wales is controlling him.

Wales drops back, looking for a kneebar! Bidness looks panicked! The fighters roll across the mat, one looking to finish, one looking to escape. Bidness looks to have wriggled free... Yes, he's got his leg free and he's dived into side control! Good work there from Bidness!

That's two minutes gone in the round.
Wales is trying to control Bidness's posture but Bidness avoids it.
The fighters are tangled up in the ropes here. We might need a restart if the fighters can't break free themselves.

That's three minutes gone in the round.
Bidness wants to stand but Wales has his arm trapped.
Wales is looking to regain half guard here but Bidness keeps moving and retains side control.
Wales is working hard here to advance position.
Wales on his back here. We all know that wrestlers don't like being on their back so let's see if Wales tries to get out of the position.
Bidness working away.

That's four minutes gone in the round.
A lull in the action here being met with boos from the crowd.

Neither fighter is doing enough for the referee's liking and he's decided to stand them back up.
Bidness connects with a body shot.
Bidness ducks right into an uppercut from Wales.
A really sloppy takedown attempt there from Wales.
Bidness scores with a jab to the body.
The crowd thankful this round is nearly over.
Wales tries to clinch but Bidness moves out of range.
Josey Wales seems to be the more aggressive standup fighter in this bout.
Wales tries to close the distance and clinch but Bidness swats him to one side with an open hand palm strike and circles away.
And thats the end of the round the fighters go back to their corners.
Sirius Bidness dominated that round.
Well, the break between rounds is over. Let's get back to the scrappin!

Danga de danga de dang - Bidness scores with a four punch combination!
Wales tries to clinch but is not successful on this occasion.
Wales throws a looping left and ducks down for a takedown. He's got his arms around Bidness's waist but Bidness gets an underhook and avoids the takedown by throwing Wales off to one side.
Wales looks frustrated there after his takedown attempt is stuffed easily.
Wales jabbing away but nothing is landing.
Wales shoots for a takedown but Bidness saw that one coming a mile off and avoided it easily.
That's three failed takedown attempts in the round for Josey Wales. That's going to take a lot out of him.
Wales closes the distance and clinches up with Bidness, looking for a takedown. Wales pushes Bidness against the ropes but Bidness circles to the side and manages to break the clinch.
No joy there for Bidness, who threw a few shots but didn't land.
Bidness ducks down and throws a hook to the body.
Bidness misses with a few strikes there.
Bidness lands a two punch combo.

Wales is rocked!
That's one minute gone in the round.
Bidness will need to tighten up his combinations if he doesn't want to gas himself out, swinging at thin air.
Oh Wales is still all over the place! His legs are completely gone! Will he be able to recover?!!
Wales wants to clinch up but Bidness keeps it at a distance.
Wales shoots in and drives through. Bidness sprawls well.
Wales looks for a takedown here. Will he get it? Bidness is fending him off so far but Wales persists. Nope, Bidness circles away and we're back to standing.
Both fighters are absolutely exhausted here.
The fight stays on the outside here - Wales looks like he's thinking about clinching though.
Bidness fails to land with a series of punches.
Wales looks for a takedown. He's got it. We're now in half guard.

The fighters are starting to get a bit slippery now, which will make submissions a bit more difficult.
Bidness makes some distance and scrambles quickly back to his feet. Nice work!
Sirius Bidness is looking to keep the fight on the feet at all costs.
That's two minutes gone in the round.
Bidness looks to score with a combo but nothing lands.
Wales looks for a takedown but Bidness sprawls well.
Bidness misses with the combination.
Wales tries to clinch there but Bidness circles away.
Bidness stuffs the takedown.
Bidness scores with a jab to the body.
Bidness fails to land with a series of punches.
Wales throws a combination that misses
and Bidness counters with a monster hook and another for good measure! Wales falls to the ground, out cold! Stick some heavy metal music over the top of that clip and it's one for the highlight makers!
Ladies and gentlemen, after 3:02 of round 2, we have a winner by way of KO (Strikes). Sirius Bidness!
|
|
|
|
|
|
|
|
|
|
|
|
|
|
|
|
|
|
|
|
|
|
|
| S |
C
A |
G |
S |
C
B |
G |
|
S |
C |
G |
|
energy
A | B |
|
hype
A | B |
|
pop
A | B |
|
mgr
A | B |
|
FIGHT
RATING
30% |
|
|
|
|
|
|

