|
|
PBP Commentary |
Coming up we have a middleweight MMA rules bout between Bob Bailey (ranked 0 p4p, 0 weight class) and Freddy Hutchinson (ranked 0 p4p, 0 weight class). Freddy Hutchinson struggled to make weight for this fight. He only made it down to 187.9lbs at the first attempt and had to take the additional two hours to make the official bout weight. Let's see how much it's taken out of him. Bob Bailey has a significant reach advantage - let's see if he can make it count.
 |
|
 |
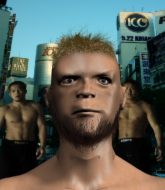
| 187 cm
28
195 lbs
14 - 17 - 0 |
|
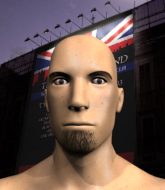
163 cm
27
204 lbs
5 - 6 - 0 |
Good wrestling
Basic striking
Very quick |
|
Good wrestler
Decent boxing
Knockout power |
|
| |
|
Ladies and gentlemen. This fight is 3 rounds, in the middleweight division.
Introducing the fighter to my left, fighting out of the red corner.
With a record of
14 - 17 - 0, fighting out of St Petersburg, Bob Bailey!
And introducing the fighter to my right, fighting out of the blue corner.
With a record of
5 - 6 - 0, fighting out of St Petersburg, Freddy Hutchinson!
The judges for this bout are Aleksei Zolotukhin, Viktor Lagutenko and Sergei Dronov.

The bell rings for round one and we are underway!
Bailey tries a switch kick but it misses it's target.
Bob Bailey seems to be the more aggressive standup fighter in this bout.
Hutchinson misses with a hook. Bailey ducked under it nicely.
Bailey fails to land the takedown.
Hutchinson misses with a looping left.
Bailey shoots in but Hutchinson avoids the takedown attempt easily.
Hutchinson stuffs a takedown. It's all about dictating where the fight takes place and Hutchinson wants it to stay on the feet.
That's three failed takedown attempts in the round for Bob Bailey. That's going to take a lot out of him.
Hutchinson darts in and out, connecting with a jab.
Hutchinson misses with a looping right.
Hutchinson throws a jab but it's blocked by Bailey.
Bailey shoots in looking for a takedown but Hutchinson manages to keep the fight standing, pushing Bailey's face into the canvas for good measure before circling away.

Hutchinson closes the distance and clinches.
Hutchinson tries to land a knee to the head but Bailey blocks with his arms.
Hutchinson throws a vicious knee straight up the middle but Bailey blocks it with crossed arms.
Hutchinson tries a knee to the head but he's missed.
Hutchinson tries to land a knee to the head but misses.

Bailey has double underhooks and is working for a body lock takedown. He's got it. The fighters land in half guard but Hutchinson regains guard immediately.

That's one minute gone in the round.
Hutchinson managing to control the position.
Hutchinson is trying to control the position from the bottom.
Bailey trying to control the position from guard on top but Hutchinson is wriggling around, looking for whatever he can.

The ref calls for a clean break and stands the fighters back up. Freddy Hutchinson wasn't active enough on the ground.
Hutchinson misses with a looping right.

That's two minutes gone in the round.
Bailey tries for a takedown but Hutchinson sees it coming a mile off and avoids it easily.
Bailey shoots and misses
and Hutchinson counters with a nice uppercut.
Hutchinson tries to clinch there but Bailey circles away.
Hutchinson doesn't manage to clinch there - Bailey circles away.
Bailey shoots for a double leg takedown but Hutchinson sprawls well. He's pushed Bailey's face into the mat and manages to get back to his feet relatively easily.
Bailey shoots in but no luck this time.
Hutchinson throws out a loose jab but Bailey uses good head movement to avoid it.
Hutchinson keeps the fight standing with a nice sprawl.
Bailey throws a looping left and ducks down for a takedown. He's got his arms around Hutchinson's waist but Hutchinson gets an underhook and avoids the takedown by throwing Bailey off to one side.
Hutchinson tries to clinch but Bailey is having none of it.
Hutchinson throws a hook to the side of Bailey's head but Bailey sees it coming and ducks under it beautifully.
Hutchinson is moving around nicely and scores here with a single head shot.
No luck for Bailey with that takedown attempt.
Fantastic stuff here - a very entertaining period of action, which has drawn cheers from the crowd.
Bailey misses with a takedown attempt - Hutchinson sprawls well and throws a nice strike on the way out which just misses.
Hutchinson scores with a sloppy right hand. Bailey should have avoided that one.

That's three minutes gone in the round.
Bailey tries to score a power double leg takedown but Hutchinson sees that one coming and sprawls well. That will dishearten Bailey somewhat.
Bailey shoots in looking for a takedown but Hutchinson manages to keep the fight standing, pushing Bailey's face into the canvas for good measure before circling away.
Hutchinson tries to clinch up but Bailey circles away and keeps his distance.
Bailey fails with a takedown attempt.
Bailey misses with a takedown attempt - Hutchinson sprawls well and throws a nice strike on the way out which just misses.
Hutchinson lands with a cross to side of his opponent's head.
Hutchinson is looking to take this fight into the clinch.
Bailey closes the distance and clinches up with Hutchinson, looking for a takedown. Bailey pushes Hutchinson against the cage but Hutchinson circles to the side and manages to break the clinch.
Hutchinson tries to clinch but Bailey is having none of it.
Bailey throws a looping left and ducks down for a takedown. He's got his arms around Hutchinson's waist but Hutchinson gets an underhook and avoids the takedown by throwing Bailey off to one side.

That's four minutes gone in the round.
Hutchinson gets a clinch.
Hutchinson tries to land a knee to the head but Bailey blocks with his arms.
Hutchinson with an attempt at a knee that misses.
Bailey fails to pull guard.
Hutchinson looking to throw knees to the head but Bailey is blocking nicely.
Hutchinson misses with a knee to the head.
Hutchinson tries to land a knee to the head but misses.
Hutchinson gets underhooks to prevent Bailey's takedown attempt.
Hutchinson is clearly stalling here... Pick up the pace son.
Fantastic stuff here - a very entertaining period of action, which has drawn cheers from the crowd.
Hutchinson using the Thai plumb to throw knees but Bailey has his back arched nicely, preventing the strike.
As the round comes to an end the crowd are showing their appreciation for a great round of action.
Bailey jumps guard but Hutchinson stands there with Bailey around his waist. Bailey gives up and drops back to his feet. We remain in the clinch.
And thats the end of the round the fighters go back to their corners.
Freddy Hutchinson dominated that round.
The corners get their ten second warning. Both fighters stand from their stools and stare eachother down, ready to get back to the action.

Bailey shoots in but no luck this time.
Hutchinson connects with a looping right hand.
Bob Bailey is looking to throw some combinations by the looks of things.
Bailey bobs and weaves well there to avoid the strikes.
No joy there for Bailey, who threw a few shots but didn't land.
Hutchinson might want to mix his strikes up a bit more. He's just going for head shots at the moment and that can become a bit predictable.
Bailey throws a series of punches but Hutchinson avoids them all with ease.
Hutchinson doesn't manage to clinch there - Bailey circles away.
Bailey shoots in for a takedown but doesn't get it.
Bailey scores with a takedown into Hutchinson's guard.
Bailey wants to control from the top but Hutchinson keeps moving.
Bailey preventing the sweep.
Bailey wants to control from the top but Hutchinson keeps moving.
Bailey content to stall in guard here.
That's one minute gone in the round.
The referee is pacing around the two fighters - he looks like he's thinking about a standup.

We're going to have a standup here because Bob Bailey wasn't active enough for the referee's liking.
Hutchinson stuffs the takedown attempt from Bailey. Bailey gets slowly back to his feet.
That's three failed takedown attempts in the round for Bob Bailey. That's going to take a lot out of him.
Bailey misses with a takedown attempt - Hutchinson sprawls well and throws a nice strike on the way out which just misses.
Hutchinson tries to sprawl but Bailey drives through with a takedown into half guard.
Hutchinson is working for an escape here. He's hooked one of Bailey's legs and he's managed to sneak out and take Bailey's back!
The fighters are pressed up against the cage, both looking to find a bit of space to work.
Hutchinson controlling from the back.
That's two minutes gone in the round.
Hutchinson trying to control momentarily.
Hutchinson wants to control but Bailey manages to buck him off and is now in Hutchinson's guard! Nice work there by Bailey!
Hutchinson pulls Bailey in close to his closed guard and prevents Bailey from doing any damage or advancing position.
Bailey trying to control but Hutchinson is working from the bottom.
Bailey has to be careful here, sitting in the guard of a superior BJJ player.
We must be close to a standup if these guys don't pick up the pace.
The ref stands the fighters back up. Freddy Hutchinson was stalling too much, according to the referee.
Hutchinson throws a hook but Bailey avoids it easily.
Wooooo! Give it up for these two warriors! They are putting on a show!
Hutchinson is looking to take this fight into the clinch.
Bailey gets the takedown into side control.
That's three minutes gone in the round.
Hutchinson is trying to get back to half guard.
Hutchinson regains half guard, as Bailey was trying to land strikes.
Bailey works his foot free and advances to mount.
Bailey wants to control the pace but Hutchinson is squirming around nicely.
Bailey sitting in mount, just looking to control for the moment.
That's four minutes gone in the round.
Hutchinson is squirming around, avoiding Bailey's attempts to control the action.
Bailey sends his fist crashing into the mat - the crowd let out a collective ooooooh. Let's hope he's not broken it!
As the round comes to an end the crowd are showing their appreciation for a great round of action.
Hutchinson tries to lock up and control but Bailey gives him a forearm to the face and pushes him away.
Bailey tries to control but Hutchinson wriggling away.
And thats the end of the round the fighters go back to their corners.
Bob Bailey dominated that second round.
The referee calls time. The cornermen exit stage left and we're back to business. This is the final round!

Bailey tries to move into range but Hutchinson moves to the side and lands with a nice right hand.
Hutchinson doesn't manage to clinch there - Bailey circles away.
Hutchinson looks to land a left hand but Bailey moved out of range nicely.
Bailey shoots in looking for a takedown. Hutchinson tries to sprawl out of it but Bailey keeps driving through. The fighters are pinned against the cage. Hutchinson manages to get underhooks and after a bit of a struggle, circles away and we're back to standing.
Bailey changes levels and looks for a double leg takedown. Hutchinson tries to avoid it but Bailey manages to keep hold of a leg and drag Hutchinson to the ground. Hutchinson escapes though and pops straight back up to his feet.
Bailey closes this distance looking for a takedown but Hutchinson circles away.
That's three failed takedown attempts in the round for Bob Bailey. That's going to take a lot out of him.
Hutchinson forces Bailey back against the cage and clinches.
Hutchinson stalling against the cage.
Hutchinson scores with a knee to the head.
Hutchinson tries a knee to the head but Bailey blocks it.
Hutchinson looking to throw knees to the head but Bailey is blocking nicely.
Hutchinson stalling.
That's one minute gone in the round.
Hutchinson misses with a knee strike.
Hutchinson connects with a knee to the head.
Hutchinson with the Thai clinch. He's looking to land a big knee but he's not managed it this time.
Hutchinson takes a big intake of breath there - he's definitely tired.
Bailey goes for a takedown attempt but Hutchinson pushes him away and we're back to fighting at a distance.
Bailey looks for a takedown but Hutchinson sprawls well.
Hutchinson lunges at Bailey with a hook that half lands and is half blocked by Bailey's hand.
Bailey keeps the fight on the outside.
Bailey moves out of range of the strikes.
Bailey shoots in for a takedown but Hutchinson shows good takedown defense there and keeps this one on the feet.
Freddy Hutchinson is looking to keep the fight on the feet at all costs.
Hutchinson tries to clinch but Bailey moves out of range.
Hutchinson looks to land a left hand but Bailey moved out of range nicely.
Bailey takes a jab right on the kisser.
That's two minutes gone in the round.
Bailey looks frustrated there after his takedown attempt is stuffed easily.
Bailey shoots in for a takedown but doesn't get it.
Hutchinson wants to clinch.
Bailey shoots in and bounces Hutchinson off the cage to secure the takedown into guard.
Hutchinson pulls Bailey in to control the position.
Wooooo! Give it up for these two warriors! They are putting on a show!
Bailey trying to control but Hutchinson is working from the bottom.
Bailey sneaks a leg through and gets to half guard. That was like a knife through butter how easily he passed Hutchinson's guard.
That's three minutes gone in the round.
Bailey trying to control the action but Hutchinson is working from the bottom.
Bailey controlling the action here.
Hutchinson is trying to maintain the position but Bailey is very close to passing his half guard.
Bailey wants to control but Hutchinson is keeping him busy.
The ref stands the fighters back up. Bob Bailey wasn't doing enough on the ground.
Bailey staying out of range there.
Bailey shoots for a double leg takedown but Hutchinson sprawls well. He's pushed Bailey's face into the mat and manages to get back to his feet relatively easily.
A swing and a miss from Hutchinson.
That's four minutes gone in the round.
Bailey looks for a takedown but Hutchinson sprawls well.
Nice defenses there by Bailey.
Bailey shoots in for a takedown but Hutchinson shows good takedown defense.
Bailey looks for a takedown but Hutchinson sprawls well.
Hutchinson instigates a clinch.
Bailey tries for a takedown but Hutchinson manages to get underhooks.
Hutchinson throws a vicious knee straight up the middle but Bailey blocks it with crossed arms.
A knee to the head by Hutchinson.

It looks like Bob Bailey has been cut.
This has been an exciting period of action!
Hutchinson tries a knee to the head but Bailey blocks it.
As the round comes to an end the crowd are showing their appreciation for a great round of action.
Hutchinson tries a knee to the head but he's missed.
Bailey is looking for a takedown up against the cage. Hutchinson gets underhooks though and prevents the takedown attempt.
Hutchinson connects with a nasty looking knee right to Bailey's face.
And that's the end of the fight!
Freddy Hutchinson comfortably won the final round on my scorecard.
I think Hutchinson has won this one but let's see whether the judges agree with me. Over to the ring announcer for the scorecards.
Ladies and gentlemen, after 3 rounds of action, we go to the scorecards for a decision.
Judge Aleksei Zolotukhin scores the fight 28:29
Judge Viktor Lagutenko scores the fight 28:29
Judge Sergei Dronov scores the fight 28:29
In favor of your winner, by unanimous decision... Freddy Hutchinson!
|
|
|
|
|
|
|
|
|
|
|
|
|
|
|
|
|
|
|
|
|
|
|
| S |
C
A |
G |
S |
C
B |
G |
|
S |
C |
G |
|
energy
A | B |
|
hype
A | B |
|
pop
A | B |
|
mgr
A | B |
|
FIGHT
RATING
61% |
|
|
|
|
|
|

