|
|
PBP Commentary |
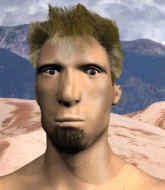
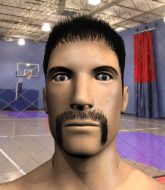
Coming up we have a super heavyweight MMA rules bout between Marcus Behnder (ranked 0 p4p, 0 weight class) and Demetrious Bingham (ranked 0 p4p, 0 weight class). Over to our ring announcer for the fighter introductions!
 |
|
 |
| 193 cm
27
268 lbs
15 - 2 - 0 |
|
185 cm
26
250 lbs
14 - 3 - 0 |
Good wrestling
Counter striker
Cardio machine |
|
Good wrestler
Counter striker
Good gas tank |
|
| |
|
Ladies and gentlemen. This fight is 3 rounds, in the super heavyweight division.
Introducing the fighter to my left, fighting out of the red corner.
With a record of
15 - 2 - 0, fighting out of Los Angeles, Marcus Behnder!
And introducing the fighter to my right, fighting out of the blue corner.
With a record of
14 - 3 - 0, fighting out of Los Angeles, Demetrious Bingham!
The judges for this bout are , Timothy Bukovac and Don Winkell.

The bell rings for round one and we are underway!
Bingham dodges the punch combination from Behnder.
Bingham throws an overhand right that lands on Behnder's shoulder, as Behnder tries to avoid the shot.
Behnder thows a body shot but no joy.
Behnder scores with a slapping inside leg kick.
Bingham scores with a sloppy right hand. Behnder should have avoided that one.

It looks like Marcus Behnder has been cut.
Bingham is looking to chop away at Behnder's legs.
Bingham defends well against a solid takedown attempt from Behnder.
Behnder throws a quick inside leg kick.

Behnder is looking for a takedown here. He's shot in and has managed to get it, finishing up in Bingham's half guard.
The referee wants the fighters to be more active or he's going to reset them on the feet.

Behnder is sneakily working for an arm triangle but Bingham sees it coming and defends easily.
Behnder sitting and controlling from the half guard.

That's one minute gone in the round.
Behnder seems to be working for a kimura but Bingham defends the submission attempt.
Behnder prevents Bingham from improving his position.
Behnder is thinking about going for an arm triangle but he can't free his leg.
Bingham trying to control here.
Behnder trying to control from half guard but Bingham is working away.

That's two minutes gone in the round.
Bingham blocking the ground and pound attempt from Behnder.
Behnder seems content to maintain position for now, rather than mounting any offense.
Bingham is looking to control Behnder's leg but it's slowly edging free. Can Bingham avoid being mounted?
Bingham avoiding damage under a succession of punches from Behnder.
Behnder is trying to work for a kimura but Bingham is defending well.
Behnder not throwing his punches with enough precision this time.
Behnder wants to take a breather but Bingham is having none of it.

That's three minutes gone in the round.
Behnder throwing punches and elbows but they're not doing any damage.
Behnder is trying to control the action in half guard but Bingham is working away on the bottom, looking perhaps to get back to full guard.
Behnder is trying a forearm choke
I don't think that's going to do much at this level of the game.
Bingham is trying to get back to full guard.
Bingham trying to control here.
Bingham tries to get to full guard but Behnder has control of the leg.
Bingham keeping control of the position.

That's four minutes gone in the round.
Bingham blocking the ground and pound attempt from Behnder.
Behnder thumps the canvas. Not on purpose obviously - he just missed Bingham's head.
Bingham trying to control from the bottom.
The ref warns both fighters not to hold the cage as they work up against the meshing.
Behnder is looking to advance position but Bingham won't allow it.
Behnder is keen to just control but Bingham is a slippery customer.
Bingham trying to control but Behnder postures up.

The ref stands the fighters back up. Demetrious Bingham was stalling too much, according to the referee.
Behnder misses with a few strikes there.
The crowd applaud the fighters efforts here as the round comes to an end.
Bingham leaves Behnder with his face pressed against the mat as he sprawls beautifully, defending against a solid takedown attempt.
And thats the end of the round the fighters go back to their corners.
Marcus Behnder dominated that round.
The cut man is working on Marcus Behnder's cut.
The fighters get back to their feet, the hooter sounds and we're back to the action!

Bingham throws a front kick aimed at Behnder's knee but Behnder avoids it well.
Behnder connects with a body shot.
Bingham keeps the fight standing with a nice sprawl.
Behnder shoots in looking for a takedown. Bingham tries to sprawl out of it but Behnder keeps driving through. The fighters are pinned against the cage. Bingham manages to get underhooks and after a bit of a struggle, circles away and we're back to standing.
Behnder throws a hook to the body but it doesn't connect.
Behnder takes a body punch but keeps moving.

Bingham shoots in for a takedown and gets it. Oh and he's advanced to full mount straight away.
Behnder gets back to half guard.
That's one minute gone in the round.
Bingham throwing shots but they're hitting the canvas more than the man.
Bingham keeping composed on the top, looking to control the action.
Bingham tries to pass to full mount but Behnder defends it.
Behnder controlling the leg, holding on to half guard.
Behnder has no desire to be mounted, so is trying to control. Bingham is working away from the top position though.
Bingham looks towards his corner to check for any instructions. The corner give him nothing to work with, so he cracks Behnder with a short hammerfist. I guess that's as good as any advice he could get in this position.
Behnder controlling the position well.
That's two minutes gone in the round.
Bingham thows a huge punch but Behnder dodges it nicely.
Behnder has no desire to be mounted, so is trying to control. Bingham is working away from the top position though.
Behnder is trying to get back to full guard.

We're going to have a standup here because Marcus Behnder wasn't active enough for the referee's liking.
Behnder fakes high and swings low for a body shot but Bingham manages to avoid it.
Behnder gets his head snapped back by a nice shot there.
Marcus Behnder's cut is getting worse.
The fans in attendance giving it up for the two fighters, who have really let it all hang out in the last minute or so!
Behnder shoots in for a takedown - he's clinched up with Bingham but Bingham pushes him off and we're back to square one.
That's three failed takedown attempts in the round for Marcus Behnder. That's going to take a lot out of him.
That's three minutes gone in the round.
Bingham is looking to chop away at Behnder's legs.
Behnder motions for Bingham to come forward. Behnder throws a leg kick but it misses it's target.
Behnder is looking to score with low kicks.
Behnder misses with a telegraphed body shot
and Bingham counters with a lovely straight right hand!
Behnder moves out of range of the strikes.
Bingham swings wildly with a right hand that was never going to find it's target.
Behnder is looking to wear down Bingham with body shots, infact he's throwing more body shots than head shots at the moment.
Bingham scores with a punch to the head.
Behnder is trying hard to land a takedown here. Bingham sprawls well and keeps this one on the feet.
Bingham throws a head kick but Behnder moves out of range.
That's four minutes gone in the round.
Bingham misses with a body punch
and Behnder counters with a good low kick that Bingham was not able to check.
Bingham throws a looping left and ducks down for a takedown. He's got his arms around Behnder's waist but Behnder gets an underhook and avoids the takedown by throwing Bingham off to one side.
Wooooo! Give it up for these two warriors! They are putting on a show!
Behnder moves his head to the side to avoid a jab but walks straight into a cross.
Marcus Behnder's cut is bleeding quite badly. He's got to try and protect it.
Bingham thows a body shot but no joy.
Bingham connects with a single shot there.
Behnder throws a jab when Bingham was well out of range.
Behnder throws a low kick but his opponent is out of range.
Demetrious Bingham seems to be the more aggressive standup fighter in this bout.
Behnder shoots in for a takedown and gets it. Let's see what he's got on the mat.
The crowd are going absolutely nuts as the round comes to an end - what a fantastic round of action!
Bingham has control of Behnder's left arm, preventing Behnder from doing any damage.
Bingham trying to keep a closed guard but Behnder is proving a slippery customer.
And thats the end of the round the fighters go back to their corners.
Demetrious Bingham showed his class in that round. I'd imagine he'll take it on all the scorecards.
The cut man is working on Marcus Behnder's cut.
That's time! Back to the action! Ladies and gentlemen, this is the final round!

Bingham looks for a takedown but Behnder sprawls well.
Bingham shoots in for a takedown but Behnder shows good takedown defense.
Bingham shoots for a double leg takedown but Behnder sprawls well. He's pushed Bingham's face into the mat and manages to get back to his feet relatively easily.
Marcus Behnder has stuffed three takedown attempts in the round now. That's going to take a lot out of Demetrious Bingham.
Behnder keeping a good distance there, avoiding the body shot.
Horrible takedown by Behnder or perhaps it was just good defense by Bingham which made him look bad.
Behnder tries to shoot in for a takedown. He's got hold of a leg but Bingham swivels and escapes.
Good shot there by Bingham.
Bingham misses with a kick to the body
and Behnder counters with a single leg into guard. Bingham didn't expect that.
That's one minute gone in the round.
Bingham keeping full guard, as Behnder tries to pass.
Behnder is looking to work some ground and pound but Bingham has wrist control.
Behnder advances to half guard.
Bingham is refusing to be controlled, as Behnder sits in half guard.
Bingham is trying to control but can't.
The fighters are pressed up against the cage, both looking to find a bit of space to work.
Behnder prevents Bingham from improving his position.
Behnder looking to pass the half guard. Not this time.
That's two minutes gone in the round.
Behnder moves nicely into side control.
Bingham regains half guard, as Behnder was trying to land strikes.
Bingham is looking for a sweep. Behnder is wise to his cunning plan and keeps the top position.
Behnder is keen to just control but Bingham is a slippery customer.
Behnder wants to work for an arm triangle but Bingham is really keeping half guard well and defending the submission attempt.
Behnder seems to be working for a kimura but Bingham defends the submission attempt.
That's three minutes gone in the round.
Behnder thows a huge punch but Bingham dodges it nicely.
Behnder trying to pass the guard but Bingham defending well.
Bingham is defending against the submission attempts here by Behnder.
Behnder passes to full mount!
Bingham wants to control but Behnder is having none of it.
That's four minutes gone in the round.
Behnder with the ground and pound from mount.
Bingham is in a horrible position here, under a barrage of strikes, he's managing to avoid any damage.
Behnder quickly switches position and commits to an armbar! It's a big risk for Behnder but it's paid off an Bingham is forced to tap! Nice work by Behnder.
Ladies and gentlemen, after 4:38 of round 3, we have a winner by way of Submission (Armbar). Marcus Behnder!
Marcus Behnder thanked the fans post fight for their support.
|
|
|
|
|
|
|
|
|
|
|
|
|
|
|
|
|
|
|
|
|
|
|
| S |
C
A |
G |
S |
C
B |
G |
|
S |
C |
G |
|
energy
A | B |
|
hype
A | B |
|
pop
A | B |
|
mgr
A | B |
|
FIGHT
RATING
55% |
|
|
|
|
|
|

