|
|
PBP Commentary |
Coming up we have a welterweight MMA rules bout between M J Shain (ranked 0 p4p, 0 weight class) and Quint Bingham (ranked 0 p4p, 0 weight class). Shain comes into the arena with Thunderstruck blaring out of the sound system. Bingham has chosen Hatebreed - Live for this as his entrance music. This should be fireworks!
 |
|
 |
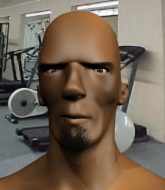
| 178 cm
28
185 lbs
21 - 13 - 1 |
|
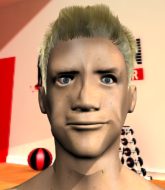
180 cm
28
178 lbs
11 - 6 - 0 |
Good wrestling
World class boxer
Cardio machine |
|
Good wrestler
Excellent boxer
Good gas tank |
|
| |
|
Ladies and gentlemen. This fight is 3 rounds, in the welterweight division.
Introducing the fighter to my left, fighting out of the red corner.
With a record of
21 - 13 - 1, fighting out of New York, M J Shain!
And introducing the fighter to my right, fighting out of the blue corner.
With a record of
11 - 6 - 0, fighting out of New York, Quint Bingham!
The judges for this bout are Chad Campbell, Jonathan Paton and Anthony Taglia.

The bell rings for round one and we are underway!
Bingham throws a hard body shot but it just misses.
Bingham ducks down and throws a hook to the body but Shain moves away.
Bingham steps to the side to avoid the strikes from Shain.
Bingham swings and misses with a hook to the body.
Shain swinging wildly here.
Bingham looks for a takedown here. Will he get it? Shain is fending him off so far but Bingham persists. Nope, Shain circles away and we're back to standing.
Bingham will need to tighten up his combinations if he doesn't want to gas himself out, swinging at thin air.
Bingham defending well as Shain loads up on a big left hand.
Shain uses some good footwork to avoid the body shot by Bingham.
Shain works Bingham's body with a nice hook.
Bingham misses with a two punch combination.
Bingham slips a jab from Shain.
Bingham lands a nice looking body shot.
Bingham moves away from the strike by Shain.
Shain fakes low and throws an overhand right that catches Bingham on the side of the head.
Bingham swings and misses with a hook to the body.
Shain scores with a punch to the gut of his opponent.
Bingham thows a body shot but no joy.
Shain darts in and out, connecting with a jab.
Bingham is throwing a lot of body shots here, looking to wear down Shain rather than just go for the knockout.

That's one minute gone in the round.
Shain cracks a nice hook into Bingham's ribs.
Bingham uses decent footwork to sidestep a right hand from Shain.
Shain jabbing away but nothing is landing.
Shain thows a left - swing and a miss!
Bingham drops his hands momentarily and Shain takes advantage with a crisp shot to the head.

Bingham changes levels and drives through with a really nice takedown into side control. Shain looks really pissed at himself for not defending that better.
You can see the frustration on Shain's face, being in this tough position on the bottom.
Shain manages to get back to half guard.

Bingham is looking for a kimura here.
Bingham missing with the ground and pound from half guard.
This is a great period of action - very entertaining stuff!
Shain wants to improve his position but Bingham is controlling well.
Bingham is trying for a guillotine from the top but the pressure isn't in the right place so Shain is just riding it out for now. Bingham eventually gives up the hold.

That's two minutes gone in the round.
Shain wants to get back to full guard.
Bingham wants to control but Shain is keeping him busy.
Shain wants to get back to full guard but Bingham has passed into side control.
Bingham is looking to finish here, going for an Americana. Shain knows the correct defense though, so he's OK.
Bingham is looking to finish here, going for an Americana. Shain knows the correct defense though, so he's OK.
Shain is trying to get back to his feet.

That's three minutes gone in the round.
Bingham is trying to get an arm triangle but Shain is defending well.
Bingham thinks about going for a far side armbar but bails out and retains the dominant position instead.
Bingham wants to work for a kimura but he's foiled early by Shain, who protects the arm well.
Shain struggling a bit here.
Shain is positioning himself to get back to half guard.
Bingham lands a decent elbow from side control.
Bingham tries for a kimura. Not really close to a finish though.

That's four minutes gone in the round.
Bingham taking a break here but Shain is having none of it and regains half guard.
Bingham stalling away here and it's allowed Shain to slip out his trapped foot and regain full guard.
Bingham drops back, looking for a kneebar! Shain looks panicked! The fighters roll across the mat, one looking to finish, one looking to escape. Shain looks to have wriggled free... Yes, he's got his leg free and he's dived into side control! Good work there from Shain!
Bingham is letting Shain control him for a moment.
As the round comes to an end the crowd are showing their appreciation for a great round of action.
Bingham is positioning himself to get back to half guard.
The crowd cheering loudly, showing their appreciation for the quality fight we're seeing here.
Shain landing with strikes to the head and body from side control.
And thats the end of the round the fighters go back to their corners.
That was a close round but I would say that M J Shain will probably get the nod.
Well, the break between rounds is over. Let's get back to the scrappin!

Shain throws a big shot that misses.
Bingham misses with the combination.
Bingham fails miserably with a takedown attempt.
Bingham is the aggressor but that punch slipped nicely by Shain.
Bingham misses with a body shot.
Bingham dodges the punch combination from Shain.
Nice defenses there by Bingham.
Shain lands a powerful looking uppercut that connected with his opponent's jaw.
Shain changes levels and scores with a jab to the body.
The fighters circling - Shain throws out the jab but it was never going to land.
Shain connects nicely with a jab. Noted by the judges no doubt.
Bingham shoots in for a takedown and gets it.
Bingham is working for a submission of some sort.
We've seen a great period of action over the last minute or so - credit to both fighters for going all out!
Shain tries to roll over but Bingham keeps him under control.
That's one minute gone in the round.
Bingham is trying to work for a kimura. This could be trouble! No, Shain has managed to free his arm - good work.
Bingham is thinking about going for an arm triangle but he can't free his leg.
Shain has no desire to be mounted, so is trying to control. Bingham is working away from the top position though.
Bingham is trying for a guillotine from the top but the pressure isn't in the right place so Shain is just riding it out for now. Bingham eventually gives up the hold.
That's two minutes gone in the round.
Bingham looking for a kimura but he'll have to free his other leg if he wants to finish that. Perhaps he's just using it as a distraction technique.
Shain is looking to control Bingham's leg but it's slowly edging free. Can Shain avoid being mounted?
Bingham is sneakily working for an arm triangle but Shain sees it coming and defends easily.
Shain makes his way to full guard. A much better position for Shain.
Bingham is pushing down on Shain's leg trying to pass to half guard. Shain is fighting to maintain full guard but Bingham has managed to sneak the leg through.
That's three minutes gone in the round.
Bingham content to control rather than advance.
Bingham looking for a kimura but he'll have to free his other leg if he wants to finish that. Perhaps he's just using it as a distraction technique.
Bingham is trying for a guillotine from the top but the pressure isn't in the right place so Shain is just riding it out for now. Bingham eventually gives up the hold.

Shain looking for submissions from an awkward position here.
That's four minutes gone in the round.
Bingham seems very keen to just sit and control from half guard but Shain does not like that idea so much and is remaining active off his back.
Shain is working for an escape here. He's hooked one of Bingham's legs and he's managed to sneak out and take Bingham's back!
Shain is staying calm and holding on to the back position, whilst working on a rear naked choke. Bingham is defending well though. Shain let's go of the attempt for now.
Shain looking for the choke from the back.
Bingham tries to escape the position - he's now mounted. Is that better or worse? Hard to tell!
Bingham tries to reverse the position but Shain maintains control.
Shain trying to control but Bingham is having none of it.
Bingham is trying to escape the mount.
As the round comes to an end the crowd are showing their appreciation for a great round of action.
Shain putting on the heat here with some good ground and pound!
And thats the end of the round the fighters go back to their corners.
That was a close second round but I would say that M J Shain will probably get the nod.
The fighters get back to their feet, the hooter sounds and we're back to the action! This is the final round!

Shain bobs and weaves and unloads with a good uppercut.
Shain throws a nice hook to the body that draws an oooh from the crowd.
Shain scores with a jab to the body.
Shain lands a slapping body shot.
Shain throws a poor cross that misses
and Bingham counters with a lovely straight right hand!
Bingham swings and misses with a hook to the body.
Shain defends well against a solid takedown attempt from Bingham.
Shain throws a looping overhand right but Bingham ducks down to avoid it.
Bingham avoids a lazy jab quite easily.
Shain looks to throw the jab but Bingham is out of range.
Bingham lands a nice looking body shot.
Shain tries a head kick but it misses.
Shain wings a very wild body shot but it does the job and lands to the midsection.
Bingham looks shocked there as he takes a right hand to the temple.
The crowd cheering loudly, showing their appreciation for the quality fight we're seeing here.
Shain scores with a big left there. The judges will like that one.
Bingham ducks down and throws a hook to the body but Shain moves away.
Shain fakes high and swings low for a body shot but Bingham manages to avoid it.
Shain throws a hard body shot but it just misses.
Wow, both these guys are really going for it!
That's one minute gone in the round.
A looping hook to the body misses from Shain. Bingham does a little dance to reset his feet.
Bingham tries to shoot in for a takedown. He's got hold of a leg but Shain swivels and escapes.
Shain thows a left - swing and a miss!
Shain scores with a body shot.
Shain throws a poor cross that misses
and Bingham counters with a shot to the ribs. That looked like it hurt.
Bingham swings for the body but Shain moves out of range.
Shain throws an overhand right that lands on Bingham's shoulder, as Bingham tries to avoid the shot.
Bingham misses with a body shot.
Shain misses with a hook
and Bingham counters with a nice body shot.
Shain lands a jab to Bingham's midsection.
A left and a right from Bingham both land. Nice combination.
M J Shain is looking to keep the fight on the feet at all costs.
Shain with a jab.
A telegraphed right hand from Shain misses the target.
Jab from Shain.
The crowd are loving this. Great action here.
Bingham lands a nice looking body shot.
Shain avoids a punch combination nicely.
Bingham takes a big intake of breath there - he's definitely tired.
That's two minutes gone in the round.
Bingham takes a step towards his opponent and connects with a left hand, before circling away.
Bingham looks for a takedown but Shain sprawls well.
M J Shain has stuffed three takedown attempts in the round now. That's going to take a lot out of Quint Bingham.
Shain moving in and out of range nicely, whilst landing the scoring shot.
Bingham slips a jab from Shain.
Shain misses with a body shot.
Bingham takes a swing at Shain's ribcage but misses.
Shain lands an overhand left. A wild punch that just about connected.

Bingham is rocked!
Shain lands an overhand left. A wild punch that just about connected.
Bingham is still on wobbly legs! Can Shain finish him?
Shain misses with a few strikes there.
Shain connects with a nice looking jab.
Shain throws a nice looking combination but Bingham bobs and weaves to avoid any damage.
Shain throws a hook to the side of Bingham's head but Bingham sees it coming and ducks under it beautifully.
Shain thows a body shot but no joy.
Bingham avoids a punch combination nicely.
Bingham scores with a hook to the body. Shain takes a step back and tries to catch his breath.
That's three minutes gone in the round.
Shain uses some good footwork to avoid the body shot by Bingham.
Bingham takes a body punch that cleary hurt but he's trying not to show any weakness.
Bingham seems to have recovered his senses.
Bingham falls off balance throwing a combination
and Shain counters with a lovely straight right hand!
M J Shain is winning the standup battle so far.
Nice cross by Shain.
Bingham's hands are dropping dangerously low here and Shain connects clean with a right hook that sends him down to one knee! Bingham scrambles back to his feet.
A big right from Shain misses.
Shain swings for the body but Bingham moves out of range.
Bingham looks to score with a jab to the body but Shain is just out of range.
Shain lands with an uppercut that bounces Bingham off the cage and back into range.
Bingham ducks down and throws a hook to the body but Shain moves away.
Bingham changes levels and drives through with a really nice takedown into side control. Shain looks really pissed at himself for not defending that better.
Shain is trying to improve his position.
Bingham wants to control but Shain is keeping him busy.
That's four minutes gone in the round.
The fans in attendance giving it up for the two fighters, who have really let it all hang out in the last minute or so!
Shain struggling a bit here.
Bingham trying to control the action but Shain is working from the bottom.
Shain wants to control but Bingham postures up.
Quint Bingham has stepped it up - he knows he needs a finish here!
Bingham working the ground and pound but Shain is defending the strikes.
The crowd are going absolutely nuts as the round comes to an end - what a fantastic round of action!
Shain is looking for a sweep.
You can see the frustration on Shain's face, being in this tough position on the bottom.
Shain is trying to get back to half guard. He's pushing on Bingham's leg. He's managed it. Nice work.
And that's the end of the fight!
M J Shain showed his dominance in that final round.
Well I reckon that's a shut out for Shain, winning every round. Will the judges agree? They are the ones who matter, even if they are often depressingly incompetent. Over to the ring announcer for the scorecards.
Ladies and gentlemen, after 3 rounds of action, we go to the scorecards for a decision.
Judge Chad Campbell scores the fight 30:27
Judge Jonathan Paton scores the fight 30:27
Judge Anthony Taglia scores the fight 30:27
In favor of your winner, by unanimous decision... M J Shain!
A loyal slave to those sponsorship dollars, M J Shain made sure he mentioned 5th Round Clothing, along with how happy he was to win his fight.
|
|
|
|
|
|
|
|
|
|
|
|
|
|
|
|
|
|
|
|
|
|
|
| S |
C
A |
G |
S |
C
B |
G |
|
S |
C |
G |
|
energy
A | B |
|
hype
A | B |
|
pop
A | B |
|
mgr
A | B |
|
FIGHT
RATING
100% |
|
|
|
|
|
|
