|
|
PBP Commentary |
Coming up we have a featherweight MMA rules bout between Luke Taylor Ii (ranked 0 p4p, 0 weight class) and Humphrey Boggins (ranked 0 p4p, 0 weight class). These two fighters really are very evenly matched on the feet - it will be fascinating to see who can assert themselves in that aspect of the fight.
 |
|
 |
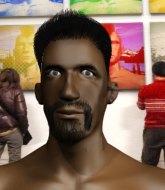
| 174 cm
25
153 lbs
2 - 3 - 0 |
|
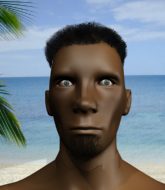
180 cm
22
149 lbs
2 - 1 - 0 |
Decent wrestler
Brawler
Good chin |
|
Decent wrestler
Counter striker
Tends to cut |
|
| |
|
Ladies and gentlemen. This fight is 3 rounds, in the featherweight division.
Introducing the fighter to my left, fighting out of the red corner.
With a record of
2 - 3 - 0, fighting out of Montreal, Luke Taylor Ii!
And introducing the fighter to my right, fighting out of the blue corner.
With a record of
2 - 1 - 0, fighting out of Montreal, Humphrey Boggins!
The judges for this bout are Steve Smith, Dillan Fox and Yves DeLean.

The bell rings for round one and we are underway!
No luck with that takedown attempt from Taylor Ii.
Taylor Ii shoots in for a takedown but Boggins shows good takedown defense.
Luke Taylor Ii seems to be the more aggressive standup fighter in this bout.

The fight moves into the clinch position.
Taylor Ii jumps guard but his hands slip and he falls flat on his back. Well, he's made himself look a right mug there, as Boggins walks away with a smile on his face. Taylor Ii gets slowly back to his feet and shakes his head.
That's three failed takedown attempts in the round for Luke Taylor Ii. That's going to take a lot out of him.
Taylor Ii gets to the clinch - let's see what his plan is here.

Boggins breaks from the clinch.
Taylor Ii misses with a jab and misses with a cross straight after too.
Taylor Ii pulls out of a head kick attempt.
Taylor Ii shoots in for a takedown but doesn't get it.
A telegraphed takedown attempt from Taylor Ii is defended easily by Boggins.
Taylor Ii moves into range and clinches up with Boggins.

That's one minute gone in the round.

Taylor Ii breaks the clinch and we return to the middle of the mat.
Taylor Ii drives through and clinches with Boggins against the cage.
Taylor Ii tries to take the fight to the ground by pulling guard but can't manage it.
Taylor Ii breaks the clinch and we return to the middle of the mat.

Boggins clinches up with Taylor Ii and pushes him back against the cage.
Taylor Ii fails to pull the fight into his guard.
Taylor Ii changes levels and goes for a takedown here. Boggins fights it off and pushes away nicely.
Taylor Ii with a poor takedown

and Boggins counters with a nice single leg takedown and he's in Taylor Ii's guard now.
Boggins slips effortlessly into side control - very nice.
Boggins throws a knee to the body but it doesn't do much damage.
We've seen a great period of action over the last minute or so - credit to both fighters for going all out!
Taylor Ii avoids any damage from the ground and pound of Boggins.

That's two minutes gone in the round.
Boggins trying to control the action but Taylor Ii is working from the bottom.
Boggins working the ground and pound.
Boggins trying to control the position but Taylor Ii is working away.
The ground and pound from Boggins seems to be hitting the mat more than his opponent.
The ref warns both fighters not to hold the cage as they work up against the meshing.

Boggins decides to stand back up. Boggins steps back and let's Taylor Ii get back to his feet.
Boggins fakes a strike and closes the distance, dragging Taylor Ii to the ground. Boggins is now in Taylor Ii's guard.
Boggins pressing down on his opponent's thigh, looking to pass guard. Taylor Ii is keeping the position for now.
Taylor Ii wants to get back to his feet but Boggins is in a dominant position and won't allow it.
Boggins wants to pass the guard but Taylor Ii is keeping the position.

That's three minutes gone in the round.
Boggins is persisting with the attempt to improve his position.
Boggins gets to his feet and steps away from his opponent.
Taylor Ii clinches up against the cage.
Taylor Ii is trying to break the clinch but Boggins has him pressed against the cage.
Boggins escapes the clinch and we're back to striking.
Taylor Ii shoots in for a takedown. He's persisting with it as Boggins sprawls well. Boggins wins this battle and keeps the fight standing. Taylor Ii gets slowly back to his feet.
Taylor Ii with a lazy takedown attempt
and Boggins counters with a shoot takedown. Taylor Ii fights it but they end up in guard.
Boggins trying to control the position from guard on top but Taylor Ii is wriggling around, looking for whatever he can.
Boggins lands a couple of digs.
Boggins has the superior BJJ but he's also working some ground strikes into his gameplan.
Boggins with a flurry of punches that miss.

That's four minutes gone in the round.
We've seen a great period of action over the last minute or so - credit to both fighters for going all out!
Taylor Ii avoiding any damage from the ground and pound.
Taylor Ii is working the butterfly guard. He manages to land a nice scissor sweep and is now in half guard on the top. Nice move.
Taylor Ii looking to pass the half guard. Not this time.
Taylor Ii throwing shots but Boggins is blocking nicely.
Boggins won't allow Taylor Ii to pass to mount.
The fighters are pressed up against the cage, both looking to find a bit of space to work.
The crowd are going absolutely nuts as the round comes to an end - what a fantastic round of action!
Taylor Ii prevents Boggins from standing back up.
Taylor Ii is controlling the pace.
And thats the end of the round the fighters go back to their corners.
Humphrey Boggins dominated that round.
Well, the break between rounds is over. Let's get back to the scrappin!

Taylor Ii throws a head kick but Boggins moves out of range.

Taylor Ii scores with a nice takedown into half guard. Let's see what he's got on the ground.
Taylor Ii sitting and controlling from the half guard.
Boggins wants to improve his position but Taylor Ii is controlling well.
Taylor Ii wants to control but Boggins is keeping him busy.
That's one minute gone in the round.
Taylor Ii missing with some ground and pound from the half guard.
Taylor Ii is looking to stall here but Boggins recovers full guard.
Boggins looking to hit a scissor sweep but Taylor Ii is one step ahead there.
Taylor Ii tries to free his leg and advance position but Boggins is retaining full guard.
That's two minutes gone in the round.
Taylor Ii slips nicely into half guard.
Taylor Ii content to sit in half guard and control for a moment.
That's three minutes gone in the round.
Boggins looks like he's trying to stand up.
Taylor Ii looks over to his corner - he wants some instructions but his corner are not responding.
Humphrey Boggins has got the better of the ground game so far.

The ref stands the fighters back up. Luke Taylor Ii wasn't doing enough on the ground.
Taylor Ii clinches up with Boggins and pushes him back against the cage.
Taylor Ii tries to pull guard but Boggins won't allow it.
Boggins's corner calls for him to break the clinch, which he does.
Taylor Ii throws out a loose jab but Boggins uses good head movement to avoid it.
Taylor Ii clinches up against the cage.
Taylor Ii is looking to take this one to the mat.
That's four minutes gone in the round.
Taylor Ii changes levels and goes for a takedown here. Boggins fights it off and pushes away nicely.
That's three failed takedown attempts in the round for Luke Taylor Ii. That's going to take a lot out of him.
Taylor Ii moves into the clinch.
Taylor Ii gets double underhooks to prevent a takedown attempt from Boggins.
Taylor Ii manages to break the clinch.
Boggins doesn't manage to clinch there - Taylor Ii circles away.
Taylor Ii shoots in for a takedown. He's persisting with it as Boggins sprawls well. Boggins wins this battle and keeps the fight standing. Taylor Ii gets slowly back to his feet.
And thats the end of the round the fighters go back to their corners.
Luke Taylor Ii dominated that second round.
That's time! Back to the action! And we move into the final round!

Taylor Ii misses with a looping left.
Taylor Ii clinches up with Boggins and pushes him back against the cage.
Taylor Ii tries to pull guard but Boggins won't allow it.
Taylor Ii gets double underhooks and manages to take the fight to the ground.
Taylor Ii throwing strikes from guard but Boggins blocks nicely.
Boggins pushes Taylor Ii off for just long enough to get back to his feet. Very athletic spring there.
Taylor Ii rushes Boggins and presses him up against the cage.
That's one minute gone in the round.
Boggins can't break the clinch.
Boggins stalling here - the referee won't stand for too much of that.
Boggins breaks from the clinch.
Taylor Ii fakes with an overhand right and moves in to clinch with Boggins, pushing him back against the cage.
Boggins is trying to break the clinch but Taylor Ii has him pressed against the cage.
Taylor Ii's corner calls for him to break the clinch, which he does.
Taylor Ii clinches up against the cage.
Boggins wants to break free but Taylor Ii has control.
Taylor Ii is working on a leg, looking for a takedown but Boggins is defending well.
That's two minutes gone in the round.
Taylor Ii is trying to pull guard but being pressed up against the cage enables Boggins to keep the fight standing.
That's three failed takedown attempts in the round for Luke Taylor Ii. That's going to take a lot out of him.
Taylor Ii goes for a takedown in the clinch but Boggins prevents it.
Taylor Ii tries for a takedown. No joy.
Boggins is pressed up against the cage. Taylor Ii has hold of a leg and is looking to drag Boggins down to the mat. Boggins avoids the attempt though and has circled away. We're back to striking at a distance.
Both fighters are breathing heavily.
Taylor Ii tries to score a power double leg takedown but Boggins sees that one coming and sprawls well. That will dishearten Taylor Ii somewhat.
Taylor Ii looks for a takedown but Boggins sprawls well.
Taylor Ii forces Boggins back against the cage and clinches.
That's three minutes gone in the round.
Taylor Ii gets a nice trip takedown into half guard.
Boggins keeps control of the position for the meantime.
Taylor Ii trying to advance position but Boggins counters by regaining guard.
Boggins wants to stand but Taylor Ii is controlling the position.
Boggins is avoiding any damage by keeping wrist control.
That's four minutes gone in the round.
Taylor Ii scoring with punches to the head and body.
Taylor Ii throwing elbows and punches but not connecting, as Boggins works some decent striking defense from the bottom.
Boggins wants to get back to his feet but Taylor Ii is in a dominant position and won't allow it.
Boggins is working from a closed guard but he's struggling to control his opponent.
The crowd applaud the fighters efforts here as the round comes to an end.
The referee is asking the fighters to pick up the pace.

The ref calls for a clean break and stands the fighters back up. Humphrey Boggins wasn't active enough on the ground.
Taylor Ii throws a sloppy head kick and Boggins moves out of range easily.
And that's the end of the fight!
Luke Taylor Ii showed his dominance in that final round.
I think Taylor Ii has won this one but let's see what the judges have to say. Over to the ring announcer for the scorecards.
Ladies and gentlemen, after 3 rounds of action, we go to the scorecards for a decision.
Judge Steve Smith scores the fight 29:28
Judge Dillan Fox scores the fight 29:28
Judge Yves DeLean scores the fight 29:28
In favor of your winner, by unanimous decision... Luke Taylor Ii!
|
|
|
|
|
|
|
|
|
|
|
|
|
|
|
|
|
|
|
|
|
|
|
| S |
C
A |
G |
S |
C
B |
G |
|
S |
C |
G |
|
energy
A | B |
|
hype
A | B |
|
pop
A | B |
|
mgr
A | B |
|
FIGHT
RATING
43% |
|
|
|
|
|
|
