|
|
PBP Commentary |
Coming up we have a light heavyweight MMA rules bout between Jamie Lynch (ranked 0 p4p, 0 weight class) and Johnny Roastbeef (ranked 0 p4p, 0 weight class). Buckle up people - heeeeeeeeeere we go!
 |
|
 |
| 182 cm
35
223 lbs
24 - 15 - 0 |
|
190 cm
28
213 lbs
17 - 8 - 0 |
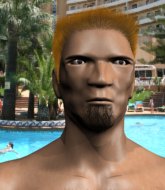
Good wrestling
Lethal high kicks
Very quick |
|
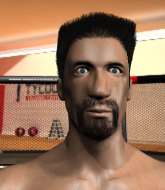
ADCC Champion
Excellent MT
Good gas tank |
|
| |
|
Ladies and gentlemen. This fight is 3 rounds, in the light heavyweight division.
Introducing the fighter to my left, fighting out of the red corner.
With a record of
24 - 15 - 0, fighting out of London, Jamie Lynch!
And introducing the fighter to my right, fighting out of the blue corner.
With a record of
17 - 8 - 0, fighting out of Amsterdam, Johnny Roastbeef!
The judges for this bout are Daniel Bishop, Steven Brown and James Ackerman.

The bell rings for round one and we are underway!
Nice takedown defense from Lynch. No joy for Roastbeef on that attempt.
Lynch with a poor takedown
and Roastbeef counters with a nice low kick that buckles Lynch's knee momentarily.
Roastbeef shoots in for a takedown. "Ole!" shouts Lynch as he jumps to the side.

Lynch changes levels and drives through with a really nice takedown into side control. Roastbeef looks really pissed at himself for not defending that better.

Lynch wants to work for a kimura but he's foiled early by Roastbeef, who protects the arm well.
Roastbeef is looking for a sweep.
Lynch is looking to take a break and control but Roastbeef is keeping him honest, looking to work from the bottom.
Roastbeef is moving his hips around well on the bottom and has managed to get back to half guard.
The fighters are pressed up against the cage, both looking to find a bit of space to work.
Roastbeef trying to get back to full guard but Lynch takes advantage of the position and moves to full mount!
Roastbeef sneaks a leg back under and regains half guard and is working straight away to try and get back to guard. He hasn't managed just yet though.

That's one minute gone in the round.
Lynch looking for a kimura but he'll have to free his other leg if he wants to finish that. Perhaps he's just using it as a distraction technique.
Lynch is thwarting Roastbeef's attempts to control the position.
Lynch drops an elbow to the side of Roastbeef's head.
Roastbeef is looking to control Lynch's leg but it's slowly edging free. Can Roastbeef avoid being mounted?
Roastbeef is working for an escape here. He's hooked one of Lynch's legs and he's managed to sneak out and take Lynch's back!
Roastbeef has Lynch flattened out and is raining down punches.
Lynch trying to control the hands but Roastbeef won't let him.
Roastbeef struggling to land strikes to the head as Lynch covers up.

That's two minutes gone in the round.
Lynch turns into Roastbeef and is now in his guard.
Roastbeef is working from a closed guard but he's struggling to control his opponent.

Roastbeef manages to escape and get back to his feet.
Lynch tries to close the distance and clinch but Roastbeef swats him to one side with an open hand palm strike and circles away.
The crowd cheering loudly, showing their appreciation for the quality fight we're seeing here.
Lynch is looking to clinch but Roastbeef is avoiding it.
Roastbeef lands a lovely overhand right.
A lazy left from Roastbeef finds it's target.
Lynch misses with a head kick.
Roastbeef pivots, looking for a leg kick but Lynch is out of range and Roastbeef settles back down.

That's three minutes gone in the round.
Lynch throws a nice inside leg kick.
Roastbeef avoids the head kick by Lynch.
The fighters circling - Roastbeef throws out the jab but it was never going to land.
Lynch lands a nice looking body shot.
Lynch tries to clinch up.
A looping hook to the body misses from Roastbeef. Lynch does a little dance to reset his feet.
Roastbeef circles away from the clinch attempt.
Lynch takes a shot right to the bread basket.
Roastbeef swats away the attempt to clinch by Lynch.
Lynch throws a head kick that connects with a bit of head and a bit of hand.

That's four minutes gone in the round.
Lynch tries to clinch but Roastbeef moves out of range.
Roastbeef swats away the attempt to clinch by Lynch.
Roastbeef misses the shot to the body.
Lynch shoots for a takedown but Roastbeef saw that one coming a mile off and avoided it easily.
Lynch fails with a takedown attempt.
That's three failed takedown attempts in the round for Jamie Lynch. That's going to take a lot out of him.
Fantastic stuff here - a very entertaining period of action, which has drawn cheers from the crowd.
Roastbeef scores with a sloppy right hand. Lynch should have avoided that one.
Roastbeef fails with a takedown attempt from distance.
As the round comes to an end the crowd are showing their appreciation for a great round of action.
Lynch slips under a jab.
Lynch shoots in with a lovely double leg takedown. Roastbeef manages to land in full guard to minimise the damage.
And thats the end of the round the fighters go back to their corners.
A close round but Johnny Roastbeef will probably get the nod.
That's time! Lynch's corner gives him a slap on the ass as he gets ready to fight.

Lynch will have to do better than that with his takedown attempts.
Roastbeef dips to his left and cracks Lynch with an uppercut!
Roastbeef has used his reach advantage pretty well so far tonight.
Roastbeef drops his hands momentarily and Lynch takes advantage with a crisp shot to the head.
Lynch tries to close the distance and clinch but Roastbeef swats him to one side with an open hand palm strike and circles away.
Lynch tries to clinch but fails miserably
and Roastbeef counters with a good right hand that lands right on the jaw.
Lynch closes the distance, clinches up and gets a nice trip takedown into side control. Very smooth.
Roastbeef tries to improve position but can't.
Roastbeef is trying to control Lynch's posture but Lynch avoids it.
Lynch goes for an armbar here - this could be all over! But no, Roastbeef has escaped beautifully and is now on top in side control! Oh, that's unlucky for Lynch but great work by Roastbeef.

Roastbeef tries for a kimura. Not really close to a finish though.
The crowd are loving this. Great action here.
Lynch is trying to improve his position.
That's one minute gone in the round.
Lynch is working hard here to advance position.
Roastbeef tries to move into full mount but can't pass Lynch's legs.
The strikes coming from Roastbeef are missing the target in this wave of attacks.
Roastbeef scores with a couple of nice shots to the head there. The referee takes a look at Lynch to see if he's OK.
Lynch pushes Roastbeef away and creates a bit of space to escape. He's almost out here... but no, Roastbeef gets a good hold of his legs and remains firmly in side control.
Roastbeef has hold of Lynch's arm. He's looking for a kimura. Lynch seems comfortable defending it but Roastbeef has shifted his position slighty and is cranking on the arm! Lynch is real pain and he's forced to tap out! Lynch is disgusted with himself for not defending it better but Roastbeef couldn't care less - he's delighted!
Ladies and gentlemen, after 1:59 of round 2, we have a winner by way of Submission (Kimura). Johnny Roastbeef!
|
|
|
|
|
|
|
|
|
|
|
|
|
|
|
|
|
|
|
|
|
|
|
| S |
C
A |
G |
S |
C
B |
G |
|
S |
C |
G |
|
energy
A | B |
|
hype
A | B |
|
pop
A | B |
|
mgr
A | B |
|
FIGHT
RATING
71% |
|
|
|
|
|
|
