|
|
PBP Commentary |
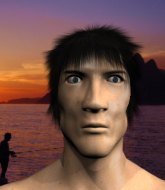
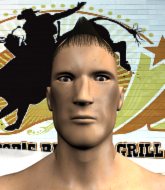
Coming up we have a welterweight MMA rules bout between Monkey D Luffy (ranked 0 p4p, 0 weight class) and Ryan Kid (ranked 0 p4p, 0 weight class). Kid has a niggling injury. He would have liked to come in 100% fit but that's not always possible. Monkey D Luffy has a significant reach advantage - let's see if he can make it count.
 |
|
 |
| 175 cm
18
170 lbs
0 - 0 - 0 |
|
160 cm
19
165 lbs
0 - 1 - 0 |
BJJ Blue Belt
Brawler
Cuts easily |
|
BJJ Blue Belt
Basic striking
Determined |
|
| |
|
Ladies and gentlemen. This fight is 3 rounds, in the welterweight division.
Introducing the fighter to my left, fighting out of the red corner.
With a record of
0 - 0 - 0, fighting out of Sydney, Monkey D Luffy!
And introducing the fighter to my right, fighting out of the blue corner.
With a record of
0 - 1 - 0, fighting out of Sydney, Ryan Kid!
The judges for this bout are Skip Squint, Winston Howard and Summer Carpenter.

The bell rings for round one and we are underway!
Luffy avoids the clinch attempt nicely.
Kid looks gassed!
Kid keeps the fight standing with a nice sprawl.
We're hearing some news coming in from back stage. It's official - Kid has eaten all the pies!
Luffy tries to clinch but Kid is having none of it.

Luffy darts in and clinches Kid up against the cage.
Luffy jumps guard but Kid turns him against the cage and keeps the fight standing.

Luffy successfully pulls guard.
Kid wants to stand and escape but instead Luffy has hit a sweep and he's now on top in guard.
Luffy pressing down on his opponent's thigh, looking to pass guard. Kid is keeping the position for now.

Luffy decides to stand up and beckons his opponent to follow.
Kid slaps away a takedown attempt from Luffy, before circling back to the center of the mat.
That's three failed takedown attempts in the round for Monkey D Luffy. That's going to take a lot out of him.

That's one minute gone in the round.
Luffy will need to tighten up his combinations if he doesn't want to gas himself out, swinging at thin air.
Kid stuffs a takedown. It's all about dictating where the fight takes place and Kid wants it to stay on the feet.
Luffy fails with a takedown attempt.
Kid throws a combination that misses
and Luffy counters by clinching up.
Luffy misses the knee to the body. Nice hip positioning from Kid.
Luffy working Kid over with knees to the body.
Luffy decides to pull guard.
Luffy will need to keep those long limbs tucked in whilst he's on the ground, to prevent any submissions.
Kid trying to stand up but can't free himself from Luffy's guard.
Luffy is working an open guard here, looking to improve his position. No doubt that will leave him open to counters but at least he's being more offensive.

Luffy is working actively off his back, looking to secure an arm or perhaps work for a triangle.

That's two minutes gone in the round.
Kid trying to stand up but can't free himself from Luffy's guard.
Luffy looking to control the pace of the fight rather than finish it.
Kid wanted to stand there but Luffy had control of the position.

Kid stands up and waves to Luffy to follow him.
Luffy doesn't manage to clinch there - Kid circles away.
Luffy shoots in for a takedown. He's persisting with it as Kid sprawls well. Kid wins this battle and keeps the fight standing. Luffy gets slowly back to his feet.

That's three minutes gone in the round.
Kid fails with an attempt to clinch.
Luffy instigates a clinch.
Luffy manages to pull guard. Let's see whether he can land a sub off his back.
Kid wants to get up but he can't break Luffy's closed guard. He needs to be careful trying to break the legs open, as he's open to submissions here.
Luffy had isolated an arm as going for a kimura. Kid defends it easily.
Kid decides he's had enough of playing guard and decides to stand. Come on Luffy, up you get!
Kid looks for a takedown here. Will he get it? Luffy is fending him off so far but Kid persists. Nope, Luffy circles away and we're back to standing.
Kid displays good takedown defense there as he swats away a double leg from Luffy.
Kid takes one on the chin but seems OK.

That's four minutes gone in the round.
Kid stalks Luffy and leaps in with a furious combination of punches. Uppercuts and crosses smash into Luffy's face. Luffy staggers backwards, shaken.
No luck for Luffy with that takedown attempt.
Kid scores with a nice looking left hook and follows it up with an uppercut!
Luffy throws a sloppy head kick and Kid moves out of range easily.
Kid keeps the fight on the outside.

Kid shoots in and gets a takedown into half guard. Kid showed some decent athleticism there.
The ref warns both fighters not to hold the cage as they work up against the meshing.
This is a great period of action - very entertaining stuff!
Luffy looks like he's trying to stand up.
As the round comes to an end the crowd are showing their appreciation for a great round of action.
Kid gets to his feet - back to striking we go!
Luffy shoots in looking for a takedown but Kid manages to keep the fight standing, pushing Luffy's face into the canvas for good measure before circling away.
And thats the end of the round the fighters go back to their corners.
That was a close round but I would say that Monkey D Luffy will probably get the nod.
That's the end of the interval. I'm sure that seemed a lot quicker than a minute for our two fighters! Back to the action.

Kid fails with a takedown attempt from distance.
Luffy has a takedown stuffed.
Luffy scores with a one two! Kid had his feet all tangled up there and couldn't avoid the strikes.
Luffy moves into the clinch.

Luffy breaks the clinch and we're back to striking at distance.
Kid stuffs the takedown.
Luffy shoots in and drives through. Kid sprawls well.
That's three failed takedown attempts in the round for Monkey D Luffy. That's going to take a lot out of him.
Luffy scores with a push kick.
Kid shoots in and drives through. Luffy sprawls well.
Kid tries to clinch up but Luffy circles away and keeps his distance.
Luffy looks for a takedown but Kid sprawls well.
Ryan Kid seems to be the more aggressive standup fighter in this bout.
Both fighters are absolutely exhausted here.
Kid shoots in with a takedown attempt and he has Luffy pinned against the cage. Luffy gets the underhooks and manages to circle away.
Kid stuffs the takedown.
That's one minute gone in the round.
Kid tries to clinch but Luffy moves out of range.
Luffy clinches up with Kid and pushes him back against the cage.
Luffy jumps guard but Kid turns him against the cage and keeps the fight standing.
Luffy is trying to pull guard but being pressed up against the cage enables Kid to keep the fight standing.
Kid is trying to trip Luffy. He has hold of a leg but Luffy is hopping around, keeping his balance for the moment. Kid persists though and gets the takedown into guard.
Kid wants to stand and escape but instead Luffy has hit a sweep and he's now on top in guard.
Luffy passes into half guard.
Luffy performing his best blanket impression for a moment.
That's two minutes gone in the round.
Kid tries to kick Luffy off in order to stand up. Luffy Avoids the leg push though and dives into side control.
Luffy just content to control the position.
Luffy decides to stand back up.
That's three minutes gone in the round.
A really sloppy takedown attempt there from Luffy.
A punch combination from Luffy misses.
Kid keeps the fight on the outside.
Kid shoots in but Luffy avoids the takedown attempt easily.
Kid throws a right and a left that Luffy avoids nicely.
Kid shoots in for a double leg but Luffy sprawls well. That's going to sap some energy.
That's four minutes gone in the round.
Kid needs to keep his hands up - Luffy had a free shot at his head there.
Monkey D Luffy is winning the standup battle so far.
Luffy shoots in with a takedown attempt and he has Kid pinned against the cage. Kid gets the underhooks and manages to circle away.
Luffy moves into the clinch successfully.

Kid manages to break the clinch.
Luffy shoots in for a takedown. "I don't think so" says Kid as he avoids it easily.
Kid shoots in looking for a takedown but Luffy manages to keep the fight standing, pushing Kid's face into the canvas for good measure before circling away.
Luffy fails with the takedown.
Kid shoots in for a takedown but doesn't get it.
As the round comes to an end the crowd are showing their appreciation for a great round of action.

Kid has Luffy up against the cage in a clinch.
Kid tries to pull guard but Luffy won't allow it.
And thats the end of the round the fighters go back to their corners.
Monkey D Luffy dominated that second round.
Well, the break between rounds is over. Let's get back to the scrappin! This is the final round!

Luffy looks for a takedown but Kid sprawls well.
Kid shoots in looking for a takedown but Luffy manages to keep the fight standing, pushing Kid's face into the canvas for good measure before circling away.
Luffy throws a head kick that misses.
Luffy throws a series of punches but Kid moves out of range.
Luffy fails miserably with a takedown attempt.
Kid dives in and grabs Luffy's left leg, looking for a takedown. Luffy pushes down on Kid's head and hops out.
Kid stuffs a takedown. It's all about dictating where the fight takes place and Kid wants it to stay on the feet.
That's three failed takedown attempts in the round for Monkey D Luffy. That's going to take a lot out of him.
Nice sprawl there from Luffy as Kid shoots in.
Kid rushes forward with a series of wild hooks but Luffy moves out of range and avoids them all easily.
Luffy shoots in but no luck this time.
Both fighters are breathing heavily.
Kid has managed to clinch.
Kid pushes off and circles away, back to the middle of the mat.
Luffy stuffs the takedown attempt from Kid. Kid gets slowly back to his feet.
That's one minute gone in the round.
Kid fails with a takedown attempt from distance.
Kid throws a series of punches but Luffy moves out of range.
Luffy swats away the attempt to clinch by Kid.
Monkey D Luffy is looking to throw some combinations by the looks of things.
Luffy is looking to clinch.
Luffy will have to do better than that with his takedown attempts.
Kid misses with a few strikes there.
Luffy misses with a takedown attempt. He shot from a bit too far out.
Luffy wants to clinch up but Kid keeps it at a distance.
Luffy pushing out the jab but it's not landing.
Nice sprawl there from Luffy as Kid shoots in.
Kid swinging wildly here.
That's two minutes gone in the round.
Luffy shoots in for a takedown but Kid shows good takedown defense there and keeps this one on the feet.
Luffy slaps away a takedown attempt from Kid, before circling back to the center of the mat.
Luffy doesn't manage to clinch there - Kid circles away.
Luffy shoots in and drives through. Kid sprawls well.
Luffy tries to clinch but Kid is having none of it.
Luffy shoots in for a takedown. He's persisting with it as Kid sprawls well. Kid wins this battle and keeps the fight standing. Luffy gets slowly back to his feet.
Kid throws a looping left and ducks down for a takedown. He's got his arms around Luffy's waist but Luffy gets an underhook and avoids the takedown by throwing Kid off to one side.
Kid will have to do better than that with his takedown attempts.
Luffy shoots in with a takedown attempt and he has Kid pinned against the cage. Kid gets the underhooks and manages to circle away.
Kid shoots in for a takedown but Luffy shows good takedown defense.
That's three minutes gone in the round.
Kid lands a jab. Then a cross. Then finally a nice hook to the body. Good work there by Kid.
Luffy tries to close the distance and clinch but Kid swats him to one side with an open hand palm strike and circles away.
Some wild striking there from Kid.
Luffy tries for a takedown but Kid sees it coming a mile off and avoids it easily.
Kid fails miserably with a takedown attempt.
Kid darts in and clinches Luffy up against the cage.
Kneeeeees! The crowd are calling for knees to the body. Luffy obliges.
Kid has hold of a leg and is looking for a trip takedown. Luffy avoids it nicely though and we remain in the clinch.
Luffy tries for a takedown but Kid manages to get underhooks.
Luffy is trying to break free.
That's four minutes gone in the round.
Luffy landing knees to the body. They look like they could hurt.
Kid jumps into guard, dragging Luffy to the mat.
Kid is working an open guard so Luffy takes the opportunity to get back to his feet.
Kid shoots in for a takedown but Luffy shows good takedown defense.
Kid defends well against a solid takedown attempt from Luffy.
Kid swats away the attempt to clinch by Luffy.
Luffy defends well against a solid takedown attempt from Kid.
The fans in attendance giving it up for the two fighters, who have really let it all hang out in the last minute or so!
Luffy slips a jab and a cross from Kid.
As the round comes to an end the crowd are showing their appreciation for a great round of action.
Luffy will have to do better than that with his takedown attempts.
Kid changes levels and looks for a double leg takedown. Luffy tries to avoid it but Kid manages to keep hold of a leg and drag Luffy to the ground. Luffy escapes though and pops straight back up to his feet.
Ryan Kid has stepped it up - he knows he needs a finish here!
Monkey D Luffy is fighting for a decision here - he's started to take the cautious approach.
Kid throws a right hand that Luffy ducks under and follows up with a left that Luffy also avoids with ease.
Kid shoots for a takedown but Luffy saw that one coming a mile off and avoided it easily.
And that's the end of the fight!
I would just about give that final round to Ryan Kid.
Well Luffy has outscored his opponent in every aspect of the fight today. Only a scarily incompetent judge or two will keep him from a well deserved win... Over to the ring announcer for the scorecards.
Ladies and gentlemen, after 3 rounds of action, we go to the scorecards for a decision.
Judge Skip Squint scores the fight 29:28
Judge Winston Howard scores the fight 29:28
Judge Summer Carpenter scores the fight 29:28
In favor of your winner, by unanimous decision... Monkey D Luffy!
During a confident post fight interview, Monkey D Luffy thanked all his fans. He seemed very genuine when describing how motivated his fans keep him.
|
|
|
|
|
|
|
|
|
|
|
|
|
|
|
|
|
|
|
|
|
|
|
| S |
C
A |
G |
S |
C
B |
G |
|
S |
C |
G |
|
energy
A | B |
|
hype
A | B |
|
pop
A | B |
|
mgr
A | B |
|
FIGHT
RATING
63% |
|
|
|
|
|
|

