|
|
PBP Commentary |
Coming up we have a middleweight MMA rules bout between Lee Bandit (ranked 0 p4p, 0 weight class) and Musashi Miyamoto (ranked 0 p4p, 0 weight class). Musashi Miyamoto acknowledges the crowd's support as he enters the cage.
 |
|
 |
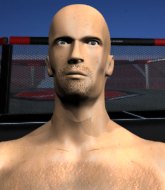
| 193 cm
24
191 lbs
8 - 11 - 0 |
|
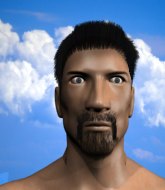
185 cm
30
188 lbs
8 - 10 - 1 |
BJJ Brown Belt
Excellent boxer
KO power |
|
Good wrestler
Excellent boxer
Granite chin |
|
| |
|
Ladies and gentlemen. This fight is 3 rounds, in the middleweight division.
Introducing the fighter to my left, fighting out of the red corner.
With a record of
8 - 11 - 0, fighting out of Helsinki, Lee Bandit!
And introducing the fighter to my right, fighting out of the blue corner.
With a record of
8 - 10 - 1, fighting out of Helsinki, Musashi Miyamoto!
The judges for this bout are Ben Zyskovitsi, Marco Blurström and Johanna Lukiainen.

The bell rings for round one and we are underway!

Bandit instigates a clinch.

Miyamoto escapes the clinch and we're back to striking.
Sloppy strikes from Bandit. Those never looked like landing.
Bandit misses with a jab and misses with a cross straight after too.
Bandit has closed the distance and engaged Miyamoto in a clinch.
Miyamoto manages to break the clinch.
Lee Bandit seems to be the more aggressive standup fighter in this bout.
Miyamoto misses with a jab, cross combination.

Miyamoto clinches with his opponent.
Miyamoto breaks from the clinch.
Jab by Bandit.

It looks like Musashi Miyamoto has been cut.
Bandit drives through and clinches with Miyamoto against the cage.
Nice body punch from Bandit - that landed with a thud.
Fantastic stuff here - a very entertaining period of action, which has drawn cheers from the crowd.
Miyamoto keeps control of Bandit as he tries to wriggle out of the double underhooks.
Bandit misses with a body punch.
Miyamoto's corner calls for him to break the clinch, which he does.
Miyamoto moves into the clinch successfully.
Miyamoto pushes off and circles away, back to the middle of the mat.
Bandit takes a swing at Miyamoto's ribcage but misses.
Nice shot by Miyamoto.

That's one minute gone in the round.
A telegraphed right hand from Bandit misses the target.
Miyamoto clobbers Bandit with an overhand right that has the crowd gasping. That made a horrendous noise.
Miyamoto sizes up Bandit with a pawing jab and scores with a straight right down the middle.
Bandit misses with a series of wild punches.
Miyamoto gets tackled into the cage by Bandit. Bandit maintains the clinch.
Bandit is trying to break the clinch but Miyamoto is controlling him.
Bandit is trying to break free.
Bandit tries to throw a body punch but Miyamoto avoids it by throwing Bandit back against the cage.
Bandit has had enough of the clinch but Miyamoto keeps him there for the moment.
Miyamoto escapes the clinch and we're back to striking.
Bandit misses with a hook
and Miyamoto counters by moving into the clinch. Good anticipation by Miyamoto.
Miyamoto pushes off and circles away, back to the middle of the mat.
Miyamoto closes the distance and presses his opponent up against the cage.
Bandit working hard to break the clinch.
An uppercut on the inside fails to land for Bandit.

Bandit breaks from the clinch.
Bandit throws a right and a left that Miyamoto avoids nicely.

That's two minutes gone in the round.
Miyamoto connects with a slap. Keep your fist closed son.
We've seen a great period of action over the last minute or so - credit to both fighters for going all out!
Miyamoto wings a very wild body shot but it does the job and lands to the midsection.
Bandit drives through and clinches with Miyamoto against the cage.
Bandit looks like he'd prefer to be striking at range right now.
Miyamoto manages to break the clinch.
Miyamoto closes the distance and pushes Bandit back into the cage.
Miyamoto prevents a body shot from Bandit.
Bandit's corner calls for him to break the clinch, which he does.
Bandit clinches up against the cage.
Bandit has had enough of the clinch and is looking to separate.
Bandit misses with a punch to the body.
Bandit tries to work over Miyamoto's body with a swooping hook but it only glances the target.
Bandit lands a body punch in the clinch.
Miyamoto breaks from the clinch.
Bandit drives through and clinches with Miyamoto against the cage.
Miyamoto manages to break the clinch.
Bandit misses with a double jab
and Bandit takes a counter punch right on the button for his troubles.

That's three minutes gone in the round.
Miyamoto uses decent footwork to sidestep a right hand from Bandit.
Bandit clinches.
Bandit misses with a hook to the ribs.
Miyamoto breaks from the clinch.
Miyamoto dips down and scores with a jab to the body.
Bandit misses with a body shot
letting Miyamoto counter with a right hand.
Miyamoto keeping his hands up high there, blocking the jab from Bandit.
Bandit closes the distance and clinches.
Bandit struggles to land a body shot inside as Miyamoto controls his hands.
Bandit wants to break the clinch but can't.
Miyamoto breaks from the clinch.
Bandit closes the distance and pushes Miyamoto back into the cage.
Bandit tries to throw a body punch but Miyamoto avoids it by throwing Bandit back against the cage.
Miyamoto breaks the clinch.
Bandit gets in close and instigates a clinch.
The crowd are loving this. Great action here.
Miyamoto manages to break the clinch.

That's four minutes gone in the round.
Miyamoto gets to the clinch - let's see what his plan is here.
Miyamoto breaks the clinch and we return to the middle of the mat.
Lee Bandit is looking to keep the fight on the feet at all costs.
Bandit has Miyamoto up against the cage in a clinch.
Bandit has had enough of the clinch and is looking to separate.
Bandit pushes off and circles away, back to the middle of the mat.
Bandit swings wildly with a right hand that was never going to find it's target.
Bandit misses with a straight left.
Bandit throws a predictable looking body shot
and Miyamoto counters with a good right hand that lands right on the jaw.
Bandit misses with a double jab.
Bandit misses with an uppercut
and Miyamoto moves into the clinch.
Bandit tries a shoulder strike but it doesn't do any damage.
The crowd are going absolutely nuts as the round comes to an end - what a fantastic round of action!
Miyamoto keeps the fight in the clinch, despite Bandit's efforts to push away.
Bandit misses with a shot to the kidneys.
Miyamoto pushes off and circles away, back to the middle of the mat.
Bandit throws a right hand that misses
and Miyamoto counters by moving into the clinch.
And thats the end of the round the fighters go back to their corners.
That was a close round but I would say that Lee Bandit will probably get the nod.
The cut man is working on Musashi Miyamoto's cut.
The referee calls time. The cornermen exit stage left and we're back to business.

Bandit closes the distance and pushes Miyamoto back into the cage.
Bandit creates a bit of distance and throws an elbow that only just misses.
Bandit tries to throw a body punch but Miyamoto avoids it by throwing Bandit back against the cage.
Bandit breaks the clinch and we return to the middle of the mat.
Miyamoto clinches up against the cage.
Miyamoto pushes off and circles away, back to the middle of the mat.
Lee Bandit is looking to throw some combinations by the looks of things.
Miyamoto takes a solid shot to the body. That one hurt him but he's trying not to show it.
Miyamoto clinches with his opponent.
Bandit wants to break free but Miyamoto has control.
Miyamoto's corner calls for him to break the clinch, which he does.
Bandit closes the distance and presses his opponent up against the cage.
Miyamoto breaks the clinch.
Miyamoto throws a nice hook to the body that draws an oooh from the crowd.
Miyamoto forces Bandit back against the cage and clinches.
This has been an exciting period of action!
Miyamoto breaks the clinch and we're back to striking at distance.
Bandit ducks right into an uppercut from Miyamoto.
Bandit clinches up with Miyamoto and pushes him back against the cage.
That's one minute gone in the round.
Bandit working hard to break the clinch.
Miyamoto breaks the clinch and we're back to striking at distance.
Bandit throws a jab, cross combination which is slipped
and Miyamoto counters by moving into the clinch.
Bandit struggles to land a body shot inside as Miyamoto controls his hands.
Bandit misses with a shot to the kidneys.
Bandit struggles to land a body shot inside as Miyamoto controls his hands.
Bandit tried to land a shot to the body but connects with Miyamoto's elbow.
Miyamoto keeps the fight in the clinch, despite Bandit's efforts to push away.
Bandit tries to work over Miyamoto's body with a swooping hook but it only glances the target.
Bandit tries to throw a body punch but Miyamoto avoids it by throwing Bandit back against the cage.
Bandit wants to break free but Miyamoto has control.
Bandit lands a right hand that snaps the head of Miyamoto backwards.
Miyamoto pushes off and circles away, back to the middle of the mat.
Miyamoto gets tackled into the cage by Bandit. Bandit maintains the clinch.
Miyamoto escapes the clinch and we're back to striking.
Musashi Miyamoto seems to be getting the better of the standup.
Bandit throws an off balance right hand
and Miyamoto counters with a left to the body.
That's two minutes gone in the round.
Miyamoto clinches up against the cage.
Miyamoto's corner calls for him to break the clinch, which he does.
Bandit throws a combination but comes up with nothing but fresh air.
Fantastic stuff here - a very entertaining period of action, which has drawn cheers from the crowd.
Bandit falls off balance throwing a combination
and Miyamoto cracks him with a counter punch right on the button.
Bandit falls off balance throwing a combination
and Miyamoto counters by clinching up.
Miyamoto breaks the clinch and we're back to striking at distance.
Bandit misses with a body shot. Nice footwork from Miyamoto.
Bandit looks to throw the jab but Miyamoto is out of range.
Miyamoto moves into range and clinches up with Bandit.
Miyamoto has Bandit pressed against the cage, preventing Bandit from circling away and getting back to striking at range.
Bandit is trying to work out of this bad position, with his back against the cage.
Bandit breaks from the clinch.
Miyamoto walks into a left hand.
Bandit throws a jab, cross combination which is slipped
and Miyamoto counters with a lovely straight right hand!
Miyamoto throws a low kick but Bandit avoids it.
That's three minutes gone in the round.
Bandit has closed the distance and engaged Miyamoto in a clinch.
Miyamoto's corner calls for him to break the clinch, which he does.
Bandit misses with a wild combination.
Bandit clinches.
Miyamoto breaks the clinch and we return to the middle of the mat.

Miyamoto drives through with a really nice takedown into side control.
Bandit looking for a sweep but Miyamoto has passed into full mount! Oh no!
Miyamoto sitting in mount, just looking to control for the moment.
Bandit is working to get back to half guard.
That's four minutes gone in the round.
Miyamoto blocks Bandit's feeble attempts to strike from the bottom.
Bandit tries to hold on but Miyamoto pushes him away.
Miyamoto looking to control and managing it successfully.
The ref warns both fighters not to hold the cage as they work up against the meshing.
This is a great period of action - very entertaining stuff!
Bandit swinging wildly from the bottom but he's not landing.
Miyamoto takes a little breather and maintains the position. The referee will be looking for him to stay active from such a dominant position though.
Bandit really trying hard to get back to half guard here.
The crowd are going absolutely nuts as the round comes to an end - what a fantastic round of action!
And thats the end of the round the fighters go back to their corners.
A close second round but Musashi Miyamoto will probably get the nod - 10:9.
The cut man is working on Musashi Miyamoto's cut.
That's time! Bandit's corner gives him a slap on the ass as he gets ready to fight. This is the final round!

Miyamoto dodges the punch combination from Bandit.
Bandit misses with a wild combination.
Bandit cracks a nice hook into Miyamoto's ribs.
Miyamoto clinches with his opponent.
Miyamoto breaks the clinch and we're back to striking at distance.
Bandit has taken the fight to the clinch.
Miyamoto breaks the clinch and we're back to striking at distance.
Bandit instigates a clinch.
Miyamoto's corner calls for him to break the clinch, which he does.
Bandit ducks down and throws a hook to the body but Miyamoto moves away.
Miyamoto pushes Bandit up against the cage in a clinch.
Bandit goes for a body shot but it's blocked.
Bandit can't break the clinch.
That's one minute gone in the round.
Miyamoto breaks the clinch and we're back to striking at distance.
Miyamoto throws a right and a left that Bandit avoids nicely.
Bandit throws a right and a left that Miyamoto avoids nicely.
Bandit misses with a combination
and Miyamoto moves into the clinch.
Miyamoto's corner calls for him to break the clinch, which he does.
Bandit misses with a combination
and Miyamoto counters with a straight right hand.
Miyamoto connects with a good right hand that stumbles Bandit. Bandit circles away out of range and recomposes himself.
Miyamoto closes the distance and clinches.
Bandit has dropped down and is looking to force the takedown but it's defended by Miyamoto after a bit of a struggle.
Bandit's corner calls for him to break the clinch, which he does.
Bandit throws a hard body shot but it just misses.
Miyamoto cracks Bandit with a nice right hand that draws applause from the crowd.
Bandit closes the distance and clinches.
Bandit tries to break free but Miyamoto pushes him back against the cage.
That's two minutes gone in the round.
This has been an exciting period of action!
Miyamoto breaks the clinch and we return to the middle of the mat.
Bandit pushes Miyamoto up against the cage in a clinch.
Miyamoto breaks from the clinch.
Bandit gets a clinch.
Miyamoto breaks the clinch and we're back to striking at distance.
Bandit misses the body punch
and Miyamoto counters with a left and a right that stings Bandit.
Miyamoto avoids a punch combination nicely.
Both fighters are breathing heavily.
Miyamoto slips a jab and a cross from Bandit.
Bandit moves into the clinch.
Miyamoto breaks the clinch and we're back to striking at distance.
Miyamoto walks into a jab.
Bandit throws a shot from downtown. Miyamoto moves away and avoids it.
Miyamoto lands with a good body shot.
Bandit rushes forward with a series of wild hooks but Miyamoto moves out of range and avoids them all easily.
That's three minutes gone in the round.
Bandit takes a jab right on the nose. That must have hurt but he shrugs his shoulders and looks to return the favor.
Bandit throws a left and a right that both miss
and Miyamoto counters with a left and a right that stings Bandit.
Miyamoto with a hook.
Miyamoto instigates a clinch.
Miyamoto manages to break the clinch.
Bandit moves into the clinch.
Bandit has had enough of the clinch and is looking to separate.
Miyamoto escapes the clinch and we're back to striking.
Miyamoto avoids a punch combination nicely.
Miyamoto moves into the clinch.
Bandit tries to work over Miyamoto's body with a swooping hook but it only glances the target.
Miyamoto escapes the clinch and we're back to striking.
Bandit throws a combination that misses
and Miyamoto holds on and brings the fighters into a clinch.
This is a great period of action - very entertaining stuff!
Bandit is trying to break the clinch but Miyamoto has him pressed against the cage.
Miyamoto manages to break the clinch.
That's four minutes gone in the round.
Bandit throws a right hand that Miyamoto ducks under and follows up with a left that Miyamoto also avoids with ease.
Miyamoto throws a series of strikes that have Bandit backpedaling.
Miyamoto drives through and clinches with Bandit against the cage.
Bandit is trying to force a seperation but Miyamoto has the dominant position.
Miyamoto breaks the clinch and we return to the middle of the mat.
Bandit misses with a lunging right hand
and Miyamoto counters with a nice double leg into half guard.
Still in half guard, Miyamoto seems content to control.
Miyamoto prevents Bandit from improving his position.
Bandit punching from the bottom.
Miyamoto really doesn't want to stay on the ground with Bandit. If he can't get it back to his feet, it's only a matter of time before he'll be tapping out.
The crowd are going absolutely nuts as the round comes to an end - what a fantastic round of action!
The referee calls for the fighters to work.
Bandit is looking to control Miyamoto's leg but it's slowly edging free. Can Bandit avoid being mounted?
Bandit has a hand on Miyamoto's thigh, trying to get back to full guard. Miyamoto takes advantage of the position though and mounts him!
And that's the end of the fight!
Musashi Miyamoto comfortably won the final round on my scorecard.
I think Miyamoto has won this one but let's see whether the judges agree with me. Over to the ring announcer for the scorecards.
Ladies and gentlemen, after 3 rounds of action, we go to the scorecards for a decision.
Judge Ben Zyskovitsi scores the fight 29:29
Judge Marco Blurström scores the fight 28:29
Judge Johanna Lukiainen scores the fight 29:28
The fight is ruled a draw!
|
|
|
|
|
|
|
|
|
|
|
|
|
|
|
|
|
|
|
|
|
|
|
| S |
C
A |
G |
S |
C
B |
G |
|
S |
C |
G |
|
energy
A | B |
|
hype
A | B |
|
pop
A | B |
|
mgr
A | B |
|
FIGHT
RATING
100% |
|
|
|
|
|
|
