|
|
PBP Commentary |
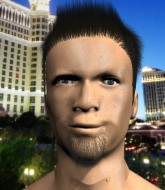
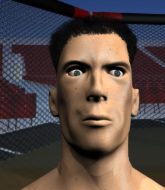
Coming up we have a welterweight MMA rules bout between Ruud Blaylock (ranked 0 p4p, 0 weight class) and Nick Diaz (ranked 0 p4p, 0 weight class). Man, I cannot wait for this one!
 |
|
 |
| 183 cm
24
178 lbs
12 - 4 - 1 |
|
177 cm
25
180 lbs
10 - 2 - 0 |
BJJ Brown Belt
Excellent MT
Cardio machine |
|
ADCC Champion
World class boxer
Good gas tank |
|
| |
|
Ladies and gentlemen. This fight is 5 rounds, for the welterweight championship of the world!
Introducing the champion to my left, fighting out of the red corner.
With a record of
12 - 4 - 1, fighting out of Las Vegas, Ruud Blaylock!
And introducing the challenger to my right, fighting out of the blue corner.
With a record of
10 - 2 - 0, fighting out of Las Vegas, Nick Diaz!
The judges for this bout are Chris Downing, Gwen Towbar and George Francis.

The bell rings for round one and we are underway!
Diaz lands with a nice body punch.
Blaylock takes a shot right to the liver - Bas would have been proud of that punch.

Blaylock pushes Diaz up against the cage in a clinch.

Diaz jumps guard and drags Blaylock to the mat. He's obviously going to be looking for submissions off his back.
We may be looking at a referee standup if the pace doesn't pick up soon.
Diaz looking to sweep here. No luck so far.
Blaylock trying to control the position from guard on top but Diaz is wriggling around, looking for whatever he can.
Diaz is working an open guard here, looking to improve his position. No doubt that will leave him open to counters but at least he's being more offensive.
Blaylock passes into half guard.
Both fighters really going for it on the ground here!
Blaylock prevents Diaz from standing back up.
Diaz is trying to maintain the position but Blaylock is very close to passing his half guard.

Diaz is defending against the submission attempts here by Blaylock.
Blaylock is trying for a guillotine from the top but the pressure isn't in the right place so Diaz is just riding it out for now. Blaylock eventually gives up the hold.
Blaylock seems very keen to just sit and control from half guard but Diaz does not like that idea so much and is remaining active off his back.

That's one minute gone in the round.
Blaylock is looking for a kimura. It's going to be difficult to finish that from half guard though and Diaz defends it well.
Blaylock is looking for a kimura but Diaz is holding onto that half guard position, so it's hard for Blaylock to get the leverage.
Diaz is looking to regain full guard. Not this time though.
Blaylock wants to pass to mount but Diaz is defending the position.
Blaylock prevents Diaz from improving his position.

Diaz is looking to sinch up a guillotine here but Blaylock pulls his head out easily.
Blaylock is trying to work for a kimura but Diaz is defending well.
Diaz is trying to get back to full guard.

That's two minutes gone in the round.
Blaylock is trying to work for a kimura but Diaz is defending well.
Blaylock wants to lay and pray for a moment but Diaz keeps working.
Blaylock wants to pass to mount but Diaz is defending the position.
The fighters are pressed up against the cage, both looking to find a bit of space to work.
Blaylock is looking for a kimura but Diaz is holding onto that half guard position, so it's hard for Blaylock to get the leverage.
Diaz works his way to full guard. Good work.
Diaz lands a beautiful switch and he's in full mount! That could spell trouble for Blaylock!
Diaz working for a guillotine from mount but Blaylock is in no mood to give up.
The fans in attendance giving it up for the two fighters, who have really let it all hang out in the last minute or so!
Diaz can't quite control the action as he would like just now, as Blaylock is looking to escape.

That's three minutes gone in the round.
Blaylock keeping his composure momentarily, calmly looking to get back to half guard.
Diaz working the ground and pound effectively.
Diaz thowing shots but they're missing.
Blaylock in a bad spot here, taking shots to the head.
Blaylock is in a horrible position here. Diaz smacks him with another shot as he tries to escape the position.
Blaylock sneaks a leg under to get to half guard.
Diaz not doing much here.
Blaylock is pressing down on Diaz's left leg trying to get back to full guard. He's managed it.
We've seen a great period of action over the last minute or so - credit to both fighters for going all out!
Diaz sneaks a leg through and gets to half guard. That was like a knife through butter how easily he passed Blaylock's guard.
Blaylock actively working from the bottom here.
Blaylock won't allow Diaz to pass to mount.

That's four minutes gone in the round.
Blaylock is working for an escape here. He's hooked one of Diaz's legs and he's managed to sneak out and take Diaz's back!
Blaylock controlling well, preventing Diaz from escaping the position.
Blaylock struggling to keep hold of the position.
Diaz tries to escape the position - he's now mounted. Is that better or worse? Hard to tell!
Diaz regains half guard.
Diaz gets full guard.
Diaz wants to sweep here but Blaylock controlling him for the moment.
Blaylock wants to control from the top but Diaz keeps moving.
Blaylock is really struggling to control Diaz but he's trying to hold on to the position.
The crowd are going absolutely nuts as the round comes to an end - what a fantastic round of action!
Diaz seems keen to control Blaylock's posture.
Blaylock is trying to work a guillotine from the top, or something like that? Don't know how he thinks he's going to get a finish from there.
And thats the end of the round the fighters go back to their corners.
Nick Diaz dominated that round.
The corners get their ten second warning. Both fighters stand from their stools and stare eachother down, ready to get back to the action.

A jab lands there for Diaz.
Blaylock moves in looking to clinch but Diaz pushes him off.
Diaz avoids the clinch attempt nicely.
Blaylock wants to clinch up but Diaz keeps it at a distance.

Blaylock closes the distance and clinches up, looking for a takedown. He shifts his weight and gets a nice trip into half guard.
Diaz is working for an escape here. He's hooked one of Blaylock's legs and he's managed to sneak out and take Blaylock's back!
Diaz softening up his opponent with strikes here.
Diaz has the hooks in. Blaylock is trying to push off one leg but he has to do so cautiously to avoid being submitted.
Nick Diaz has got the better of the ground game so far.
Blaylock is displaying good submission defense - not really looking in danger of submitting to the rear naked choke at the moment. That could change in an instant of course if Diaz gets his way!
This has been an exciting period of action!
Diaz looking for the choke but no joy.
Diaz looking to break Blaylock's wrist control so he can sink in the choke. Blaylock remaining controlled and patient though - he really has to keep calm otherwise Diaz will wrap this one up with the rear naked choke!
That's one minute gone in the round.
You can see the frustration on Blaylock's face
He knows he is in trouble unless he improves his position sooner rather than later.
Blaylock is keeping busy.
Blaylock manages to reverse the position and now he's in Diaz's guard. Nice work there by Blaylock.
Diaz can't keep his opponent in guard - Blaylock advances to half guard, no doubt looking to mount.
Diaz is looking to improve his position.
Diaz is defending against the submission attempts here by Blaylock.
Blaylock is looking for a kimura but Diaz is holding onto that half guard position, so it's hard for Blaylock to get the leverage.
Diaz is looking to sinch up a guillotine here but Blaylock pulls his head out easily.
The ref warns both fighters not to hold the cage as they work up against the meshing.
Diaz trying to control here.
That's two minutes gone in the round.
Diaz is staying active underneath Blaylock, who seems content to just control the action from this position.
Diaz looking to work for a kimura from the bottom.
Diaz is refusing to be controlled, as Blaylock sits in half guard.
Diaz wants to improve his position but Blaylock is controlling well.
Diaz trying to control from the bottom.
Blaylock is looking for an arm triangle, whilst trying to pass to side control. Diaz doesn't seem that keen to cooperate though. No luck this time Blaylock.
Blaylock is looking to take a break and control but Diaz is keeping him honest, looking to work from the bottom.
Blaylock is looking for a kimura. It's going to be difficult to finish that from half guard though and Diaz defends it well.
This is a great period of action - very entertaining stuff!
Diaz is trying to control but can't.
That's three minutes gone in the round.
Blaylock is thinking about going for an arm triangle but he can't free his leg.
Blaylock wants to take a breather but Diaz is having none of it.
Blaylock is looking for a kimura but Diaz is holding onto that half guard position, so it's hard for Blaylock to get the leverage.
Diaz moves into full guard.
Blaylock is sitting in close to Diaz's body. Diaz has gone for a guillotine from the bottom. Oh damn, that looks pretty tight! Blaylock is panicking - it looks like this one could be all over! Yes, Blaylock is tapping! That was a very nice submission by Diaz.
Ladies and gentlemen, after 3:47 of round 2, we have a winner by way of Submission (Guillotine). Nick Diaz!
Nick Diaz is the new welterweight champion!
Nick Diaz decided to go for the less than humble approach in his post fight interview, telling everyone how he is going to conquer the world. The crowd seemed to like it when really that sort of approach could have gone either way.
|
|
|
|
|
|
|
|
|
|
|
|
|
|
|
|
|
|
|
|
|
|
|
| S |
C
A |
G |
S |
C
B |
G |
|
S |
C |
G |
|
energy
A | B |
|
hype
A | B |
|
pop
A | B |
|
mgr
A | B |
|
FIGHT
RATING
63% |
|
|
|
|
|
|
