|
|
PBP Commentary |
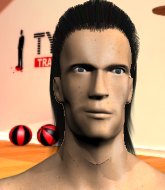
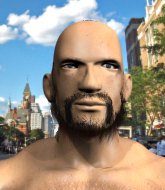
Coming up we have a welterweight MMA rules bout between Wilson Maughan (ranked 0 p4p, 0 weight class) and Yamamoto Takiyama (ranked 0 p4p, 0 weight class). This should be fireworks!
 |
|
 |
| 178 cm
28
180 lbs
5 - 6 - 0 |
|
176 cm
25
175 lbs
3 - 2 - 0 |
BJJ Purple Belt
Excellent boxer
Experienced |
|
BJJ Purple Belt
Basic striking
Determined |
|
| |
|
Ladies and gentlemen. This fight is 3 rounds, in the welterweight division.
Introducing the fighter to my left, fighting out of the red corner.
With a record of
5 - 6 - 0, fighting out of London, Wilson Maughan!
And introducing the fighter to my right, fighting out of the blue corner.
With a record of
3 - 2 - 0, fighting out of London, Yamamoto Takiyama!
The judges for this bout are Andrew Berry, Donald Grub and James Ackerman.

The bell rings for round one and we are underway!
A really sloppy takedown attempt there from Takiyama.
Takiyama wants to clinch
and Maughan counters with a stiff right hand.
Wilson Maughan seems to be the more aggressive standup fighter in this bout.
Takiyama closes this distance looking for a takedown but Maughan circles away.
Maughan lands a jab followed by a nice looking cross.
Takiyama will have to do better than that with his takedown attempts.
Wilson Maughan has stuffed three takedown attempts in the round now. That's going to take a lot out of Yamamoto Takiyama.
Nice uppercut there from Maughan.
Takiyama tries to clinch up but Maughan circles away and keeps his distance.
A head kick misses from Takiyama.
Takiyama tries to close the distance and clinch up but Maughan swats him away and circles back towards the center.
Maughan lands a pitter patter jab to the forehead of his opponent.
Takiyama gets his head snapped back by a nice shot there.
Takiyama takes one to the chin there.
This has been an exciting period of action!
Maughan lands a nice hook to Takiyama's body. Takiyama takes it in his stride and looks to land his own strikes.
Maughan misses with the combination.
A shot to the liver by Maughan. Beautiful body shot.

That's one minute gone in the round.
Takiyama tries a switch kick but it misses it's target.
Takiyama misses with a takedown attempt - Maughan sprawls well and throws a nice strike on the way out which just misses.
Maughan will need to tighten up his combinations if he doesn't want to gas himself out, swinging at thin air.
Sloppy strikes from Maughan. Those never looked like landing.
Maughan slips in close and lands a nice hook before moving back out of range.
Takiyama tries to clinch but Maughan moves out of range.
Nice takedown defense from Maughan. No joy for Takiyama on that attempt.
The fight stays on the outside here - Takiyama looks like he's thinking about clinching though.

Takiyama closes the distance and gets a double leg, slamming Maughan to the mat! Maughan manages to get full guard.
Maughan keeping full guard, as Takiyama tries to pass.

Maughan looking for submissions from the bottom here. Moving his hips around, possibly looking for an armbar.

That's two minutes gone in the round.
Takiyama pressing down on his opponent's thigh, looking to pass guard. Maughan is keeping the position for now.
Takiyama trying to control but Maughan is working from the bottom.
Takiyama looking to sit in guard and control but Maughan gets the butterfly guard and sweeps. He's now in the guard on the top.
Maughan pressing down on his opponent's thigh, looking to pass guard. Takiyama is keeping the position for now.
Takiyama has a butterfly guard looking to sweep but Maughan has passed into side control.

That's three minutes gone in the round.
Takiyama can't do much from the bottom here.
Takiyama tries to slip a leg under to move to half guard but Maughan presses down on the leg and jumps into full mount!
Takiyama is desperately trying to improve his position but Maughan has a good base and remains in mount.
The fighters are starting to get a bit slippery now, which will make submissions a bit more difficult.

That's four minutes gone in the round.
Maughan controlling the position easily from mount.
Takiyama wants to control but Maughan is having none of it.
As the round comes to an end the crowd are showing their appreciation for a great round of action.
And thats the end of the round the fighters go back to their corners.
That was a close round but I would say that Wilson Maughan will probably get the nod.
The fighters get back to their feet, the hooter sounds and we're back to the action!

The fight stays on the outside here - Takiyama looks like he's thinking about clinching though.
Maughan goes to the watering hole and comes back with a big thumbs up from the judges as he scores a three punch combo.
Maughan avoids the clinch attempt nicely.
Maughan connects with a looping left hand that seems like it dazed Takiyama momentarily.
Maughan feints a jab promting Takiyama to slip. Maughan then demonstrates his capabilities by jabbing again. Takiyama slips again and ducks right into an uppercut.
Maughan dips to his left and cracks Takiyama with an uppercut!
Maughan throws a right and a left that both miss.
Takiyama tries to clinch up against the cage, rushing in the close the distance. Maughan manages to break the clinch and circles back to the middle of the mat.
Maughan avoids the clinch attempt nicely.

Takiyama gets a clinch.
Maughan tried to land a shot to the body but connects with Takiyama's elbow.
Maughan throws a blind hook that connects with the side of Takiyamas head.
Nice body punch from Maughan - that landed with a thud.
That's one minute gone in the round.

Maughan breaks the clinch.
Maughan shuffles to his left behind two crisp jabs. Takiyama eats them both and turns towards Maughan to reposition himself and eats a stinging right hand-left hook combo.
Maughan scores with a nice looking left hook and follows it up with an uppercut!
Takiyama gets his head snapped back by a nice shot there.
Maughan jabs Takiyama right on the nose. Takiyama blinks but takes it well.
Takiyama fails with an attempt to clinch.
Takiyama takes an uppercut right on the jaw but it doesn't phase him.
Takiyama fails in his attempt to clinch.
Takiyama shoots in for a takedown but doesn't get it.
Takiyama tries to clinch there but Maughan circles away.
Wilson Maughan is looking to throw some combinations by the looks of things.
Maughan circles away from the clinch attempt
and Maughan counters with a crisp hook to the side of the head.
Maughan looks to score with a jab to the body but Takiyama is just out of range.
That's two minutes gone in the round.
Maughan throws out a powerful jab.
Takiyama shoots in looking for a double leg takedown. Maughan defends it nicely.
Takiyama fails with the takedown.
Wilson Maughan has stuffed three takedown attempts in the round now. That's going to take a lot out of Yamamoto Takiyama.
Takiyama fails with an attempt to clinch.
Takiyama fails in his attempt to clinch.
Maughan scores with a reasonable looking shot to the body. Takiyama doesn't seem bothered though.
Wooooo! Give it up for these two warriors! They are putting on a show!
Maughan slips in close and lands a nice hook before moving back out of range.
Wilson Maughan is winning the standup battle so far.
Takiyama shoots in for a takedown - he's clinched up with Maughan but Maughan pushes him off and we're back to square one.
Takiyama misses with a takedown attempt - Maughan sprawls well and throws a nice strike on the way out which just misses.
Maughan lands a nice looking body shot.
That's three minutes gone in the round.
Takiyama tries to clinch up but Maughan circles away and keeps his distance.
Takiyama takes a shot right to the bread basket.
Takiyama scores a trip takedown into side control. Nice.
The fighters are pressed up against the cage, both looking to find a bit of space to work.
Takiyama is breathing heavily.
Maughan is not content to let Takiyama control the position.
Check out the look on Takiyama's face as he threw that strike - that's one determined fighter!
Takiyama is looking to take a break and control but Maughan is keeping him honest, looking to work from the bottom.
That's four minutes gone in the round.

Takiyama goes for an armbar here - this could be all over! But no, Maughan has escaped beautifully and is now on top in side control! Oh, that's unlucky for Takiyama but great work by Maughan.
Takiyama tries to buck Maughan off but Maughan is having none of it.
Maughan taking a breather here.
Takiyama is moving his hips around well on the bottom and has managed to get back to half guard.
This is a great period of action - very entertaining stuff!
As the round comes to an end the crowd are showing their appreciation for a great round of action.
Takiyama is looking to sinch up a guillotine here but Maughan pulls his head out easily.
Takiyama looking for submissions off his back.
And thats the end of the round the fighters go back to their corners.
That was a close second round but I would say that Wilson Maughan will probably get the nod.
That's the end of the interval. I'm sure that seemed a lot quicker than a minute for our two fighters! Back to the action. This is the final round!

Maughan thuds his right hand into Takiyama's forehead from close range. That could be painful for both fighters.
Takiyama fails with a rather predictable takedown attempt.
Takiyama shoots in with a takedown attempt and he has Maughan pinned against the cage. Maughan gets the underhooks and manages to circle away.
Takiyama is looking to clinch.
Maughan works Takiyama's body with a nice hook.
Takiyama scores a trip takedown into side control. Nice.
Maughan avoids any damage from the ground and pound of Takiyama.
Maughan regains half guard there - taking advantage of Takiyama's attempt to lay and pray for a moment.
That's one minute gone in the round.
Takiyama is looking to take a break and control but Maughan is keeping him honest, looking to work from the bottom.
Takiyama is working for a submission of some sort.
Takiyama is working for a submission of some sort.
Takiyama takes a big intake of breath there - he's definitely tired.
Takiyama lands strikes from half guard.
That's two minutes gone in the round.
Takiyama is trying to work for a kimura but Maughan is defending well.
Takiyama throws a strike but Maughan avoids it easily and moves to full guard.
Takiyama trying to control the position from guard on top but Maughan is wriggling around, looking for whatever he can.
Takiyama looking to sit in guard and control but Maughan gets the butterfly guard and sweeps. He's now in the guard on the top.
Takiyama had isolated an arm as going for a kimura. Maughan defends it easily.
That's three minutes gone in the round.
Maughan working some ground and pound from guard but it's not doing any damage.
Maughan advances position into side control!
Takiyama is looking for a sweep.
Wilson Maughan is fighting for a decision here - he's started to take the cautious approach.
Maughan is looking to take a break and control but Takiyama is keeping him honest, looking to work from the bottom.
The ref warns both fighters not to hold the cage as they work up against the meshing.
Takiyama is trying to control Maughan's posture but Maughan avoids it.
Yamamoto Takiyama has stepped it up - he knows he needs a finish here!
That's four minutes gone in the round.
Takiyama is trying to improve his position.
Takiyama manages to get back to half guard.
Takiyama gets back to full guard.
The crowd applaud the fighters efforts here as the round comes to an end.
Takiyama has his foot on Maughan's thigh. He's trying to push off and get in position for a triangle, I think. Maughan works his way back into a safe position though.
And that's the end of the fight!
Yamamoto Takiyama comfortably won the final round on my scorecard.
I think Maughan has won this one but let's see what the judges have to say. Over to the ring announcer for the scorecards.
Ladies and gentlemen, after 3 rounds of action, we go to the scorecards for a decision.
Judge Andrew Berry scores the fight 29:29
Judge Donald Grub scores the fight 28:29
Judge James Ackerman scores the fight 29:28
The fight is ruled a draw!
|
|
|
|
|
|
|
|
|
|
|
|
|
|
|
|
|
|
|
|
|
|
|
| S |
C
A |
G |
S |
C
B |
G |
|
S |
C |
G |
|
energy
A | B |
|
hype
A | B |
|
pop
A | B |
|
mgr
A | B |
|
FIGHT
RATING
58% |
|
|
|
|
|
|
