|
|
PBP Commentary |
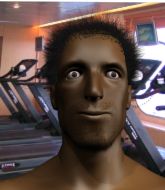
Coming up we have a light heavyweight MMA rules bout between Richard Burgess (ranked 0 p4p, 0 weight class) and Arial Jones (ranked 0 p4p, 0 weight class). Jones has a niggling injury. He would have liked to come in 100% fit but that's not always possible. Both fighters look fresh as a daisy as they make their way towards the cage.
 |
|
 |
| 188 cm
30
215 lbs
5 - 5 - 1 |
|
188 cm
21
217 lbs
1 - 1 - 0 |
Powerful takedowns
Brawler
Very strong |
|
Good wrestler
Excellent boxer
Good gas tank |
|
| |
|
Ladies and gentlemen. This fight is 3 rounds, in the light heavyweight division.
Introducing the fighter to my left, fighting out of the red corner.
With a record of
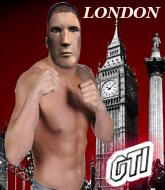
5 - 5 - 1, fighting out of London, Richard Burgess!
And introducing the fighter to my right, fighting out of the blue corner.
With a record of
1 - 1 - 0, fighting out of London, Arial Jones!
The judges for this bout are Sam Margolis, Richard Clark and Steven Brown.

The bell rings for round one and we are underway!
Jones takes a step towards his opponent and connects with a left hand, before circling away.

Burgess throws a loose over hand right and dives in with a double leg takedown. Jones tries to sprawl but it's too late and the fighters hit the mat. Burgess is in Jones's guard.
The ref warns both fighters not to hold the cage as they work up against the meshing.
We must be close to a standup if these guys don't pick up the pace.
Jones wants to sweep here but Burgess controlling him for the moment.
Burgess is sitting in guard, working some ground and pound.

Jones has a loose triangle. He'll be looking to tighten that up but Burgess can see exactly what he's planning and manages to posture up and free himself.
Burgess trying to land body shots but he keeps hitting the mat.
Jones throwing his legs up looking for a triangle.
We've seen a great period of action over the last minute or so - credit to both fighters for going all out!
Burgess engaging in some classic timewasting tactics.
Burgess passes Jones's left leg - he's now in half guard.
Jones tries to regain full guard. Instead though, Burgess has advanced to mount. Uh oh.
Burgess landing strikes from the mount and Jones is in trouble!

That's one minute gone in the round.
Jones is trying to escape the mount.
Burgess pausing momentarily but resumes with a couple of decent strikes that do a bit of damage.
The fighters are pressed up against the cage, both looking to find a bit of space to work.
Burgess prevents Jones from getting the reversal.
Burgess is landing with some decent strikes but Jones is trying to advance his position so the referee is letting the fight continue.
Burgess trying to control but he's not successful this time.
Burgess working away from the top, dropping strikes.
Burgess looking to control and managing it successfully.
Jones manages to regain half guard. Good work.
This has been an exciting period of action!
Jones gets full guard.

That's two minutes gone in the round.
The fighters are going at a pretty good pace and they're both starting to sweat now.
Burgess seems content to control from guard here. He's going to have to remain active though if he doesn't want to get stood back up.
Jones looking for submissions from the bottom here. Moving his hips around, possibly looking for an armbar.
Burgess advances position into side control!
Jones sneaks a leg under to get back to half guard.
Burgess wants to control but Jones is keeping him busy.
Jones gets back to full guard.
Burgess passes Jones's right leg, so he's now in half guard.
Burgess not throwing his punches with enough precision this time.
Burgess seems very keen to just sit and control from half guard but Jones does not like that idea so much and is remaining active off his back.

That's three minutes gone in the round.
Jones trying to get back to full guard but Burgess takes advantage of the position and moves to full mount!
Jones is squirming around, avoiding Burgess's attempts to control the action.
Burgess is really struggling to control Jones but he's trying to hold on to the position.
Jones can't escape the position.
Burgess punishing his opponent with strikes.
Jones keeping his composure momentarily, calmly looking to get back to half guard.
Burgess scoring with some good ground and pound from mount here. Will he manage to finish Jones?
Jones is squirming around, avoiding Burgess's attempts to control the action.
Burgess dominating with strikes here.

That's four minutes gone in the round.
Jones is working to get back to half guard.
This has been an exciting period of action!
Burgess connects with a couple of good shots from mount.
Jones sneaks a leg under to get to half guard.

Burgess is working for submissions here but there's nothing on.
Jones regains full guard. Nicely done.
Burgess in full guard, throwing the ground and pound. No damage this time.
Jones utilising some decent striking defenses from the guard, preventing the ground and pound.
Burgess stopping the sweep attempt from Jones.
Jones looks gassed!
The crowd are going absolutely nuts as the round comes to an end - what a fantastic round of action!
Jones wants to hit a switch here but Burgess passes into full mount! Oh no, disaster for Jones there!
And thats the end of the round the fighters go back to their corners.
Richard Burgess dominated that round.
Well, the break between rounds is over. Let's get back to the scrappin!

Burgess shoots in and drives through. Jones sprawls well.
The fight stays on the outside here - Burgess looks like he's thinking about clinching though.
Jones slaps away a takedown attempt from Burgess, before circling back to the center of the mat.
A slow jab from Jones misses its intended target.
Burgess defends well against a solid takedown attempt from Jones.
Burgess shoots in for a takedown - he's clinched up with Jones but Jones pushes him off and we're back to square one.
That's three failed takedown attempts in the round for Richard Burgess. That's going to take a lot out of him.
Burgess on the wrong end of a decent looking cross there.
Richard Burgess is looking to throw some combinations by the looks of things.
Jones throws a lazy right hand but Burgess sees it coming a mile off and sidesteps it easily.
Burgess is looking to clinch but Jones is avoiding it.
That's one minute gone in the round.
Burgess misses with a takedown attempt
and Jones counters nicely by changing levels and landing a hook to the body.
Jones throws a nice looking combination but Burgess bobs and weaves to avoid any damage.
Jones stuffs the takedown.
Jones digs a good body shot into Burgess's ribs.
A big left from Jones misses.
Burgess shoots in for a takedown - he's clinched up with Jones but Jones pushes him off and we're back to square one.
Jones will need to tighten up his combinations if he doesn't want to gas himself out, swinging at thin air.
Jones is breathing heavily.
Horrible takedown by Burgess or perhaps it was just good defense by Jones which made him look bad.
Burgess fails with a rather predictable takedown attempt.
That's two minutes gone in the round.
Horrible takedown by Burgess or perhaps it was just good defense by Jones which made him look bad.
Burgess tries to clinch up.
Burgess is trying hard to land a takedown here. Jones sprawls well and keeps this one on the feet.
Jones thows a left - swing and a miss!

Jones shoots in with a lovely double leg takedown. Burgess manages to land in full guard to minimise the damage.
Burgess preventing the ground and pound from doing any damage.
Jones trying to control but Burgess is working from the bottom.
Burgess working for a triangle but Jones defends it easily.
Wooooo! Give it up for these two warriors! They are putting on a show!
Burgess looking to sweep here. No luck so far.
That's three minutes gone in the round.
Jones trying to control the position from guard on top but Burgess is wriggling around, looking for whatever he can.
Jones trying to pass the guard but can't manage it just yet.
Burgess trying to control the position.
Jones looking to pass the guard.
Burgess doesn't do any damage with a couple of strikes from the bottom.
Jones tries to free his leg and advance position but Burgess is retaining full guard.
Richard Burgess overall seems to be getting the better of the ground position in the fight so far.
Burgess preventing the ground and pound from doing any damage.
Jones prevents Burgess from getting back to his feet.
That's four minutes gone in the round.
Burgess avoiding any damage from the ground and pound.
Jones throws a big right hand that misses.
Jones pressing down on his opponent's thigh, looking to pass guard. Burgess is keeping the position for now.
Jones with a couple of shots to the head there. Not particularly brutal.
Burgess trying to keep a closed guard but Jones is proving a slippery customer.
Burgess wants to sweep here but Jones controlling him for the moment.
Jones postures up in Burgess's guard and throws a big left but Burgess blocks it.
The crowd applaud the fighters efforts here as the round comes to an end.
Jones throws a big right hand that misses.
Jones preventing the sweep.
Burgess bucks up whilst keeping hold of a body lock, managing to reverse the position. Now he's in top in Jones's guard.
And thats the end of the round the fighters go back to their corners.
Arial Jones showed his class in that round. I'd imagine he'll take it on all the scorecards.
Well, the break between rounds is over. Let's get back to the scrappin! Let's hear some noise people - this is the final round!

Burgess takes one on the button.
Burgess on the wrong end of a decent looking cross there.
Jones throws a poor cross that misses
and Burgess decides to take the opportunity to score a takedown. He's landed in Jones's guard.
Burgess is working Jones over from the guard. He should look to pass the guard and do a little more damage with these strikes.
Jones escapes his hips to the side and looks to be working for an armbar. Burgess gives him a little smile and shakes his head. No chance.
Burgess wanted to stand there but Jones had control of the position.
Jones looking for a guillotine here but Burgess defends easily.
The crowd cheering loudly, showing their appreciation for the quality fight we're seeing here.
Jones has an omoplata and is looking to use it perhaps as a submission or perhaps to transition. Burgess is in a bit of discomfort here, but he's managed to free himself and has dived into side control! That didn't work out too well for Jones.
Jones takes a big intake of breath there - he's definitely tired.
Burgess tries for a kimura. Not really close to a finish though.
That's one minute gone in the round.
Burgess tries for a kimura but Jones is defending well.
Jones regains half guard.
Jones regains full guard. Nicely done.
Burgess preventing the sweep.
Jones working for submissions but it's allowed Burgess to get to half guard.
Jones is trying to get back to full guard.
Burgess takes advantage of the dominant position to land a couple of big hammer fists.
That's two minutes gone in the round.
Burgess perhaps working for something from half guard, or maybe not. It looks like he's just sitting there.
Jones manages to get to full guard.
Burgess looking to pass the guard.
Jones is looking for a triangle here but Burgess uses the submission attempt to pass into side control.
Jones tries to work a leg under to get back to half guard but Burgess wriggles his own leg back out and remains in side control.
Jones struggling a bit here.
The crowd cheering loudly, showing their appreciation for the quality fight we're seeing here.
Jones is looking for a sweep.
Burgess trying to control the action but Jones is working from the bottom.
That's three minutes gone in the round.
Jones tries to improve position but can't.
Burgess wants to control but Jones is keeping him busy.
The referee looks like he's ready to step in and stand the fighters back up.
Jones sneaks a leg under to get back to half guard.
Jones looking to work for a kimura from the bottom.
Burgess is keen to just control but Jones is a slippery customer.
That's four minutes gone in the round.
Burgess is pressing down on Jones's thigh, looking to free his foot. Jones is holding on for now.

Burgess stands up from half guard.
Burgess shoots in for a takedown - he's clinched up with Jones but Jones pushes him off and we're back to square one.
Jones throws a hook but Burgess blocks it.
Jones throws the left hand but Burgess avoids the punch easily.
Jones listening to his corner there, landing a nice uppercut.
Burgess fails with a rather predictable takedown attempt.
As the round comes to an end the crowd are showing their appreciation for a great round of action.
Jones stuffs the takedown.
That's three failed takedown attempts in the round for Richard Burgess. That's going to take a lot out of him.
Jones connects with a lovely right hand, straight down the pipe.
And that's the end of the fight!
That was a close round. You could make an argument for either fighter but I would give it to Richard Burgess.
I think Burgess has won this one but let's see what the judges have to say. Over to the ring announcer for the scorecards.
Ladies and gentlemen, after 3 rounds of action, we go to the scorecards for a decision.
Judge Sam Margolis scores the fight 29:28
Judge Richard Clark scores the fight 29:28
Judge Steven Brown scores the fight 29:28
In favor of your winner, by unanimous decision... Richard Burgess!
|
|
|
|
|
|
|
|
|
|
|
|
|
|
|
|
|
|
|
|
|
|
|
| S |
C
A |
G |
S |
C
B |
G |
|
S |
C |
G |
|
energy
A | B |
|
hype
A | B |
|
pop
A | B |
|
mgr
A | B |
|
FIGHT
RATING
83% |
|
|
|
|
|
|

