|
|
PBP Commentary |
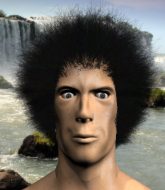
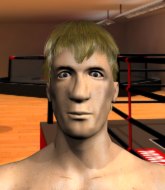
Coming up we have a lightweight MMA rules bout between Lyzekel Rage (ranked 0 p4p, 0 weight class) and Juukaa Duudsen (ranked 0 p4p, 0 weight class). Juukaa Duudsen has the better chin. Will he look to stand and bang today?
 |
|
 |
| 180 cm
22
160 lbs
0 - 1 - 0 |
|
173 cm
21
161 lbs
0 - 3 - 0 |
BJJ Blue Belt
Counter striker
Big heart |
|
BJJ Blue Belt
Brawler
Granite chin |
|
| |
|
Ladies and gentlemen. This fight is 3 rounds, in the lightweight division.
Introducing the fighter to my left, fighting out of the red corner.
With a record of
0 - 1 - 0, fighting out of Helsinki, Lyzekel Rage!
And introducing the fighter to my right, fighting out of the blue corner.
With a record of
0 - 3 - 0, fighting out of Helsinki, Juukaa Duudsen!
The judges for this bout are Ben Zyskovitsi, Marco Blurström and Matti Vanhoillinen.

The bell rings for round one and we are underway!
Duudsen throws a head kick but Rage moves out of range.
Duudsen fails to land with the punch combination there - jab, cross, hook, miss, miss, miss.
Rage misses with a jab, cross combination.
Rage looks to land a combination. Duudsen sees it coming but can only parry a couple of the shots.

Duudsen closes the distance and gets a double leg, slamming Rage to the mat! Rage manages to get full guard.
Duudsen in full guard, throwing the ground and pound. No damage this time.
Duudsen would like to get this fight back to the feet but can't get free from the closed guard.
Duudsen missing there with some ground and pound from the guard.
Duudsen loading up with the ground and pound but he's missing more than he's landing in this flurry.
Duudsen loading up with the ground and pound but he's missing more than he's landing in this flurry.
Duudsen postures up.
Duudsen wants to stand and escape but instead Rage has hit a sweep and he's now on top in guard.
Rage pushes down on Duudsen's leg and manages to get into half guard.

That's one minute gone in the round.
Duudsen is trying to get back to full guard.
Rage trying to control the action but Duudsen is working from the bottom.
Duudsen is looking for a sweep. Rage is wise to his cunning plan and keeps the top position.
Duudsen is trying to control but can't.
Still in half guard, Rage seems content to control.

Rage decides he's had enough of the ground and stands up.
Rage gets the takedown into side control.
The fighters are pressed up against the cage, both looking to find a bit of space to work.
Duudsen being controlled for a moment.
Rage is looking to take a break and control but Duudsen is keeping him honest, looking to work from the bottom.

That's two minutes gone in the round.
Duudsen can't do much from the bottom here.
Duudsen is looking to slip a leg under and get half guard but Rage is one step ahead and moves to full mount!
Duudsen looking to escape from mount but he's given up his back!
Rage is hanging on to Duudsen's back as he tries to escape.

Duudsen is having to fend off submission attempts from Rage, who is looking to sink in the choke. Rage doesn't have the hooks in though and Duudsen manages to reverse position! He's now on top, in his opponent's guard.

That's three minutes gone in the round.
Rage keeping moving, preventing Duudsen from controlling successfully.
Rage has his foot on Duudsen's thigh. He's trying to push off and get in position for a triangle, I think. Duudsen works his way back into a safe position though.
Rage is breathing heavily.
Duudsen stands up and waves to Rage to follow him.
Duudsen throws a left and a right that both miss
and Rage counters with a driving takedown into guard. Nice work there by Rage.
Rage works a leg free and moves into half guard.
Duudsen is looking for a sweep. Rage is wise to his cunning plan and keeps the top position.
Rage drops an elbow to the side of Duudsen's head.
Duudsen is looking to escape.

That's four minutes gone in the round.
Rage stalling away here and it's allowed Duudsen to slip out his trapped foot and regain full guard.
Duudsen keeping full guard, as Rage tries to pass.
Duudsen had isolated an arm as going for an omaplata. Rage is defending the submission well but is in a very vulnerable position. Duudsen Is leaning forward trying to finish the omaplata but decides to abandon it, and take Rage's back instead.
Rage is taking damage to the body and head.
Duudsen is looking for the choke from the back position but Rage is controlling his hands well.
Duudsen throws a series of strikes and Rage wriggles onto his back, so he's now mounted. He's in real trouble here.
Duudsen looking to secure an arm triangle but Rage defends it well.
And thats the end of the round the fighters go back to their corners.
Lyzekel Rage dominated that round.
OK. That's time! The bell goes and we're back to the action.

Duudsen scoring well with a low kick there.
Duudsen tries a switch kick but it misses it's target.
Duudsen throws a sloppy head kick
and Rage counters with a solid body kick.
Rage stuffs the takedown.
Duudsen bobs and weaves into range and then changes levels and scores with a nice takedown into side control.
Duudsen trying to control the position but Rage is working away.
The ref warns both fighters not to hold the cage as they work up against the meshing.
Rage wants to control but Duudsen postures up.
Duudsen decides to stand up, so the ref orders Rage to his feet.
Duudsen scores with a jab.
Juukaa Duudsen seems to be the more aggressive standup fighter in this bout.
Both fighters are absolutely exhausted here.

Duudsen clinches up with Rage and pushes him back against the cage.
Duudsen has clasped his hands together around Rage's back... aaand, he's got a takedown into side control. Nicely done.
Duudsen stands up and beckons Rage to his feet.
That's one minute gone in the round.
Duudsen darts in and lands a nice takedown into half guard.
Duudsen thows a wild elbow that connects with the canvas.
Rage is controlling Duudsen's position as best he can from this difficult position.
Rage wants to control but Duudsen is keeping busy and won't allow it.
Duudsen is working for submissions here but there's nothing on.
Rage looking for submissions off his back.
That's two minutes gone in the round.
Rage trying to control but Duudsen postures up.
Duudsen thows a huge punch but Rage dodges it nicely.

Neither fighter is doing enough for the referee's liking and he's decided to stand them back up.
Rage clinches up with Duudsen and pushes him back against the cage.
Duudsen misses with an elbow strike.
Duudsen pushes off an throws an elbow but Rage leans to the side and avoids it. We're back to clinching against the cage.

Duudsen manages to break the clinch.
Rage has Duudsen up against the cage in a clinch.
Rage landing some nice looking knees to the body.
Rage pulls guard effortlessly.
Duudsen pushing down on Rage's thigh, trying to pass to half guard. He's managed it... Nice work.
Rage is looking to control Duudsen's leg but it's slowly edging free. Can Rage avoid being mounted?
Rage moves into full guard.
That's three minutes gone in the round.
Rage not looking particularly offensive just at the moment.
Duudsen postures up and scores with a shot to the body and a follow up elbow to the head.
Rage is working an open guard so Duudsen takes the opportunity to get back to his feet.
Rage bobs and weaves well there to avoid the strikes.
A really sloppy takedown attempt there from Rage.
Rage has closed the distance and engaged Duudsen in a clinch.
Rage on the defensive, avoiding the knees to the body.
Duudsen is looking for a takedown up against the cage. Rage gets underhooks though and prevents the takedown attempt.
Rage blocks a punch to the side of the head.
Rage managing to block the knees to the body from Duudsen.
Duudsen landing knees to the head.
Rage wants to break the clinch but can't.
Rage fails to pull the fight into his guard.
Rage is trying to stall.
That's four minutes gone in the round.
Duudsen lands a knee to the body.
Rage takes a knee right on the jaw!
Rage fails to pull guard.
That's three failed takedown attempts in the round for Lyzekel Rage. That's going to take a lot out of him.
Rage unloads a knee to the mid-section. Duudsen lets out a prehistoric sounding urrrrgh.
Rage tries to pull guard but can't drag his opponent to the mat. Duudsen just stands there and leans against the cage.
The two fighters are working to gain dominance in the clinch.
Rage lands a nice knee to the body.
Duudsen tries to land a knee to the head but misses.
Duudsen misses with a short punch on the inside.
Duudsen prevents the takedown attempt.
Rage is working for a takedown up against the cage. He can't get it on this occasion though.
Duudsen unloads a knee to the mid-section. Rage lets out a prehistoric sounding urrrrgh.
The fans in attendance giving it up for the two fighters, who have really let it all hang out in the last minute or so!
Duudsen pushes Rage back against the cage and lands a hook to the side of the head.
Duudsen works for the underhooks and manages to get a trip takedown into guard.
Duudsen throwing shots from guard but he's hitting more mat than opponent.
Rage is avoiding any damage by keeping wrist control.
Rage is working from a closed guard but he's struggling to control his opponent.
As the round comes to an end the crowd are showing their appreciation for a great round of action.
Rage lands a beautiful switch and he's in full mount! That could spell trouble for Duudsen!
And thats the end of the round the fighters go back to their corners.
Juukaa Duudsen showed his class in that round. I'd imagine he'll take it on all the scorecards.
That's the end of the round. The referee orders the cornermen out of the cage so we can get back down to business. This is the final round!

Rage gets in close and instigates a clinch.
Rage tries to pull guard but can't drag his opponent to the mat. Duudsen just stands there and leans against the cage.
Duudsen unloads a knee to the mid-section. Rage lets out a prehistoric sounding urrrrgh.
Duudsen landing some nice looking knees to the body.
Duudsen pushes Rage back against the cage and unloads with a body punch.
Duudsen managing to block the knees to the body from Rage.
Knees in the clinch landing for Duudsen.
Rage looking to stall.
Rage misses with a knee strike.
Nice elbow from Duudsen.
Rage goes for a takedown in the clinch but Duudsen prevents it.
Rage is looking for a takedown up against the cage. Duudsen gets underhooks though and prevents the takedown attempt.
That's three failed takedown attempts in the round for Lyzekel Rage. That's going to take a lot out of him.
Rage managing to block the knees to the body from Duudsen.
Rage wants a takedown.
Duudsen breaks the clinch and we're back to striking at distance.
Rage throws a quick head kick that skims the top of Duudsen's head.
Duudsen just misses with a punch to the body.
No luck for Rage with that takedown attempt.
Duudsen takes a big intake of breath there - he's definitely tired.
Duudsen throws a sloppy head kick
and Rage counters by moving into the clinch.
That's one minute gone in the round.
Duudsen gets a nice trip takedown into half guard.
Rage is looking to sinch up a gullotine here but Duudsen pulls his head out easily.
Duudsen throwing shots but Rage is blocking nicely.
Rage regains full guard. Nicely done.
Duudsen must be cautious of submissions here, given that his opponent has the superior Jiu Jitsu.
Duudsen wants to pass the guard but Rage is keeping the position.
Duudsen is holding a leg here, probably looking for an ankle lock - he drops back and goes for it! Rage is in trouble! Is it all over??? No! Rage has escaped and now he's on top!
Duudsen throwing some rather feeble looking strikes off his back.
That's two minutes gone in the round.
There's a bit of a scramble here and now Duudsen is on top in guard.
Duudsen stands up from Rage's guard - Duudsen perhaps looking for a knockout.
Duudsen throws a lazy head kick
and Rage makes the exchange count by landing a cracking kick to the body. Duudsen really felt that one!
Rage throws a head kick that misses.
Rage is looking to clinch.
Duudsen throws a head kick that misses and slips in the process. He scrambles back to his feet and the fighters circle.
A leg kick checked by Rage.
Rage misses with a low kick.
Duudsen throws a head kick that misses
and Rage counters with a straight right hand.
Duudsen instigates a clinch.
Rage goes for a takedown attempt but Duudsen pushes him away and we're back to fighting at a distance.
Duudsen scores a trip takedown into side control. Nice.
That's three minutes gone in the round.
Rage manages to work his way to half guard, despite Duudsen's best efforts.
The fighters are battling for position here. Rage manages to regain full guard. Nice work.
Rage has his hands on Duudsen's head, controlling the position.
Duudsen is posturing up here but Rage has hold of an arm and he's gone for an armbar! Duudsen tries to roll out but it's too tight and Duudsen has to tap! Slick submission there by Rage!
Ladies and gentlemen, after 3:34 of round 3, we have a winner by way of Submission (Armbar). Lyzekel Rage!
|
|
|
|
|
|
|
|
|
|
|
|
|
|
|
|
|
|
|
|
|
|
|
| S |
C
A |
G |
S |
C
B |
G |
|
S |
C |
G |
|
energy
A | B |
|
hype
A | B |
|
pop
A | B |
|
mgr
A | B |
|
FIGHT
RATING
0% |
|
|
|
|
|
|

