|
|
PBP Commentary |
Coming up we have a heavyweight MMA rules bout between Fred Safire (ranked 0 p4p, 0 weight class) and Ta Sau Sei (ranked 0 p4p, 0 weight class). Sau Sei has chosen 周杰倫 - 青花瓷 as his entrance music, which hasn't gone down very well with the crowd. I can't wait for this one - let's get the fighter introductions out of the way and get this one started!
 |
|
 |
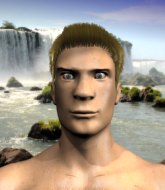
| 183 cm
25
280 lbs
10 - 3 - 0 |
|
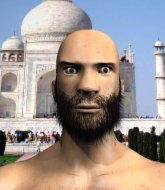
188 cm
30
265 lbs
9 - 3 - 0 |
Good wrestling
Dangerous knees
Insanely flexible |
|
Good wrestler
World class boxer
Granite chin |
|
| |
|
Ladies and gentlemen. This fight is 3 rounds, in the heavyweight division.
Introducing the fighter to my left, fighting out of the red corner.
With a record of
10 - 3 - 0, fighting out of Sydney, Fred Safire!
And introducing the fighter to my right, fighting out of the blue corner.
With a record of
9 - 3 - 0, fighting out of Sydney, Ta Sau Sei!
The judges for this bout are Damien Edna, Donatello Bradman and Bruno Hogan.

The bell rings for round one and we are underway!
Nice sprawl there from Sau Sei as Safire shoots in.
Safire wants to clinch.
A low kick from Sau Sei is predictable there

and Safire counters with a takedown into side control.
Safire wants to control but Sau Sei is keeping him busy.
Sau Sei really doesn't want to stay on the ground with Safire. If he can't get it back to his feet, it's only a matter of time before he'll be tapping out.
Sau Sei is looking to regain half guard here but Safire keeps moving and retains side control.

Safire swings around for an armbar but Sau Sei sees it coming a mile off and turns beautifully into Safire's guard.
Safire throws a couple of weedy looking strikes off his back.
The ref warns both fighters not to hold the cage as they work up against the meshing.
Sau Sei wants to stand and escape but instead Safire has hit a sweep and he's now on top in guard.
The fans in attendance giving it up for the two fighters, who have really let it all hang out in the last minute or so!
Safire trying to control but Sau Sei is working from the bottom.

That's one minute gone in the round.
Sau Sei utilising some decent striking defenses from the guard, preventing the ground and pound.
Safire working some ground and pound from guard but it's not doing any damage.
Safire trying to pass the guard but can't manage it just yet.
Safire trying to control the position from guard on top but Sau Sei is wriggling around, looking for whatever he can.
Safire scoring with some ground and pound.
Sau Sei keeping moving, preventing Safire from controlling successfully.
Safire drops back looking for a heel hook - he quickly realises he's not going to get it but Sau Sei manages to dive on top of him before he can escape and now Safire has Sau Sei in his guard.

That's two minutes gone in the round.
Sau Sei stopping the sweep attempt from Safire.
Sau Sei looking to control the position here, rather than advance.
Safire has a loose triangle. He'll be looking to tighten that up but Sau Sei can see exactly what he's planning and manages to posture up and free himself.

That's three minutes gone in the round.
Safire working for a triangle but Sau Sei defends it easily.
Safire looks to be working for a triangle here. Oh, it looks like he might have it! Sau Sei has picked Safire up and slammed him! Safire can't keep hold of the triangle and Sau Sei manages to pass to side control!
You can see the frustration on Safire's face, being in this tough position on the bottom.

That's four minutes gone in the round.
Safire manages to get back to half guard.
Safire looking to work for a kimura from the bottom.
Sau Sei is thwarting Safire's attempts to control the position.
Safire misses with some strikes from the bottom.
The crowd applaud the fighters efforts here as the round comes to an end.
Safire is looking to sinch up a guillotine here but Sau Sei pulls his head out easily.
And thats the end of the round the fighters go back to their corners.
Fred Safire dominated that round.
The referee calls time. The cornermen exit stage left and we're back to business.

Safire tries to clinch but Sau Sei moves out of range.
Sau Sei clobbers Safire with an overhand right that has the crowd gasping. That made a horrendous noise.
Sau Sei circles away from the clinch attempt.
Safire fakes high and shoots in for a takedown but Sau Sei avoids it really well and circles away.
Nice cross by Sau Sei.
Sau Sei stuffs a takedown. It's all about dictating where the fight takes place and Sau Sei wants it to stay on the feet.
A slow jab from Sau Sei misses its intended target.
Safire walks straight into an uppercut. Luckily it didn't land flush.

It looks like Fred Safire has been cut.
Safire has a takedown stuffed.
That's three failed takedown attempts in the round for Fred Safire. That's going to take a lot out of him.
Safire tries to clinch up but Sau Sei circles away and keeps his distance.
That's one minute gone in the round.
Horrible takedown by Safire or perhaps it was just good defense by Sau Sei which made him look bad.
Safire shoots in for a takedown but doesn't get it.
A head kick misses from Safire.
Safire fails with a takedown attempt.
Safire closes the distance looking to clinch
and Sau Sei counters with a nice leg kick.
Both fighters are absolutely exhausted here.
Sau Sei throws a body punch but Safire moves out of range.
Ta Sau Sei is looking to keep the fight on the feet at all costs.
Safire gets his head snapped back by a nice shot there.
Safire fails with a rather predictable takedown attempt.
That's two minutes gone in the round.
Safire wants to clinch up but Sau Sei keeps it at a distance.
Sau Sei throws a one two combo.
This has been an exciting period of action!

Sau Sei drives through and clinches with Safire against the cage.
Sau Sei working some nice short punches in the clinch.
Sau Sei lands on the inside with an uppercut.
Safire blocks a punch to the side of the head.
Safire is trying to drag Sau Sei to the mat but Sau Sei just about manages to keep his footing. He used the cage to his advantage there.
Safire has hold of a leg and is looking for a trip takedown. Sau Sei avoids it nicely though and we remain in the clinch.
Sau Sei lands a right hand that snaps the head of Safire backwards.
Sau Sei scores with a shot to the side of Safire's head.
Safire tries to land knees in the clinch but Sau Sei avoids the damage to the body.
Safire is trying to work for a single leg takedown but Sau Sei pulls him back up using the underhooks.
Sau Sei lands a hook to the side of the head.
Safire blocks a punch to the side of the head.
A body shot lands from Sau Sei.
That's three minutes gone in the round.
Safire takes a shot to the head.
Fred Safire's cut is getting worse.
Sau Sei lands a hook to the side of the head.
Safire blocks a punch to the side of the head.
Safire blocks an uppercut.
Safire has Sau Sei pressed up against the cage. He's trying to work for a single leg takedown. Safire pulls back from the cage and twists to the side, sending Sau Sei tumbling to the mat - Safire dives into Sau Sei's guard.
Sau Sei avoiding any damage from the ground and pound.
Sau Sei is looking to stand up but Safire isn't so interested in that idea.
We get told so often about how wrestlers don't like to be on their backs. Let's see if Sau Sei can do anything to dispel that myth.
Sau Sei keeping full guard, as Safire tries to pass.
Safire drops back looking for a heel hook - he quickly realises he's not going to get it but Sau Sei manages to dive on top of him before he can escape and now Safire has Sau Sei in his guard.
That's four minutes gone in the round.
Sau Sei is taking a break and basically stalling. The referee will not allow him to do that for long.
Wooooo! Give it up for these two warriors! They are putting on a show!
The crowd are going absolutely nuts as the round comes to an end - what a fantastic round of action!
Sau Sei avoids a guillotine attempt easily.
And thats the end of the round the fighters go back to their corners.
Ta Sau Sei showed his class in that round. I'd imagine he'll take it on all the scorecards.
The cut man is working on Fred Safire's cut.
OK. That's time! The bell goes and we're back to the action. Ladies and gentlemen, this is the final round!

Sau Sei looks to throw the jab but Safire is out of range.
Sau Sei scores with a jab to the jaw.
The fight stays on the outside here - Safire looks like he's thinking about clinching though.
Safire is looking to take this fight into the clinch.
Safire shoots in for a takedown. "Ole!" shouts Sau Sei as he jumps to the side.
Safire lands a head kick!

It looks like Ta Sau Sei has been cut.
Safire fails with the takedown
and Sau Sei cracks him with a counter punch right on the button.
That's one minute gone in the round.
No luck for Safire with that takedown attempt.
That's three failed takedown attempts in the round for Fred Safire. That's going to take a lot out of him.
Sau Sei circles away from the clinch attempt.
Sau Sei circles away from the clinch attempt
letting Sau Sei counter with a right hand.
Fred Safire's cut is bleeding quite badly. He's got to try and protect it.
Safire tries to clinch
and Sau Sei counters with a quick right hand to the jaw.
Safire with a poor takedown
and Sau Sei connects with a straight left hand counter down the middle.
Both fighters are breathing heavily.
Safire fails with a takedown attempt.
Safire tries to clinch but fails miserably
and Sau Sei counters with a stiff right hand.
Jeez, Fred Safire's cut is really nasty now. The referee must be thinking about getting that checked.
This has been an exciting period of action!
Sau Sei swings and misses with a hook to the body.
Fred Safire seems to be the more aggressive standup fighter in this bout.
Safire ducks under an overhand right and circles away with a smile on his face.
Safire tries to keep at a distance but Sau Sei has taken the fight into the clinch.
That's two minutes gone in the round.
Safire using the Thai clinch to land knees to the body.
A short right hand to the side of the head by Sau Sei.
Sau Sei misses with a punch on the inside.
Safire is trying to pull guard but Sau Sei turns him against the cage and we stay in the clinch.
A head punch on the inside from Sau Sei fails to land.
An uppercut on the inside fails to land for Sau Sei.
Sau Sei is defending well against a takedown attempt.
Knees in the clinch landing for Safire.
Safire misses the knee to the body. Nice hip positioning from Sau Sei.
Safire can't get the takedown.
A quick uppercut on the inside from Sau Sei.
The referee calls the doctor in to look at Fred Safire's cut. Oh no, the doctor has called an end to the bout!
Ladies and gentlemen, after 2:50 of round 3, we have a winner by way of TKO (Cut). Ta Sau Sei!
A very excited looking Ta Sau Sei made sure he remembered to thank all the fans both in the arena and on the internet. He said all the coolest people spend all day on MMA websites, which got a big reaction.
|
|
|
|
|
|
|
|
|
|
|
|
|
|
|
|
|
|
|
|
|
|
|
| S |
C
A |
G |
S |
C
B |
G |
|
S |
C |
G |
|
energy
A | B |
|
hype
A | B |
|
pop
A | B |
|
mgr
A | B |
|
FIGHT
RATING
84% |
|
|
|
|
|
|
