|
|
PBP Commentary |
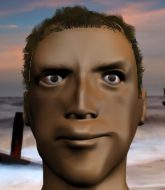
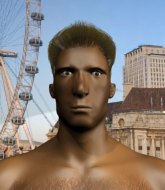
Coming up we have a light heavyweight MMA rules bout between Bilbass Boggins (ranked 0 p4p, 0 weight class) and Donald Trieds (ranked 0 p4p, 0 weight class). We have two fighters making their debuts here, so let's see who comes out of this one with their first professional victory.
 |
|
 |
| 188 cm
20
215 lbs
0 - 0 - 0 |
|
188 cm
19
204 lbs
0 - 0 - 0 |
BJJ White Belt
Solid Muay Thai
Granite chin |
|
BJJ Blue Belt
Brawler
Very confident |
|
| |
|
Ladies and gentlemen. This fight is 3 rounds, in the light heavyweight division.
Introducing the fighter to my left, fighting out of the red corner.
With a record of
0 - 0 - 0, fighting out of Sydney, Bilbass Boggins!
And introducing the fighter to my right, fighting out of the blue corner.
With a record of
0 - 0 - 0, fighting out of Sydney, Donald Trieds!
The judges for this bout are Damien Edna, Bruno Hogan and Winston Howard.

The bell rings for round one and we are underway!

Trieds rushes Boggins and pushes him back against the cage in a clinch.
Boggins looking to stall.
Boggins is trying to push Trieds away but Trieds has him pressed against the cage, so he's going nowhere.
Boggins is looking to control Trieds's arms but Trieds gets an underhook and turns him. Now Boggins has his back to the cage.
A frustrated look appears on Trieds's face as he tries to break the clinch.
Boggins fails to pull the fight into his guard.
Boggins wants to break the clinch but can't.
Trieds slowing the pace effectively.
Trieds wants to get back to striking at distance but Boggins won't allow it.
Trieds lands a short shot on the inside that snaps the head of Boggins backwards.

Trieds decides to pull guard.
Boggins stopping the sweep attempt from Trieds.
Trieds wants to stand and escape but Boggins is having none of it.

That's one minute gone in the round.
Boggins stopping the sweep attempt from Trieds.
Trieds wants to stand up but Boggins is controlling him.
The fighters are pressed up against the cage, both looking to find a bit of space to work.

Trieds isolates an arm and boxes in a triangle. Boggins stacks Trieds on his neck as he steps over and passes to the side. He's now in a much more dominant position where he can look to do some serious damage. Nice move by Boggins!
Boggins is looking to take a break and control but Trieds is keeping him honest, looking to work from the bottom.

That's two minutes gone in the round.
Trieds holds on to Boggins's head and controls the position momentarily.
Boggins knows he needs to get back to his feet asap. He's simply no match for Trieds on the ground.
Boggins trying to control the action but Trieds is working from the bottom.
Boggins tries to stand but Trieds controls the position and pulls Boggins into his guard.

Trieds pushes Boggins off and gets back to his feet.

That's three minutes gone in the round.
Boggins misses the shot to the body.
Trieds tries to shoot in for a takedown. He's got hold of a leg but Boggins swivels and escapes.
The fight stays on the outside here - Boggins looks like he's thinking about clinching though.
Trieds rushes Boggins and presses him up against the cage.
Boggins wants to get back to striking at distance but Trieds won't allow it.
Trieds tries for a takedown but Boggins manages to get underhooks.
Boggins has hold of a leg and is looking for a trip takedown. Trieds avoids it nicely though and we remain in the clinch.
Trieds can't get the takedown.
Bilbass Boggins has stuffed three takedown attempts in the round now. That's going to take a lot out of Donald Trieds.
Trieds wants to break free but Boggins has control.

That's four minutes gone in the round.
Boggins misses the knee to the body. Nice hip positioning from Trieds.
Trieds has a body lock and is looking for a takedown. Boggins is bouncing around trying to prevent the takedown and somehow he has indeed managed to stay on his feet.
Boggins is trying to work out of this bad position, with his back against the cage.
Trieds ties up his opponent against the cage and manages to drag the fight down to the ground. Trieds no doubt will be looking to work submissions from his guard.
Boggins won't allow Trieds to get back to his feet.
Boggins trying to control the position from guard on top but Trieds is wriggling around, looking for whatever he can.
Boggins is really struggling to control Trieds but he's trying to hold on to the position.
The crowd applaud the fighters efforts here as the round comes to an end.

The ref stands the fighters back up. Bilbass Boggins wasn't doing enough on the ground.
Trieds stuffs a takedown. It's all about dictating where the fight takes place and Trieds wants it to stay on the feet.
And thats the end of the round the fighters go back to their corners.
Donald Trieds dominated that round.
That's the end of the interval. I'm sure that seemed a lot quicker than a minute for our two fighters! Back to the action.

Trieds shoots in for a takedown but Boggins shows good takedown defense.
Trieds drives through and clinches with Boggins against the cage.
Boggins is looking to control Trieds's arms but Trieds gets an underhook and turns him. Now Boggins has his back to the cage.
Trieds has had enough of the clinch and is looking to separate.
Boggins jumps guard but Trieds stands there with Boggins around his waist. Boggins gives up and drops back to his feet. We remain in the clinch.
Trieds is trying to work for a single leg takedown but Boggins pulls him back up using the underhooks.
Trieds looks like he'd prefer to be striking at range right now.
Trieds wants to push off and get back to the center of the mat but Boggins has him pressed against the cage.
Boggins gets underhooks to prevent Trieds's takedown attempt.
Bilbass Boggins has stuffed three takedown attempts in the round now. That's going to take a lot out of Donald Trieds.
Trieds manages to pull guard.
Boggins throwing strikes from guard but Trieds blocks nicely.
Boggins looking to pass the guard.
That's one minute gone in the round.
Trieds trying to control the position.
Boggins trying to control but Trieds is working from the bottom.
Trieds trying to punch from his back but it's not doing any damage.

Boggins postures up as if he's going to throw some strikes but drops back for an ankle! Trieds is in big trouble! He looks ready to tap! But no, he's escaped and dives on top of Boggins, into his guard.
Boggins has his foot on Trieds's thigh. He's trying to push off and get in position for a triangle, I think. Trieds works his way back into a safe position though.
That's two minutes gone in the round.
Boggins is trying to keep Trieds in close.
Boggins throws some sloppy strikes off his back.
Boggins not looking particularly offensive just at the moment.
It looks like the ref is thinking about a standup.
Trieds is trying to work a guillotine from the top, or something like that? Don't know how he thinks he's going to get a finish from there.
Trieds trying to land body shots but he keeps hitting the mat.
That's three minutes gone in the round.
Trieds is frustrating his opponent with some stalling tactics from top position.
Trieds pushing down on Boggins's thigh, trying to pass to half guard. He's managed it... Nice work.
Donald Trieds has got the better of the ground game so far.
Trieds seems to be working for a kimura but Boggins defends the submission attempt.
Boggins pushes Trieds off looking to stand but Trieds dives back in and keeps control.
Boggins is looking for a sweep. Trieds is wise to his cunning plan and keeps the top position.
Both fighters are absolutely exhausted here.
That's four minutes gone in the round.
Boggins looking to work for a kimura from the bottom.
Still in half guard, Trieds seems content to control.
The ref warns both fighters not to hold the cage as they work up against the meshing.
Trieds stands up and beckons Boggins to join him on the feet.

Boggins has closed the distance and engaged Trieds in a clinch.
The crowd applaud the fighters efforts here as the round comes to an end.
Trieds is working for takedown but Boggins is calmly controlling the position for now.
Trieds tries for a takedown. No joy.
And thats the end of the round the fighters go back to their corners.
Donald Trieds showed his class in that round. I'd imagine he'll take it on all the scorecards.
That's the end of the round. The referee orders the cornermen out of the cage so we can get back down to business. This is the final round!

Trieds tries to score a power double leg takedown but Boggins sees that one coming and sprawls well. That will dishearten Trieds somewhat.

Boggins bobs and weaves into range and then changes levels and scores with a nice takedown into side control.
Boggins is looking to finish here, going for an Americana. Trieds knows the correct defense though, so he's OK.
Trieds is moving his hips around well on the bottom and has managed to get back to half guard.
Trieds is staying active underneath Boggins, who seems content to just control the action from this position.
Trieds controlling the position for now.
That's one minute gone in the round.
Trieds gets back to full guard.
Trieds has Boggins pulled in close to control his posture.
Trieds working from the bottom, still in full guard. He's managed to get a loose triangle. Boggins doesn't seem to be doing much to defend here, obviously he feels comfortable in the position. Boggins manages to throw the legs off his shoulder and he's back into guard - no problem.
Trieds pulls Boggins in to control the position.
Boggins has to be careful here, sitting in the guard of a superior BJJ player.
That's two minutes gone in the round.
Trieds keeping full guard, as Boggins tries to pass.
Trieds looking for a sweep. Not yet Trieds, not yet.
Trieds keeping moving, preventing Boggins from controlling successfully.
The referee decides to stand the fighters back up, due to lack of activity on the part of Bilbass Boggins.
Trieds misses with a takedown attempt. He shot from a bit too far out.
Trieds takes a big intake of breath there - he's definitely tired.
Boggins shoots in for a takedown. "Ole!" shouts Trieds as he jumps to the side.
Trieds tries to check the leg kick but that clearly hurt him.
That's three minutes gone in the round.
Boggins tries to keep at a distance but Trieds has taken the fight into the clinch.
With the fighters up against the cage, Boggins throws an elbow but misses.
Trieds dictating the pace here, as the fighters clinch against the cage.
Trieds prevents Boggins from breaking the clinch.
Boggins throws an elbow but it's blocked.
Boggins gets double underhooks to prevent a takedown attempt from Trieds.
Bilbass Boggins has stuffed three takedown attempts in the round now. That's going to take a lot out of Donald Trieds.
Boggins can't break the clinch.
That's four minutes gone in the round.
Trieds blocks a knee to the body. He'll have a nicely bruised forearm in the morning.
Boggins has Trieds pressed up against the cage and is working for takedown. Trieds manages to improve position though and keeps the fight standing.
Trieds tries for a takedown. No joy.
Boggins wants a takedown.
Trieds wants to break free but Boggins has control.
Trieds is trying to drag Boggins to the mat but Boggins just about manages to keep his footing. He used the cage to his advantage there.
Boggins is trying to push Trieds away but Trieds has him pressed against the cage, so he's going nowhere.
The crowd applaud the fighters efforts here as the round comes to an end.
Trieds slowing the pace effectively.
Bilbass Boggins has stepped it up - he knows he needs a finish here!
Donald Trieds is fighting for a decision - hopefully he's judged it right and he's actually winning the fight.
Boggins pulls Trieds into guard.
And that's the end of the fight!
That was a close round. You could make an argument for either fighter but I would give it to Bilbass Boggins.
I think Trieds has won this one but let's see whether the judges agree with me. Over to the ring announcer for the scorecards.
Ladies and gentlemen, after 3 rounds of action, we go to the scorecards for a decision.
Judge Damien Edna scores the fight 28:30
Judge Bruno Hogan scores the fight 28:30
Judge Winston Howard scores the fight 28:29
In favor of your winner, by unanimous decision... Donald Trieds!
|
|
|
|
|
|
|
|
|
|
|
|
|
|
|
|
|
|
|
|
|
|
|
| S |
C
A |
G |
S |
C
B |
G |
|
S |
C |
G |
|
energy
A | B |
|
hype
A | B |
|
pop
A | B |
|
mgr
A | B |
|
FIGHT
RATING
43% |
|
|
|
|
|
|

