|
|
PBP Commentary |
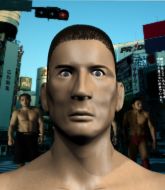
Coming up we have a light heavyweight MMA rules bout between Benjamin Hubbard (ranked 0 p4p, 0 weight class) and Rickson Ottesen (ranked 0 p4p, 0 weight class). Benjamin Hubbard has the edge in experience - let's see if he can make that count tonight.
 |
|
 |
| 185 cm
19
210 lbs
2 - 2 - 0 |
|
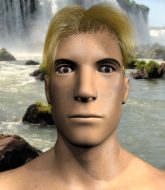
185 cm
22
212 lbs
1 - 1 - 0 |
BJJ Blue Belt
Brawler
Cuts easily |
|
BJJ Brown Belt
Basic striking
Solid chin |
|
| |
|
Ladies and gentlemen. This fight is 3 rounds, in the light heavyweight division.
Introducing the fighter to my left, fighting out of the red corner.
With a record of
2 - 2 - 0, fighting out of Montreal, Benjamin Hubbard!
And introducing the fighter to my right, fighting out of the blue corner.
With a record of
1 - 1 - 0, fighting out of Montreal, Rickson Ottesen!
The judges for this bout are Trevor Gratis, Steve Smith and Alec Ball.

The bell rings for round one and we are underway!
Ottesen shoots in for a takedown but doesn't get it.
Ottesen looks frustrated there after his takedown attempt is stuffed easily.

Ottesen darts in and lands a nice takedown into half guard.
Ottesen blocks the strikes from Hubbard.
Ottesen looking to pass the half guard. Not this time.
Ottesen throwing shots but Hubbard is blocking nicely.

Ottesen wants to work for an arm triangle but Hubbard is really keeping half guard well and defending the submission attempt.
Ottesen is trying to work for a kimura but Hubbard is defending well.
Hubbard is trying to stand back up but Ottesen is controlling him
Ottesen is looking to pass the guard... He's managed it - he's now in full mount!
Hubbard throwing punches from his back but nothing is landing.
Ottesen throws an elbow from mount that misses. Lucky escape for Hubbard because Ottesen loaded up on that one.

That's one minute gone in the round.
Hubbard is trying to stand up.
Hubbard is trying to escape the mount.
Ottesen working for a guillotine from mount but Hubbard is in no mood to give up.
Ottesen landing strikes, looking to finish!
Ottesen looks gassed!
Hubbard is really trying hard to get back to his feet.
Ottesen throws an elbow from mount that misses. Lucky escape for Hubbard because Ottesen loaded up on that one.
Hubbard is working to get back to half guard.
Ottesen can't quite control the action as he would like just now, as Hubbard is looking to escape.
Ottesen jumps to the side looking to secure the arm triangle
. Ooooh, that looks tight
Hubbard is gargling but he's managed to escape! Nice work there by Hubbard and Ottesen has given up the dominant position trying to land that submission.
The ref warns both fighters not to hold the cage as they work up against the meshing.

That's two minutes gone in the round.
My god... these two guys really need to pick up the pace or everyone will leave to go get a beer.
Hubbard is looking for a sweep.
Both fighters really going for it on the ground here!
Hubbard is looking to work his way out of this bad position but Ottesen is controlling him well.
Ottesen is looking for a kimura. He might have it! No, Hubbard has escaped the position, nice work there.
Ottesen throwing strikes but missing, from side control.
The ground and pound from Ottesen seems to be hitting the mat more than his opponent.
Hubbard is trying to stand back up. He's worked his way up against the cage but Ottesen has just dragged him back down to the mat.

Ottesen has had enough of the ground for now and decides to stand.
Hubbard lands three nice shots there - that looked like it hurt!
No joy there for Hubbard, who threw a few shots but didn't land.
Hubbard closes the distance and lands a one-two.
Benjamin Hubbard is looking to keep the fight on the feet at all costs.

That's three minutes gone in the round.
Hubbard fails to land with the punch combination there - jab, cross, hook, miss, miss, miss.
Ottesen tries to shoot in for a takedown. He's got hold of a leg but Hubbard swivels and escapes.
Benjamin Hubbard has stuffed three takedown attempts in the round now. That's going to take a lot out of Rickson Ottesen.
Ottesen fails to land with a series of punches.
A head kick misses from Hubbard.
Hubbard scores with a one two! Ottesen had his feet all tangled up there and couldn't avoid the strikes.
Ottesen decides to change it up a bit and drives through with a nice takedown into half guard.
Ottesen is trying to work for a kimura. He's got his hands clasped together - this could be trouble! No, Hubbard has managed to free his arm - good work.
Hubbard wants to get back to full guard.
Ottesen looking to pass the half guard. Not this time.
Ottesen has the superior BJJ but he's also working some ground strikes into his gameplan.
Ottesen is working for a kimura but Hubbard is defending it quite comfortably.
Ottesen trying to mount his opponent but Hubbard defends it.

That's four minutes gone in the round.
Hubbard tries to roll over but Ottesen keeps him under control.
Ottesen wants to work for an arm triangle but Hubbard is really keeping half guard well and defending the submission attempt.

Well, the referee has seen enough. Neither fighter is active enough on the ground so he's stood them back up.
Ottesen takes a shot to the body in his stride.
Benjamin Hubbard seems to be the more aggressive standup fighter in this bout.
Hubbard with a nice looking leg kick. You could hear that one land in a back row.
Ottesen steps to his left, right into the path of a big body kick from Hubbard. That one must have hurt.
Hubbard scores with a three punch combo!
Nice sprawl there from Hubbard as Ottesen shoots in.
Hubbard throws a head kick that Ottesen semi-blocks.
Ottesen has his head slapped from side to side by a 3 punch combination. That must have hurt him.
And thats the end of the round the fighters go back to their corners.
A close round but Rickson Ottesen will probably get the nod.
The minute break is over - no more time for sponges and pep talks - back to the action!

Hubbard wings a very wild body shot but it does the job and lands to the midsection.
Some wild striking there from Hubbard.
Ottesen shoots in for a takedown but Hubbard shows good takedown defense.
Hubbard swings away but doesn't land with a series of punches.
Ottesen closes the distance, clinches up and gets a nice trip takedown into side control. Very smooth.
Ottesen throws a knee to the body but it doesn't do much damage.
Hubbard is pushing Ottesen's head away, looking to escape. Ottesen manages to hold on to the position though.
Ottesen tries for an arm triangle. That looks pretty tight to me. Is this one over!?! Possibly, maybe, no Ottesen has let go of the choke. Obviously it wasn't as tight as we thought!
Ottesen tries for a kimura but Hubbard is defending well.
Ottesen tries for a kimura but Hubbard is defending well.
Both fighters are absolutely exhausted here.
That's one minute gone in the round.
Ottesen tries for a kimura but Hubbard is defending well.
Hubbard struggling a bit here.
The fighters are pressed up against the cage, both looking to find a bit of space to work.
Ottesen advances to full mount.
Hubbard tries to hold on but Ottesen postures up.
Hubbard knows he needs to get back to his feet asap. He's simply no match for Ottesen on the ground.
Ottesen looking to secure an arm triangle but Hubbard defends it well.
Hubbard is controlling an arm, preventing Ottesen from taking his back. Although keeping him in mount is no better to be honest.
That's two minutes gone in the round.
There's not a lot going on here and the crowd are letting the fighters know they're not willing to tolerate a lack of action.
Hubbard is desperately trying to improve his position but Ottesen has a good base and remains in mount.
Hubbard has given up his back. Will we see Ottesen going for some submissions?
Ottesen gets his hands free as Hubbard looks to control.
Watch the back of the head! Comes the shout from the referee towards Ottesen.
Hubbard can't escape the position.
Ottesen is punishing Hubbard with strikes - can he finish him?!
Hubbard trying to get back to his feet but Ottesen is in full control for now.
Hubbard showing good submission defense here.
Ottesen lands shots from the back.
That's three minutes gone in the round.
Ottesen has his hand under the chin of his opponent looking for the choke. He's nearly got it! This one could be all over! But no, Hubbard has freed his hand and lives to survive another
well, another couple of seconds at least!
Ottesen is working hard for the rear naked choke here.
Hubbard wants to escape the position.
Ottesen has his opponent trapped and is landing shots. Not a good position for Hubbard.
Hubbard tries to escape the position - he's now mounted. Is that better or worse? Hard to tell!
Ottesen has control of Hubbard's right arm, working for a kimura. It's a bit of a token attempt though and Hubbard regains control of the situation pretty easily.
Ottesen lands a nice shot to the head.
That's four minutes gone in the round.
A lull in the action here being met with boos from the crowd.
Ottesen is looking to secure an arm. He's managed it! He's pivoting for an armbar - that looks tight! But Hubbard has managed to get out of it and now he's in a dominant position. Nice work from Hubbard!
Ottesen keeping busy on the bottom but Hubbard has passed one foot through into half guard.
Hubbard is trying to get back to his feet now but his leg is trapped.
Ottesen is looking to sinch up a gullotine here but Hubbard pulls his head out easily.
Ottesen wants to get back to full guard.
Ottesen is persisting with the attempt to improve his position.
Hubbard seems very keen to just sit and control from half guard but Ottesen does not like that idea so much and is remaining active off his back.
And thats the end of the round the fighters go back to their corners.
Rickson Ottesen showed his class in that round. I'd imagine he'll take it on all the scorecards.
The minute break is over - no more time for sponges and pep talks - back to the action! This is the final round!

Nice sprawl there from Hubbard as Ottesen shoots in.
Benjamin Hubbard is looking to throw some combinations by the looks of things.
Hubbard lands a straight punch to the body, keeping Ottesen at a distance.
Ottesen will have to do better than that with his takedown attempts.
Hubbard closes the distance and lands a one-two.
Hubbard throws a combination but it was largely blocked by Ottesen.
Hubbard throws a right and a left that Ottesen avoids nicely.
No luck for Ottesen with that takedown attempt.
Benjamin Hubbard has stuffed three takedown attempts in the round now. That's going to take a lot out of Rickson Ottesen.
Hubbard swinging wilding here.
Hubbard throws a nice looking combination but Ottesen bobs and weaves to avoid any damage.
Ottesen throws a head kick that misses and slips in the process. He scrambles back to his feet and the fighters circle.
Ottesen tries for a takedown but Hubbard sees it coming a mile off and avoids it easily.
Hubbard throws a right and a left that both miss.
Both fighters are breathing heavily.
Hubbard stuffs the takedown attempt from Ottesen. Ottesen gets slowly back to his feet.
Ottesen showing good head movement there, avoiding the strikes from Hubbard.
That's one minute gone in the round.
Ottesen shoots for a takedown but Hubbard saw that one coming a mile off and avoided it easily.
Nice takedown defense from Hubbard. No joy for Ottesen on that attempt.
A solid body kick from Hubbard.
Hubbard scores with a one two! Ottesen had his feet all tangled up there and couldn't avoid the strikes.
Ottesen swings wildly with a couple of big hooks
and Hubbard counters with a good low kick that Ottesen was not able to check.
Ottesen looks frustrated there after his takedown attempt is stuffed easily.
Ottesen shoots in for a takedown but doesn't get it.
Ottesen takes a body kick right on the floating rib. Ouchie.
Hubbard throws a series of punches but Ottesen avoids them all with ease.
Ottesen drops down and drives through with a powerful takedown into guard.
Ottesen stands up and looks to throw the legs aside to pass to side control. Hubbard swivels though and keeps the full guard.
Ottesen throwing elbows and punches but not connecting, as Hubbard works some decent striking defense from the bottom.
That's two minutes gone in the round.
Ottesen pressing down on his opponent's thigh, looking to pass guard. Hubbard is keeping the position for now.
Ottesen trying to control the position from guard on top but Hubbard is wriggling around, looking for whatever he can.
Ottesen prevents Hubbard from getting back to his feet.
Ottesen drops back looking for a submission - "I'm sorry sir, but I'm gunna break your leg" says Ottesen as he cranks on the unfortunate limb! Hubbard screams and taps out before any major damage is done! Don't mess with Ottesen! Nice submission victory there!
Ladies and gentlemen, after 2:52 of round 3, we have a winner by way of Submission (Kneebar). Rickson Ottesen!
|
|
|
|
|
|
|
|
|
|
|
|
|
|
|
|
|
|
|
|
|
|
|
| S |
C
A |
G |
S |
C
B |
G |
|
S |
C |
G |
|
energy
A | B |
|
hype
A | B |
|
pop
A | B |
|
mgr
A | B |
|
FIGHT
RATING
80% |
|
|
|
|
|
|
