|
|
PBP Commentary |
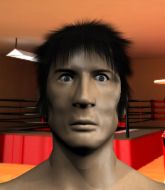
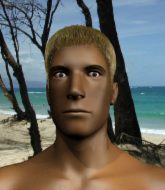
Coming up we have a lightweight MMA rules bout between Charlie Reynolds (ranked 0 p4p, 0 weight class) and Sandy Hawkins (ranked 0 p4p, 0 weight class). Hawkins has chosen Enter Sandman as his entrance music. Charlie Reynolds is staring across the cage at his opponent, tweaking his nipples... Tweaking his own nipples that is.
 |
|
 |
| 174 cm
29
165 lbs
18 - 12 - 0 |
|
180 cm
31
164 lbs
20 - 15 - 0 |
Good wrestling
Great elbows
Cardio machine |
|
ADCC Champion
World class MT
Granite chin |
|
| |
|
Ladies and gentlemen. This fight is 3 rounds, in the lightweight division.
Introducing the fighter to my left, fighting out of the red corner.
With a record of
18 - 12 - 0, fighting out of Montreal, Charlie Reynolds!
And introducing the fighter to my right, fighting out of the blue corner.
With a record of
20 - 15 - 0, fighting out of Montreal, Sandy Hawkins!
The judges for this bout are William Peck, Steve Smith and Alec Ball.

The bell rings for round one and we are underway!
Reynolds throws a half hearted mid kick.
Reynolds takes a swing at Hawkins's ribcage but misses.
Reynolds scores with a straight right hand, right through his opponent's guard.
Hawkins swats away the attempt to clinch by Reynolds.
Hawkins staying out of range there.
Reynolds throws a right and a left that Hawkins avoids nicely.
Reynolds keeping his hands up high there, blocking the jab from Hawkins.

Hawkins looks for a takedown. He's got it. We're now in half guard.
We've had a lack of effective grappling in the last minute or so, which could well see a referee standup.
Hawkins perhaps working for something from half guard, or maybe not. It looks like he's just sitting there.
Hawkins takes advantage of the dominant position to land a couple of big hammer fists.

Hawkins is trying to work for a kimura. This could be trouble! No, Reynolds has managed to free his arm - good work.
Hawkins has the superior BJJ but he's also working some ground strikes into his gameplan.
Hawkins throwing punches and elbows but they're not doing any damage.
The fighters are pressed up against the cage, both looking to find a bit of space to work.
Reynolds won't allow Hawkins to pass to mount.

That's one minute gone in the round.
Hawkins is sneakily working for an arm triangle but Reynolds sees it coming and defends easily.
Hawkins prevents Reynolds from standing back up.
Hawkins is looking for a kimura but he's never going to get it from there.
Hawkins is sneakily working for an arm triangle but Reynolds sees it coming and defends easily.
Hawkins trying to pass the guard but Reynolds defending well.
Hawkins is working for submissions here but there's nothing on.
Reynolds trying to hold on to Hawkins's head to control him but Hawkins postures up.

That's two minutes gone in the round.
Well, if Hawkins is going to just lie there, perhaps we should talk about what we're having for dinner tonight
I'm having a ham and pineapple pizza
Yum. Can't wait.
Hawkins is trying to work for a kimura. This could be trouble! No, Reynolds has managed to free his arm - good work.
The ref warns both fighters not to hold the cage as they work up against the meshing.
Reynolds is looking to improve his position.
Hawkins slows the pace down in half guard.
Reynolds wants to control but Hawkins is keeping busy.

That's three minutes gone in the round.
Hawkins has freed up his trapped foot and advances to mount.
Hawkins avoids the attempt from Reynolds to control.
Reynolds is desperately trying to improve his position but Hawkins has a good base and remains in mount.
Hawkins dominating with strikes here.
Reynolds is bucking up trying to escape but Hawkins cracks him with another couple of good strikes.
Hawkins looking to ground and pound but Reynolds is blocking nicely.
Hawkins manages to capitalize on a mistake by Reynolds to take his back!

That's four minutes gone in the round.
Hawkins working for a RNC but it's not happening just yet.
Reynolds is trying to stand back up.
Fantastic stuff here - a very entertaining period of action, which has drawn cheers from the crowd.
Reynolds avoids the strikes from Hawkins.
Hawkins tightening his grip on Reynolds, looking for the choke.
Reynolds rolls and manages to get back to half guard. Nicely done.
As the round comes to an end the crowd are showing their appreciation for a great round of action.
Reynolds tries to get to full guard but Hawkins has control of the leg.
And thats the end of the round the fighters go back to their corners.
Sandy Hawkins dominated that round.
The fighters get back to their feet, the hooter sounds and we're back to the action!

Hawkins throws a couple of head shots and lands with the final one - a decent hook, which struck Reynolds on the side of the head.
Reynolds fails to land with a series of punches.
Hawkins circles away from the clinch attempt.
Reynolds takes a step back and watches a body kick go sailing past his mid section.
Hawkins throws a loose over hand right and dives in with a double leg takedown. Reynolds tries to sprawl but it's too late and the fighters hit the mat. Hawkins is in Reynolds's guard.
Hawkins slips nicely into half guard.
Hawkins is looking for a kimura here.
Hawkins tries to pass the half guard into mount. Reynolds knows what he's doing though and prevents the attempt.
Reynolds tries to roll over but Hawkins keeps him under control.
That's one minute gone in the round.
Hawkins wants to free his trapped foot but Reynolds is holding on for dear life with his legs.
Hawkins trying to control from half guard but Reynolds is working away.
Reynolds tries to roll over but Hawkins keeps him under control.
Hawkins trying to pass the guard but Reynolds defending well.
Hawkins throwing punches and elbows but they're not doing any damage.
Reynolds is trying to stand.
Hawkins missing with the ground and pound from half guard.
That's two minutes gone in the round.
Hawkins is looking to advance position but Reynolds won't allow it.
Reynolds is staying active underneath Hawkins, who seems content to just control the action from this position.
Reynolds has no desire to be mounted, so is trying to control. Hawkins is working away from the top position though.
Hawkins missing with the ground and pound from half guard.
Hawkins is just sitting in half guard, waiting for something to happen.
Hawkins trying to pass the guard but Reynolds defending well.
Hawkins is looking to take a break and control but Reynolds is keeping him honest, looking to work from the bottom.
That's three minutes gone in the round.
The referee claps his hands together and tells the fighters to work.

The referee has ruled that neither fighter is active enough on the ground and has stood them back up.
Reynolds tries to bum rush Hawkins with a series of wild strikes but Hawkins uses good footwork to avoid the assault.
Reynolds avoids a kick to the body.
A head kick misses from Reynolds.
A head kick misses from Hawkins.
Reynolds throws a nice looking combination but Hawkins bobs and weaves to avoid any damage.
Hawkins circles away from the clinch attempt.
Reynolds lunges in with swinging rights and lefts but Hawkins circles away quickly and effectively.
Reynolds showing good head movement there, avoiding the strikes from Hawkins.
Charlie Reynolds seems to be the more aggressive standup fighter in this bout.
Hawkins pulls out of a head kick attempt.
Reynolds misses with a leg kick
and Hawkins counters with a three punch combo that has Reynolds backing up. Reynolds nods at Hawkins to acknowledge the strikes.
Sandy Hawkins is looking to throw some combinations by the looks of things.
Reynolds scores with a head kick. Hawkins tried to block it but didn't get his arm up in time.
Charlie Reynolds is looking to keep the fight on the feet at all costs.
Reynolds throws a right hand that misses
and Reynolds takes a counter punch right on the button for his troubles.
A big right from Reynolds misses.
Hawkins misses with a jab and misses with a cross straight after too.
That's four minutes gone in the round.
Hawkins walks into a stiff left hand from Reynolds.
Hawkins throws a body kick that digs right into the meat.
We've seen a great period of action over the last minute or so - credit to both fighters for going all out!
Reynolds misses with a jab, cross combination.
Reynolds is looking to clinch but Hawkins is avoiding it.
Hawkins slips a jab from Reynolds.
Reynolds connects with a lovely jab that went straight through the gap between Hawkins's hands.
Hawkins throws a right and a left that both miss.
A head kick misses from Hawkins.
Reynolds is looking to land body kicks.
Reynolds looks to score with a jab to the body but Hawkins is just out of range.
Hawkins circles away from the clinch attempt.
Reynolds throws a hook to the body but it doesn't connect.
As the round comes to an end the crowd are showing their appreciation for a great round of action.
Reynolds scores with a slapping inside leg kick.
Reynolds loads up on a big right hand but Hawkins slips the punch.
Reynolds tries to close the distance and clinch up against the cage but Hawkins paws at him with a jab and circles away.
And thats the end of the round the fighters go back to their corners.
Sandy Hawkins showed his class in that round. I'd imagine he'll take it on all the scorecards.
The minute break is over - no more time for sponges and pep talks - back to the action! Let's hear some noise people - this is the final round!


Reynolds moves into the clinch successfully.
A quick uppercut on the inside from Reynolds.
Hawkins blocks a body shot from Reynolds.
Hawkins trying to control the position but instead, Reynolds has worked for underhooks and has pushed Hawkins into the cage.
Hawkins slowing the pace effectively.
Hawkins looking to slow down the pace here.
Reynolds throws an elbow that misses.
Reynolds letting Hawkins take a breather here.
The ref breaks the fighters up, due to lack of action by Sandy Hawkins.
Reynolds waving his hands out in front of him, looking to distract Hawkins.
Hawkins thows a body shot but no joy.
That's one minute gone in the round.
Hawkins's jab looks to have found its range, popping Reynolds under the eye.
An inside leg kick lands from Hawkins.
Charlie Reynolds is winning the standup battle so far.
Reynolds swings away with a leg kick that misses.
Hawkins lands a jab. Then a cross. Then finally a nice hook to the body. Good work there by Hawkins.
Reynolds fails with an attempt to clinch.
Hawkins slips under a jab from Reynolds.
Reynolds tries to close the distance and clinch up but Hawkins swats him away and circles back towards the center.
Reynolds wants to clinch up but Hawkins keeps it at a distance.
Reynolds tests Hawkins's chin there with a solid looking shot.
Reynolds lands with a straight right. Hawkins didn't see that one coming.
Reynolds throws a body kick but he was well out of range there.
Hawkins closes the distance and clinches up, looking for a takedown. He shifts his weight and gets a nice trip into half guard.
Hawkins is trying to work for a kimura. This could be trouble! No, Reynolds has managed to free his arm - good work.
Sandy Hawkins has got the better of the ground game so far.
Hawkins seems content to maintain position for now, rather than mounting any offense.
That's two minutes gone in the round.
Wooooo! Give it up for these two warriors! They are putting on a show!
Reynolds is looking for a sweep. Hawkins is wise to his cunning plan and keeps the top position.
Reynolds is staying active underneath Hawkins, who seems content to just control the action from this position.
Hawkins sitting in half guard, looking to land shots. Reynolds defending well though.
Hawkins is looking for a kimura but he's never going to get it from there.
Reynolds is refusing to be controlled, as Hawkins sits in half guard.
Reynolds trying to control from the bottom.
That's three minutes gone in the round.
Hawkins is trying a forearm choke
I don't think that's going to do much at this level of the game.
Hawkins is looking to take a break and control but Reynolds is keeping him honest, looking to work from the bottom.
Charlie Reynolds has stepped it up - he knows he needs a finish here!
Hawkins is trying a forearm choke
I don't think that's going to do much at this level of the game.
Sandy Hawkins is fighting for a decision - hopefully he's judged it right and he's actually winning the fight.
Hawkins slows the pace down in half guard.
That's four minutes gone in the round.
Hawkins thumps the canvas. Not on purpose obviously - he just missed Reynolds's head.
Hawkins trying to pass the guard but Reynolds defending well.
Hawkins is thinking about going for an arm triangle but he can't free his leg.
The crowd applaud the fighters efforts here as the round comes to an end.
Hawkins controlling the action here.
And that's the end of the fight!
Sandy Hawkins comfortably won the final round on my scorecard.
I've got Hawkins winning every round here. Surely the decision will go his way and he'll pick up a well deserved decision victory. Over to the ring announcer for the scorecards.
Ladies and gentlemen, after 3 rounds of action, we go to the scorecards for a decision.
Judge William Peck scores the fight 27:30
Judge Steve Smith scores the fight 27:30
Judge Alec Ball scores the fight 27:30
In favor of your winner, by unanimous decision... Sandy Hawkins!
A very excited looking Sandy Hawkins made sure he remembered to thank all the fans both in the arena and on the internet. He said all the coolest people spend all day on MMA websites, which got a big reaction.
|
|
|
|
|
|
|
|
|
|
|
|
|
|
|
|
|
|
|
|
|
|
|
| S |
C
A |
G |
S |
C
B |
G |
|
S |
C |
G |
|
energy
A | B |
|
hype
A | B |
|
pop
A | B |
|
mgr
A | B |
|
FIGHT
RATING
54% |
|
|
|
|
|
|
