|
|
PBP Commentary |
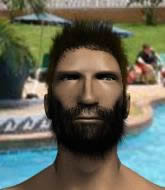
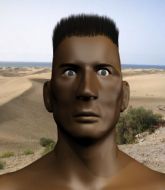
Coming up we have a middleweight MMA rules bout between Musse Hasselvall (ranked 0 p4p, 0 weight class) and Apollo Need (ranked 0 p4p, 0 weight class). These two fighters really are very evenly matched on the feet - it will be fascinating to see who can assert themselves in that aspect of the fight.
 |
|
 |
| 186 cm
21
185 lbs
4 - 2 - 0 |
|
185 cm
22
195 lbs
1 - 1 - 0 |
BJJ Blue Belt
Counter striker
Experienced |
|
BJJ Brown Belt
Decent boxing
Powerful |
|
| |
|
Ladies and gentlemen. This fight is 3 rounds, in the middleweight division.
Introducing the fighter to my left, fighting out of the red corner.
With a record of
4 - 2 - 0, fighting out of Rio de Janeiro, Musse Hasselvall!
And introducing the fighter to my right, fighting out of the blue corner.
With a record of
1 - 1 - 0, fighting out of Rio de Janeiro, Apollo Need!
The judges for this bout are Alexandre Firmino, Seu Braga and Matheus Silva.

The bell rings for round one and we are underway!
Hasselvall pulls out of a head kick attempt.
Hasselvall tries a switch kick but it misses it's target.

Hasselvall moves into the clinch successfully.
Need avoiding damage as Hasselvall throws knees to the body.
Hasselvall scores with a knee to the head.
Need wants a takedown but no success here.
Need keeps control of Hasselvall as he tries to wriggle out of the double underhooks.
Need tries to jump guard but he falls flat on his backside. Hasselvall smiles and moves away.
Hasselvall misses with a double jab.
Hasselvall lands with a slapping head kick.
Hasselvall looks to land a combination but Need avoids it well.
Hasselvall lands a head kick. Need smiles back at him and beckons him forward.
Need closes the distance and clinches up with Hasselvall, looking for a takedown. Need pushes Hasselvall against the cage but Hasselvall circles to the side and manages to break the clinch.
Musse Hasselvall has stuffed three takedown attempts in the round now. That's going to take a lot out of Apollo Need.
Need shoots in for a takedown but doesn't get it.
Need avoids the head kick by Hasselvall.
Hasselvall scores with a slapping inside leg kick.
Hasselvall pulls out of a head kick attempt.
Hasselvall walks straight into an uppercut. Luckily it didn't land flush.
Need missing with a left hand there. Hasselvall was out of range so wasted energy throwing that one.

That's one minute gone in the round.
Hasselvall gets to the clinch - let's see what his plan is here.

Hasselvall breaks the clinch.
Hasselvall throws a right hand that Need ducks under and follows up with a left that Need also avoids with ease.
Hasselvall scores with a leg kick.
Hasselvall misses with a jab and misses with a cross straight after too.
Hasselvall throws a head kick that misses.
Need fails with a takedown attempt from distance.
Hasselvall tries a switch kick but it misses it's target.
Musse Hasselvall is looking to keep the fight on the feet at all costs.
Hasselvall throws a feint and then finishes with a kick to the body.
Need shoots in with a takedown attempt and he has Hasselvall pinned against the cage. Hasselvall gets the underhooks and manages to circle away.
Hasselvall throws a sloppy head kick and Need moves out of range easily.
Hasselvall throws a sloppy head kick and Need moves out of range easily.
Hasselvall looks to land a combination but Need avoids it well.
Need shoots for a takedown but Hasselvall saw that one coming a mile off and avoided it easily.
Hasselvall throws a hook but Need avoids it easily.

That's two minutes gone in the round.
Hasselvall is looking to slow Need down with leg kicks.
Hasselvall throws an uppercut from half a mile away. Need sees it coming and avoids it easily.
Hasselvall thows a left - swing and a miss!
A decent looking body kick lands there for Hasselvall.
Hasselvall goes for a high kick. It partially lands.
Hasselvall lands a head kick!
The fight stays on the outside here - Hasselvall looks like he's thinking about clinching though.
Hasselvall fails in his attempt to clinch.
Need closes the distance and clinches up with Hasselvall, looking for a takedown. Need pushes Hasselvall against the cage but Hasselvall circles to the side and manages to break the clinch.
Need steps to the side to avoid the strikes from Hasselvall.
Hasselvall closes the distance and clinches.
Need tries to pull guard but can't drag his opponent to the mat. Hasselvall just stands there and leans against the cage.
Hasselvall manages to break the clinch.
Hasselvall throws a right hand that Need ducks under and follows up with a left that Need also avoids with ease.

That's three minutes gone in the round.
Need fails miserably with a takedown attempt.
Need blocks a head kick by Hasselvall.
Hasselvall moves into the clinch.
Hasselvall has Need pushed against the cage.
Need tries to pull guard but Hasselvall won't allow it.
Hasselvall throws a vicious knee straight up the middle but Need blocks it with crossed arms.
Hasselvall with the Thai clinch. He's looking to land a big knee but he's not managed it this time.
Hasselvall is looking to break free of the clinch but Need has double underhooks.
Hasselvall breaks the clinch.
Hasselvall throws a low kick but it's checked well by Need.
Need misses with a takedown attempt. He shot from a bit too far out.
Need misses with a jab and misses with a cross straight after too.
Hasselvall throws a combination but it was largely blocked by Need.
Need shoots in for a takedown but doesn't get it.
Need looks gassed!
Need fails with a rather predictable takedown attempt.

That's four minutes gone in the round.
Hasselvall displays some good footwork, moving neatly out of range as Need throws out the jab.
Hasselvall explodes with a nice body kick and back out of range. Nice work.
Apollo Need seems to be the more aggressive standup fighter in this bout.
Hasselvall clinches.
Need is trying desperately to land a takedown but Hasselvall is having absolutely none of it. This is turning into a bit of a nightmare for Need.
Hasselvall slows down the pace here.
Hasselvall with the Thai clinch. He's looking to land a big knee but he's not managed it this time.
Need goes for a takedown in the clinch but Hasselvall prevents it.
Need jumps guard but Hasselvall stands there with Need around his waist. Need gives up and drops back to his feet. We remain in the clinch.
Hasselvall manages to break the clinch.
Hasselvall clinches with his opponent.
Hasselvall landing knees to the body.
The crowd applaud the fighters efforts here as the round comes to an end.
A knee to the head by Hasselvall.
Hasselvall breaks the clinch.
Need looks for a takedown but Hasselvall sprawls well.
Hasselvall instigates a clinch.
And thats the end of the round the fighters go back to their corners.
Musse Hasselvall dominated that round.
The fighters get back to their feet, the hooter sounds and we're back to the action!

Hasselvall fails to land with the punch combination there - jab, cross, hook, miss, miss, miss.
Hasselvall throws a nice looking combination but Need bobs and weaves to avoid any damage.
Hasselvall connects with a solid leg kick.
Need shoots in but Hasselvall avoids the takedown attempt easily.
Hasselvall looking to take his opponent's legs away with the low kicks.
Musse Hasselvall is looking to throw some combinations by the looks of things.
Like a baseball bat into the meat of his leg there - nice leg kick by Hasselvall.
A head kick misses from Hasselvall.
Hasselvall clinches up with Need and pushes him back against the cage.
Hasselvall trying to land knees to the body.
Hasselvall escapes the clinch and we're back to striking.
Need fails to land the takedown.
Hasselvall will need to tighten up his combinations if he doesn't want to gas himself out, swinging at thin air.
Hasselvall lands a high kick!
Need is breathing heavily.
That's one minute gone in the round.
Hasselvall looks to score with a combo but nothing lands.
Hasselvall looks to land a combination. Need sees it coming but can only parry a couple of the shots.
Need closes the distance and clinches up with Hasselvall, looking for a takedown. Need pushes Hasselvall against the cage but Hasselvall circles to the side and manages to break the clinch.
Musse Hasselvall has stuffed three takedown attempts in the round now. That's going to take a lot out of Apollo Need.
Hasselvall throws a half hearted mid kick.
No luck for Need with that takedown attempt.
Need shoots in for a takedown but Hasselvall shows good takedown defense.
Need avoids a punch combination nicely.
Need waving his hands out infront of him, looking to distract Hasselvall.
Hasselvall moves into range and clinches up with Need.
Hasselvall lands a knee to the body.
Need misses with a short punch on the inside.
Hasselvall breaks the clinch.
Hasselvall tries to clinch but Need moves out of range.
Hasselvall moves into the clinch successfully.
That's two minutes gone in the round.
Hasselvall stops a takedown attempt from Need.
Hasselvall controlling the action here for a moment.
Need blocks an elbow strike from Hasselvall.
Hasselvall breaks the clinch.
Hasselvall misses with the combination.
Hasselvall scores with a punch to the gut of his opponent.
Need dodges the punch combination from Hasselvall.
Hasselvall tries a head kick but it misses.
Hasselvall misses with a half-hearted attempt at a head kick.
Need throws a right hand that Hasselvall ducks under and follows up with a left that Hasselvall also avoids with ease.
No luck for Need with that takedown attempt.
Hasselvall throws a couple of head shots and lands with the final one - a decent hook, which struck Need on the side of the head.
That's three minutes gone in the round.
No luck for Need with that takedown attempt.
Hasselvall scores with a kick to the midsection.
Hasselvall connects with a high kick.
Hasselvall has managed to clinch.
Hasselvall breaks the clinch and we're back to striking at distance.

Need shoots in for a takedown! He's got it and he's managed to land in full mount! That's better than Need was expecting from the takedown attempt, I'm sure!
Hasselvall is trying to escape the mount.
The fighters are pressed up against the cage, both looking to find a bit of space to work.
Need fails to take his opponent's back.
Hasselvall gets back to half guard.
Hasselvall trying to control from the bottom.

Need is looking for an arm triangle, whilst trying to pass to side control. Hasselvall doesn't seem that keen to cooperate though. No luck this time Need.
Hasselvall is looking to control Need's leg but it's slowly edging free. Can Hasselvall avoid being mounted?
Both fighters really going for it on the ground here!
That's four minutes gone in the round.
Need tries to stand but can't do so whilst Hasselvall controls his leg.
Need is looking for a kimura but he's never going to get it from there.
Hasselvall is doing well to control the position and prevent Need from advancing to side control.
Need is looking for an arm triangle, whilst trying to pass to side control. Hasselvall doesn't seem that keen to cooperate though. No luck this time Need.
Need is working for a submission of some sort.
And thats the end of the round the fighters go back to their corners.
Musse Hasselvall dominated that second round.
The minute break is over - no more time for sponges and pep talks - back to the action! This is the final round!

Hasselvall fails to land with a series of punches.
Hasselvall thuds a mid kick into his opponent's body. That will wear on Need if he has to take too many more of those.
Hasselvall steps to the side to avoid the strikes from Need.
Need closes this distance looking for a takedown but Hasselvall circles away.
Need takes a head kick and keeps coming.
Need shoots in for a double leg but Hasselvall sprawls well. That's going to sap some energy.
Hasselvall lands with a slapping head kick.
Hasselvall clinches up against the cage.
Need takes a big intake of breath there - he's definitely tired.
Hasselvall landing knees to the head.
Come on Hasselvall - let's have some action - none of this stalling nonsense.
Need wants to break the clinch but can't.
Hasselvall looking to throw knees to the head but Need is blocking nicely.
Hasselvall landing knees to the head.
Hasselvall landing knees to the body.
That's one minute gone in the round.
Hasselvall lands a hook that snaps the head of Need backwards.
Hasselvall gets an overhook and lands an elbow to the side of the head.
Hasselvall using the Thai plumb to throw knees but Need has his back arched nicely, preventing the strike.
Need tries to jump guard but he falls flat on his backside. Hasselvall smiles and moves away.
Musse Hasselvall has stuffed three takedown attempts in the round now. That's going to take a lot out of Apollo Need.
No luck for Need with that takedown attempt.
Hasselvall's corner calls for a 1,2 combination and Hasselvall duly obliges.
Hasselvall scores with a head kick.
Hasselvall scores with a big left there. The judges will like that one.
Need looks for a takedown here. Will he get it? Hasselvall is fending him off so far but Need persists. Nope, Hasselvall circles away and we're back to standing.
Hasselvall throws a series of punches but Need avoids them all with ease.
Hasselvall fakes and then throws a beautiful body shot. Need looks a bit winded and takes a step backwards to take a breath.
Hasselvall tries to clinch but Need moves out of range.
Hasselvall lands with a nice low kick. That'll leave a bruise.
Musse Hasselvall is winning the standup battle so far.
That's two minutes gone in the round.
A head kick misses from Hasselvall.
Need shoots in for a takedown. "Ole!" shouts Hasselvall as he jumps to the side.
Hasselvall gets to the clinch - let's see what his plan is here.
Need wants to break free but Hasselvall has control.
Need goes for a takedown attempt but Hasselvall pushes him away and we're back to fighting at a distance.
Hasselvall lands a high kick!
Danga de danga de dang - Hasselvall scores with a four punch combination!
Hasselvall tries a head kick but it misses.
Hasselvall misses with a few strikes there.
Need shoots in looking for a takedown. Hasselvall tries to sprawl out of it but Need keeps driving through. The fighters are pinned against the cage. Hasselvall manages to get underhooks and after a bit of a struggle, circles away and we're back to standing.
Hasselvall throws a head kick that misses and slips in the process. He scrambles back to his feet and the fighters circle.
That's three minutes gone in the round.
Need closes this distance looking for a takedown but Hasselvall circles away.
Hasselvall throws a head kick that half lands.
Hasselvall misses with a two punch combination.
Hasselvall moves out of range of the strikes.
Hasselvall will need to tighten up his combinations if he doesn't want to gas himself out, swinging at thin air.
Hasselvall tries to clinch but Need is having none of it.
Need shoots in but no luck this time.
Need is on the wrong end of a nice combination from Hasselvall.
A head kick from Hasselvall lands but Need takes it in his stride.
Hasselvall is really dominating this fight. Is there anything that Need can do to turn this around?
Need fails to land the takedown.
Hasselvall has Need up against the cage in a clinch.
That's four minutes gone in the round.
Need goes for a takedown attempt but Hasselvall pushes him away and we're back to fighting at a distance.
Need takes a kick to the side of the head.
Need shoots for a takedown but Hasselvall saw that one coming a mile off and avoided it easily.
A thudding body kick lands there by Hasselvall!
Hasselvall throws a wild combination but nothing lands.
Horrible takedown by Need or perhaps it was just good defense by Hasselvall which made him look bad.
Hasselvall lets the fists fly and connects with a left straight followed by a right hook.
Hasselvall throws a head kick but Need moves out of range.
A punch lands to the side of Need 's head but he takes it in his stride.
Apollo Need has stepped it up - he knows he needs a finish here!
Need shoots in for a double leg but Hasselvall sprawls well. That's going to sap some energy.
And that's the end of the fight!
Musse Hasselvall showed his dominance in that final round.
Well I reckon that's a shut out for Hasselvall, winning every round. Will the judges agree? They are the ones who matter, even if they are often depressingly incompetent. Over to the ring announcer for the scorecards.
Ladies and gentlemen, after 3 rounds of action, we go to the scorecards for a decision.
Judge Alexandre Firmino scores the fight 30:26
Judge Seu Braga scores the fight 30:26
Judge Matheus Silva scores the fight 30:26
In favor of your winner, by unanimous decision... Musse Hasselvall!
|
|
|
|
|
|
|
|
|
|
|
|
|
|
|
|
|
|
|
|
|
|
|
| S |
C
A |
G |
S |
C
B |
G |
|
S |
C |
G |
|
energy
A | B |
|
hype
A | B |
|
pop
A | B |
|
mgr
A | B |
|
FIGHT
RATING
54% |
|
|
|
|
|
|
