|
|
PBP Commentary |
Coming up we have a middleweight MMA rules bout between Baz Baldwin (ranked 0 p4p, 0 weight class) and Markus Riley (ranked 0 p4p, 0 weight class). Riley has chosen 'So Many People' by Neurosonic as his entrance music. The atmosphere really building for this one as we go over to our ring announcer for the fighter introductions!
 |
|
 |
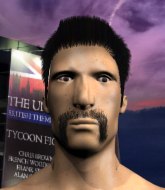
| 180 cm
19
190 lbs
3 - 2 - 0 |
|
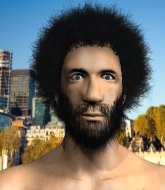
183 cm
22
191 lbs
2 - 1 - 0 |
BJJ Purple Belt
Counter striker
Good chin |
|
BJJ Purple Belt
Basic striking
Granite chin |
|
| |
|
Ladies and gentlemen. This fight is 3 rounds, in the middleweight division.
Introducing the fighter to my left, fighting out of the red corner.
With a record of
3 - 2 - 0, fighting out of New York, Baz Baldwin!
And introducing the fighter to my right, fighting out of the blue corner.
With a record of
2 - 1 - 0, fighting out of New York, Markus Riley!
The judges for this bout are Lou da Vinci, John Roberts and Eddie Farnsworth.

The bell rings for round one and we are underway!
Baldwin displays some good footwork, moving neatly out of range as Riley throws out the jab.

Riley moves into range and clinches up with Baldwin.
Baldwin prevents the takedown attempt.
Baldwin landing knees to the body.
Baldwin stalls.
Riley tries to pull guard but Baldwin holds him up against the cage and eventually Riley drops back down to his feet.

Baldwin breaks from the clinch.
Baldwin darts in and clinches Riley up against the cage.
Baldwin lands a shot to the body.
Baldwin tries to land a knee to the head but Riley blocks with his arms.
Baldwin avoiding damage.
Riley takes a knee right on the jaw!
Baldwin lands a nice knee to the body.
Riley is stalling here.
Riley is trying to maintain a safe position but Baldwin gets an underhook and turns Riley into the cage.
Baldwin keeps control of Riley as he tries to wriggle out of the double underhooks.
Baldwin lands a knee to the body.
Baldwin using the Thai plumb to throw knees but Riley has his back arched nicely, preventing the strike.
Baldwin tries a knee to the head but he's missed.

That's one minute gone in the round.
Riley wants to stall.
Baldwin scores a nice knee to the body.
Riley looks gassed!
Baldwin misses with a knee strike.
Baldwin lands a damaging elbow.
Baldwin has Riley pressed against the cage.
Baldwin lands a glancing elbow in the clinch.
Riley looking to stall.
Riley tries to pull guard but Baldwin won't allow it.
Baz Baldwin has stuffed three takedown attempts in the round now. That's going to take a lot out of Markus Riley.
Riley tries to pull guard but can't drag his opponent to the mat. Baldwin just stands there and leans against the cage.
Baldwin tries to land a knee to the head but Riley blocks with his arms.
Baldwin with the Thai clinch, lands a knee to the head.
Baldwin tries a knee to the head but Riley blocks it.
Baldwin landing some nice looking knees to the body.
Riley dodges an elbow strike from Baldwin.
Baldwin with the Thai clinch, lands a knee to the head.
Baldwin scores with a knee to the head.
Baldwin tries to land a knee to the head but misses.

That's two minutes gone in the round.
Riley drops down for a takedown but doesn't get it.
Riley looking for a takedown.
Stalling in the clinch from Baldwin.
Riley tries to take the fight to the ground by pulling guard but can't manage it.
Baldwin looking to throw knees to the head but Riley is blocking nicely.
Baldwin tries to land a knee to the head but Riley blocks with his arms.
Baldwin misses with a knee strike.
Baldwin tries a knee to the head but Riley blocks it.
Baldwin misses with a knee to the head.
Riley is trying to maintain a safe position but Baldwin gets an underhook and turns Riley into the cage.
Baldwin missing with knees to the body.
Baldwin is trying to stall.
Riley changes levels and goes for a takedown here. Baldwin fights it off and pushes away nicely.
Riley tries to clinch
and Riley takes a counter punch right on the button for his troubles.
Riley forces Baldwin back against the cage and clinches.

That's three minutes gone in the round.
Riley tries to jump guard but he falls flat on his backside. Baldwin smiles and moves away.
Riley throws a jab but it's blocked by Baldwin.
Riley tries to clinch there but Baldwin circles away.
Riley swinging wilding here.
Baldwin has Riley up against the cage in a clinch.
Riley fails to pull guard.

Baldwin gets the body lock takedown. After a quick scramble, Riley regains guard.
Baldwin postures up.

Riley is active off his back here, looking for submissions.

That's four minutes gone in the round.
Riley working away from the bottom but not quite defensive enough there because Baldwin has passed into half guard!
Riley is looking to improve his position.
Baldwin looks over to his corner - he wants some instructions but his corner are not responding.
Riley tries to regain full guard. Instead though, Baldwin has advanced to mount. Uh oh.
Baldwin sitting in mount, just looking to control for the moment.
And thats the end of the round the fighters go back to their corners.
Baz Baldwin dominated that round.
The fighters get back to their feet, the hooter sounds and we're back to the action!

Baldwin lands a pitter patter jab to the forehead of his opponent.
Riley misses with a combination
and Baldwin counters with a head kick.
Baldwin scores with a jab. Riley acknowledges it with a nod of the head.
Baldwin plants his feet and lands a nice head kick!
Baldwin scores with a nice one two combo and darts back out of range to avoid anything coming in the opposite direction.
Baldwin scores with a decent looking hook.
Baldwin circles away from the clinch attempt
and Baldwin counters with a kick to the head that grazes his opponent. Riley is lucky that one didn't land flush.
Baldwin tries a switch kick but it misses it's target.
Baldwin swings away but doesn't land with a series of punches.
That's one minute gone in the round.
Baldwin gets to the clinch - let's see what his plan is here.
Baldwin tries to land knees in the clinch but Riley avoids the damage to the body.
Riley wants to push off and get back to the center of the mat but Baldwin has him pressed against the cage.
Baldwin content to slow the pace in the clinch.
Riley avoiding damage as Baldwin throws knees to the body.
Riley tries to take the fight to the ground by pulling guard but can't manage it.
Riley wants to strike at distance but he can't break free of the clinch.
Baldwin lands a nice knee to the body.
Baldwin is working for takedown but Riley is calmly controlling the position for now.
Both fighters are absolutely exhausted here.
Baldwin misses with a knee to the head.
Baldwin pulls Riley into guard.
Riley trying to control the position from guard on top but Baldwin is wriggling around, looking for whatever he can.
Riley with a flurry of punches that miss.
Riley is pushing down on Baldwin's leg trying to pass to half guard. Baldwin is fighting to maintain full guard but Riley has managed to sneak the leg through.
Riley is trying to work for a kimura. He's got his hands clasped together - this could be trouble! No, Baldwin has managed to free his arm - good work.
That's two minutes gone in the round.
Riley is working for a kimura here but Baldwin manages to reverse the position and he's now in Riley's guard.
Baldwin distracts Riley with his right hand and drops a big elbow with his other arm.
Riley throws a couple of weedy looking strikes off his back.
Baldwin trying to control the position from guard on top but Riley is wriggling around, looking for whatever he can.
Riley is trying to control the position from the bottom.
Baldwin thows a big elbow that misses.
Riley can't keep his opponent in guard - Baldwin advances to half guard, no doubt looking to mount.
That's three minutes gone in the round.
Baldwin takes advantage of the dominant position to land a couple of big hammer fists.
Riley wants to control but Baldwin is keeping busy and won't allow it.
Riley is looking to regain full guard. Not this time though.
Baldwin content to control rather than advance.
Riley won't allow Baldwin to pass to mount.
That's four minutes gone in the round.
There's not a lot going on here and the crowd are letting the fighters know they're not willing to tolerate a lack of action.
Riley is looking to control Baldwin's leg but it's slowly edging free. Can Riley avoid being mounted?

The referee decides to stand the fighters back up.
Riley takes a punch to the jaw and another one to the bread basket.
Riley misses with a combination
and Baldwin counters with a nice single leg takedown and he's in Riley's guard now.
Baldwin stands up and looks to throw the legs aside to pass to side control. Riley swivels though and keeps the full guard.
Riley looking to sweep using the butterfly guard but Baldwin puts pay to that idea as he passes nicely into half guard.
Baldwin slows the pace down in half guard.
Riley manages to get to full guard.
Baldwin has to be careful here, sitting in the guard of a superior BJJ player.
Riley looking to sweep here. No luck so far.
And thats the end of the round the fighters go back to their corners.
Baz Baldwin dominated that second round.
The corners get their ten second warning. Both fighters stand from their stools and stare eachother down, ready to get back to the action. This is the final round!

Baldwin has taken the fight to the clinch.
Knees to the body from Baldwin.
Baldwin lands a knee to the body.
Baldwin prevents a takedown attempt there.
A knee to the head by Baldwin.
Baldwin connects with a nasty looking knee right to Riley's face.
Baldwin with a knee to the head.
Riley takes an elbow to the forehead.
Baz Baldwin has scored more points in the clinch so far.
Baldwin connects with a nasty looking knee right to Riley's face.
Knees to the body from Baldwin.
Baldwin unloads a knee to the mid-section. Riley lets out a prehistoric sounding urrrrgh.
Riley tries to jump guard but he falls flat on his backside. Baldwin smiles and moves away.
Riley throws a jab, cross combination which is slipped
and Baldwin counters with a crisp hook to the side of the head.
Baldwin scores with a nice looking left hook and follows it up with an uppercut!
Both fighters are breathing heavily.
Baldwin closes the distance and clinches.
Baldwin scores a nice knee to the body.
That's one minute gone in the round.
Baldwin missing with knees to the body.
Riley manages to pull guard.
Riley is active off his back here, looking for submissions.
Baldwin wants to control from the top but Riley keeps moving.
Riley had isolated an arm as going for an omaplata. Baldwin is defending the submission well but is in a very vulnerable position. Riley Is leaning forward trying to finish the omaplata but decides to abandon it, and take Baldwin's back instead.
Baldwin just trying to survive but Riley is wriggling into a better position, looking to finish.
Baldwin is going to have to think about doing something other than just controlling because Riley is managing to avoid having the position dictated to him.
Riley working for a choke but Baldwin is defending well.
That's two minutes gone in the round.
Riley thows a huge left but connects with the canvas and not his opponent.
Riley is controlling the position but Baldwin somehow manages to roll and ends up with half guard.
Baldwin misses with some strikes from the bottom.
Baldwin is positioning himself well to prevent Riley advancing to mount.
Riley is keen to just control but Baldwin is a slippery customer.
That's three minutes gone in the round.
Baldwin wants to control but Riley is keeping busy.
Riley seems to be working for a kimura but Baldwin defends the submission attempt.
The fighters are battling for position here. Baldwin manages to regain full guard. Nice work.
Baldwin is avoiding any damage by keeping wrist control.
Riley looking to sit in guard and control but Baldwin gets the butterfly guard and sweeps. He's now in the guard on the top.
Riley looking for submissions from the bottom here. Moving his hips around, possibly looking for an armbar.
That's four minutes gone in the round.
A lull in the action here being met with boos from the crowd.
Riley looking to control but Baldwin passes into half guard.
Baldwin working some ground and pound from close in. He's looking to maintain this position and strike for a while by the looks of things... although he'll probably advance to full mount in a minute now I've said that.
Riley is looking to get back to full guard here but Baldwin has managed to pass to side control instead.
Riley tries to lock up and control but Baldwin gives him a forearm to the face and pushes him away.
Baldwin with a couple of short strikes.
Markus Riley has stepped it up - he knows he needs a finish here!
Baldwin controlling from mount.
Riley wants to hold on but Baldwin pushes him away.
And that's the end of the fight!
Baz Baldwin showed his dominance in that final round.
Well Baldwin has outscored his opponent in every aspect of the fight today. Only a scarily incompetent judge or two will keep him from a well deserved win... Over to the ring announcer for the scorecards.
Ladies and gentlemen, after 3 rounds of action, we go to the scorecards for a decision.
Judge Lou da Vinci scores the fight for Baz Baldwin!
Judge John Roberts scores the fight for Baz Baldwin!
Judge Eddie Farnsworth scores the fight for Baz Baldwin!
Baz Baldwin wins by unanimous decision!
|
|
|
|
|
|
|
|
|
|
|
|
|
|
|
|
|
|
|
|
|
|
|
| S |
C
A |
G |
S |
C
B |
G |
|
S |
C |
G |
|
energy
A | B |
|
hype
A | B |
|
pop
A | B |
|
mgr
A | B |
|
FIGHT
RATING
29% |
|
|
|
|
|
|

