|
|
PBP Commentary |
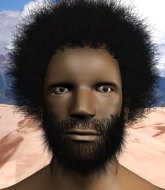
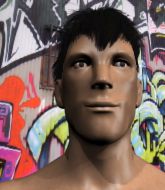
Coming up we have a welterweight MMA rules bout between Jack London (ranked 0 p4p, 0 weight class) and Han Solo (ranked 0 p4p, 0 weight class). We have two fighters making their debuts here, so let's see who comes out of this one with their first professional victory.
 |
|
 |
| 180 cm
20
182 lbs
0 - 0 - 0 |
|
195 cm
23
180 lbs
0 - 0 - 0 |
BJJ Purple Belt
Brawler
Self confident |
|
BJJ Purple Belt
Basic striking
Determined |
|
| |
|
Ladies and gentlemen. This fight is 3 rounds, in the welterweight division.
Introducing the fighter to my left, fighting out of the red corner.
With a record of
0 - 0 - 0, fighting out of St Petersburg, Jack London!
And introducing the fighter to my right, fighting out of the blue corner.
With a record of
0 - 0 - 0, fighting out of St Petersburg, Han Solo!
The judges for this bout are Valeri Chadov, Aleksandr Martynov and Vladimir Khabensky.

The bell rings for round one and we are underway!
Solo keeps the fight standing with a nice sprawl.
Solo tries to bum rush London with a series of wild strikes but London uses good footwork to avoid the assault.
Solo is a painfully thin specimen of a man. You do wonder whether a good body kick would snap him clean in two.

Solo shoots in and gets a takedown into London's guard.
The referee wants the fighters to be more active or he's going to reset them on the feet.

Solo postures up as if he's going to throw some strikes but drops back for an ankle! London is in big trouble! He looks ready to tap! But no, he's escaped and dives on top of Solo, into his guard.
Both fighters really going for it on the ground here!
Solo looking for submissions off his back, moving his hips, looking for an opening.
London might be looking to lock onto one of his opponent's long limbs for a submission, whilst we're on the ground.
London pressing down on his opponent's thigh, looking to pass guard. Solo is keeping the position for now.
London wants to control from the top but Solo keeps moving.
Solo avoiding any damage from the ground and pound.
Solo is throwing his legs up, looking for submissions. London is aware though and is defending well.
London wants to control from the top but Solo keeps moving.
Fantastic stuff here - a very entertaining period of action, which has drawn cheers from the crowd.
Solo working for a triangle but London defends it easily.

That's one minute gone in the round.
Solo keeping moving, preventing London from controlling successfully.
The ref warns both fighters not to hold the cage as they work up against the meshing.
London's corner is telling him to maintain position.
Solo throwing his legs up looking for a triangle.
London tries to free his leg and advance position but Solo is retaining full guard.
London wants to control from the top but Solo keeps moving.
Solo is looking for a triangle but London pushes his legs off easily.
London landing with the ground and pound.
The fighters are pressed up against the cage, both looking to find a bit of space to work.
Solo working for a triangle but London defends it easily.

That's two minutes gone in the round.
London wants to control from the top but Solo keeps moving.
London advances position into side control!

London tries for a kimura but Solo is defending well.
London wants to work for a kimura but he's foiled early by Solo, who protects the arm well.
This has been an exciting period of action!
London looking for an arm triangle but it's way too loose to do anything.
London wants to control but Solo is keeping him busy.
London looking for an arm triangle but it's way too loose to do anything.

That's three minutes gone in the round.
Solo manages to get one leg in to regain half guard.
Solo is refusing to be controlled, as London sits in half guard.
London is pressing down on Solo's thigh, looking to free his foot. Solo is holding on for now.
Solo actively working from the bottom here.
Solo is looking to sinch up a guillotine here but London pulls his head out easily.
London seems to be working for a kimura but Solo defends the submission attempt.
Solo tries to get to full guard but London has control of the leg.
London is working for submissions here but there's nothing on.

That's four minutes gone in the round.
Solo looking for submissions from an awkward position here.
Solo looks winded!
London is working for a kimura but Solo is defending it quite comfortably.
Solo looking for submissions off his back.
Solo is looking to sinch up a guillotine here but London pulls his head out easily.
London seems to be looking for submissions.
As the round comes to an end the crowd are showing their appreciation for a great round of action.
Solo is trying to stand.
London is looking for a kimura but he's never going to get it from there.
Solo looking for submissions from an awkward position here.
And thats the end of the round the fighters go back to their corners.
That was a close round but I would say that Jack London will probably get the nod.
The fighters' corners scream their final instructions, as the referee calls time. Here we go, back to the action!

London tries to score a power double leg takedown but Solo sees that one coming and sprawls well. That will dishearten London somewhat.
Solo displays good takedown defense there as he swats away a double leg from London.
London has a takedown stuffed.
That's three failed takedown attempts in the round for Jack London. That's going to take a lot out of him.
Solo closes the distance, clinches up and gets a nice trip takedown into side control. Very smooth.
Solo advances to mount.
London is working to get back to half guard.
Solo is thinking about an arm triangle here, looking to tighten it up before moving to side control. London can see it coming though and defends well with a couple of strikes to the head and some good arm positioning.
Solo prevents London from getting the reversal.
That's one minute gone in the round.
London is working hard here to advance position.
Solo has hold of London's left arm, perhaps looking for a submission. The two fighters tussle over control of the isolated limb and London manages to get his arm back to his side and away from danger.
Solo is thinking about an arm triangle here, looking to tighten it up before moving to side control. London can see it coming though and defends well with a couple of strikes to the head and some good arm positioning.
Solo is breathing heavily.
London throwing hammer fists to the chest of Solo. What's that going to do exactly?
London is looking to get to half guard.
Solo working for a guillotine from mount but London is in no mood to give up.
London tries to lock up and control but Solo gives him a forearm to the face and pushes him away.
That's two minutes gone in the round.
London sneaks a leg back under and regains half guard and is working straight away to try and get back to guard. He hasn't managed just yet though.
Solo looking to pass the half guard. Not this time.
Solo prevents London from improving his position.
London manages to get to full guard.
London will have to put a bit more behind his punches if he's going to do any damage from this position.
Solo stopping the sweep attempt from London.
Fantastic stuff here - a very entertaining period of action, which has drawn cheers from the crowd.
London trying to keep a closed guard but Solo is proving a slippery customer.
Solo preventing the sweep.
That's three minutes gone in the round.
Solo trying to move into half guard but instead London has managed to sweep!
London postures up and scores with a shot to the body and a follow up elbow to the head.
London wanted to stand there but Solo had control of the position.
Solo has his foot on London's thigh. He's trying to push off and get in position for a triangle, I think. London works his way back into a safe position though.
London avoids a guillotine attempt easily.
London is trying to work a guillotine from the top, or something like that? Don't know how he thinks he's going to get a finish from there.
London slips nicely into half guard.
London stalling.
London trying to mount his opponent but Solo defends it.
That's four minutes gone in the round.
London is thinking about going for an arm triangle but he can't free his leg.
Jack London overall seems to be getting the better of the ground position in the fight so far.
Solo is looking to improve his position.
Solo actively working from the bottom here.
London is trying a forearm choke
I don't think that's going to do much at this level of the game.
The crowd are loving this. Great action here.
Solo is not content to let London control the position.
As the round comes to an end the crowd are showing their appreciation for a great round of action.
Solo is looking to sinch up a guillotine here but London pulls his head out easily.
And thats the end of the round the fighters go back to their corners.
That was a close second round but I would say that Jack London will probably get the nod.
The referee calls time. The cornermen exit stage left and we're back to business. This is the final round!

Solo shoots in for a takedown from distance. He catches London napping and manages to drive through into side control!
London struggling a bit here.
London gets back to half guard.
London is looking to sinch up a guillotine here but Solo pulls his head out easily.
Solo looking for a kimura but he'll have to free his other leg if he wants to finish that. Perhaps he's just using it as a distraction technique.
Solo is looking for a kimura. It's going to be difficult to finish that from half guard though and London defends it well.
Solo takes a big intake of breath there - he's definitely tired.
London moves into full guard.
That's one minute gone in the round.
London is active off his back here, looking for submissions.
London not looking particularly offensive just at the moment.
Solo drops back for a leg! It's a sloppy attempt though and Solo jumps back into guard quickly, to retain the dominant position.
Solo drops back looking for a leg! London is in trouble here! The fighters roll with the hold and London manages to kick Solo off! Solo jumps back into London's guard.
Solo drops back, looking for a kneebar! London looks panicked! The fighters roll across the mat, one looking to finish, one looking to escape. London looks to have wriggled free... Yes, he's got his leg free and he's dived into side control! Good work there from London!
London trying to control the action but Solo is working from the bottom.
That's two minutes gone in the round.
Solo is trying to get back to half guard.
Solo is not content to let London control the position.
Sloppy strikes there by London.
You can see the frustration on Solo's face as London controls the position.
Solo is looking to reverse the position.
London is trying to get an arm triangle but Solo is defending well.
London tries for an arm triangle. That looks pretty tight to me. Is this one over!?! Possibly, maybe, no London has let go of the choke. Obviously it wasn't as tight as we thought!
The crowd are loving this. Great action here.
Solo is looking for a sweep.
That's three minutes gone in the round.
Solo is trying to get back to half guard. He's pushing on London's leg. He's managed it. Nice work.
Solo is in trouble now - London has advanced to mount!
London wants to finish this one by submission but Solo is holding onto his waist, trying to prevent any attacks from London.
London thowing shots but they're missing.
Solo is desperately trying to improve his position but London has a good base and remains in mount.
Solo in a bad spot here, taking shots to the head.
London working for a submission but Solo is keeping him at bay.
Solo is looking to improve his position but London isn't that keen on the idea.
That's four minutes gone in the round.
Solo tries to buck London off but he can't manage it.
London wants to take his opponent's back but Solo doesn't allow it.
London trying to control but he's not successful this time.
London dominating with strikes here.
London content just to control the position here.
This has been an exciting period of action!
London prevents Solo from getting the reversal.
As the round comes to an end the crowd are showing their appreciation for a great round of action.

London stands up from mount. Strange move.
Wow, both these guys are really going for it!
London tries to shoot in for a takedown. He's got hold of a leg but Solo swivels and escapes.
Han Solo has stepped it up - he knows he needs a finish here!
Jack London is fighting for a decision here - he's started to take the cautious approach.
Solo tries a head kick but it misses.
And that's the end of the fight!
Jack London showed his dominance in that final round.
Well I reckon that's a shut out for London, winning every round. Will the judges agree? They are the ones who matter, even if they are often depressingly incompetent. Over to the ring announcer for the scorecards.
Ladies and gentlemen, after 3 rounds of action, we go to the scorecards for a decision.
Judge Valeri Chadov scores the fight 30:27
Judge Aleksandr Martynov scores the fight 30:27
Judge Vladimir Khabensky scores the fight 30:27
In favor of your winner, by unanimous decision... Jack London!
|
|
|
|
|
|
|
|
|
|
|
|
|
|
|
|
|
|
|
|
|
|
|
| S |
C
A |
G |
S |
C
B |
G |
|
S |
C |
G |
|
energy
A | B |
|
hype
A | B |
|
pop
A | B |
|
mgr
A | B |
|
FIGHT
RATING
80% |
|
|
|
|
|
|
