|
|
PBP Commentary |
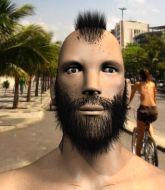
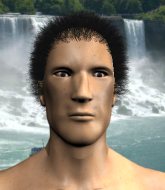
Coming up we have a welterweight MMA rules bout between Jay Bleezy (ranked 0 p4p, 0 weight class) and Daniel Hart (ranked 0 p4p, 0 weight class). Hart has chosen Hide Your Tears as his entrance music. The key to victory for Jay Bleezy has got to be keeping the fight on the feet.
 |
|
 |
| 175 cm
26
184 lbs
5 - 0 - 0 |
|
180 cm
27
177 lbs
6 - 3 - 0 |
Powerful takedowns
Basic striking
Cardio machine |
|
BJJ Purple Belt
Counter striker
Determined |
|
| |
|
Ladies and gentlemen. This fight is 2 rounds, in the welterweight division.
Introducing the fighter to my left, fighting out of the red corner.
With a record of
5 - 0 - 0, fighting out of Las Vegas, Jay Bleezy!
And introducing the fighter to my right, fighting out of the blue corner.
With a record of
6 - 3 - 0, fighting out of Los Angeles, Daniel Hart!
The judges for this bout are , Frank Antenori and Timothy Bukovac.

The bell rings for round one and we are underway!

Hart shoots in from a long way out. He's driving through with the takedown attempt and he eventually gets it, landing in Bleezy's guard.
Hart wants to stand but Bleezy is controlling his posture from full guard.
Bleezy striking off his back but it's not causing Hart any problems.
Bleezy keeping moving, preventing Hart from controlling successfully.

Hart thinks about going for a leg but decides against it, in order to maintain the position.
Bleezy thows some rabbit punches from the bottom but they don't do any damage.
Bleezy pulls Hart in close to his closed guard and prevents Hart from doing any damage or advancing position.
Hart is looking to work some ground and pound but Bleezy has wrist control.

That's one minute gone in the round.
Bleezy controls Hart momentarily but Hart frees himself.
Hart wants to control from the top but Bleezy keeps moving.

The referee decides to stand the fighters back up.
Hart gets a takedown into half guard.
Hart working the head and body with strikes.
Bleezy avoiding damage under a succession of punches from Hart.
Bleezy keeping control of the leg, stopping his opponent passing to mount.
Hart is sneakily working for an arm triangle but Bleezy sees it coming and defends easily.
Bleezy wants to control but Hart is keeping busy.

That's two minutes gone in the round.
Hart is looking to take a break and control but Bleezy is keeping him honest, looking to work from the bottom.
Hart seems to be working for a kimura but Bleezy defends the submission attempt.
Bleezy has his hands clasped together around Hart's back. He's all about the action.
Hart thows a wild elbow that connects with the canvas.
Bleezy trying to control from the bottom.
This has been an exciting period of action!
We've had a lack of effective grappling in the last minute or so, which could well see a referee standup.
Bleezy regains full guard. Nicely done.

That's three minutes gone in the round.
Bleezy is trying to keep Hart in close.
Bleezy lands some strikes from the bottom.
Bleezy tries to land a sweep but no joy.
Hart missing there with some ground and pound from the guard.
Hart trying to pass the guard but can't manage it just yet.
Bleezy trying to keep a closed guard but Hart is proving a slippery customer.
Hart is looking to stand up but Bleezy won't let him.
Hart with a flurry of punches that miss.
Bleezy controls Hart momentarily but Hart frees himself.

The ref stands the fighters back up. Jay Bleezy wasn't doing enough on the ground.
Hart misses with a takedown attempt - Bleezy sprawls well and throws a nice strike on the way out which just misses.

That's four minutes gone in the round.
Hart stuffs the takedown attempt from Bleezy. Bleezy gets slowly back to his feet.
Bleezy digs a good hook to Hart's body.
Bleezy connects with a body shot that sends Hart's belly button to the back.
Hart shoots in and gets a takedown into half guard. Hart showed some decent athleticism there.
This has been an exciting period of action!
Hart is working for submissions here but there's nothing on.
Hart looks winded!
Bleezy desperately trying to maintain half guard.
Hart is trying to work for a kimura. This could be trouble! No, Bleezy has managed to free his arm - good work.

That's five minutes gone in the round.
Hart is working for an americana but Bleezy has been sneaky and has managed to get back to half guard, whilst Hart was thinking about the submission.
The fighters are trapped in the ropes so we're going to have a reposition here. The ref calls for a break and repositions the fighters in the center of the ring.
Bleezy has Hart pulled in close to control his posture.
Hart looking to pass the guard.
Hart postures up.
Hart loading up with the ground and pound but he's missing more than he's landing in this flurry.
Bleezy manages to land a sweep and now he's in mount on top!
Bleezy lands an elbow that was bordering on illegal but the referee lets it go with a warning.

That's six minutes gone in the round.
Bleezy looking to ground and pound his opponent to a finish here.
Wooooo! Give it up for these two warriors! They are putting on a show!
Bleezy breaks from Hart's wrist control and lands an elbow.
Bleezy avoids the attempt from Hart to control.
Hart is trying to escape the mount.
Hart doing his best to control the position. Can he escape?
Hart tries to lock up and control but Bleezy gives him a forearm to the face and pushes him away.
Bleezy looking to control but Hart is working nicely, looking to advance position himself.
Bleezy with the ground and pound from mount.
Hart tries to hold on but Bleezy postures up.

That's seven minutes gone in the round.
Bleezy prevents Hart from getting the reversal.
Hart regains half guard.

Bleezy is looking for a kimura here.
Hart is pressing down on Bleezy's left leg trying to get back to full guard. He's managed it.
Bleezy pushes down on Hart's leg and manages to get into half guard.
Bleezy passes the half guard and he's now in mount! Big trouble for Hart!
Bleezy can't quite control the action as he would like just now, as Hart is looking to escape.

That's eight minutes gone in the round.
Bleezy prevents Hart from getting the reversal.
Bleezy working the ground and pound effectively.
Hart really trying hard to get back to half guard here.
Bleezy looking to control and managing it successfully.
The crowd are loving this. Great action here.
Hart is squirming around, avoiding Bleezy's attempts to control the action.

That's nine minutes gone in the round.
Bleezy looking to secure an arm triangle but Hart defends it well.
Hart regains half guard.
Bleezy is pressing down on Hart's thigh, looking to free his foot. Hart is holding on for now.
Bleezy is looking for a kimura but Hart is holding onto that half guard position, so it's hard for Bleezy to get the leverage.
As the round comes to an end the crowd are showing their appreciation for a great round of action.
Bleezy is just content to waste time from the top position. Hart takes advantage of the situation and regains full guard.
Bleezy slips effortlessly into side control - very nice.
And thats the end of the round the fighters go back to their corners.
Jay Bleezy dominated that round.
That's time! Bleezy's corner gives him a slap on the ass as he gets ready to fight. This is the final round!

Bleezy blocks a head kick by Hart.
Jab from Bleezy.
A really sloppy takedown attempt there from Hart.
A really sloppy takedown attempt there from Hart.

Bleezy gets a double leg takedown into Hart's guard.
Bleezy in full guard, throwing the ground and pound. No damage this time.
Bleezy wants to control from the top but Hart keeps moving.
Hart is throwing his legs up, looking for submissions. Bleezy is aware though and is defending well.
Bleezy wanted to stand there but Hart had control of the position.
Hart is breathing heavily.
Hart keeping full guard, as Bleezy tries to pass.
That's one minute gone in the round.
Hart keeping moving, preventing Bleezy from controlling successfully.
Hart is working from a closed guard but he's struggling to control his opponent.
Hart looking for submissions off his back, moving his hips, looking for an opening.
Hart looking to control.
Bleezy trying to control but Hart is working from the bottom.
Jay Bleezy has forced the referee to step in and bring the fight back to the feet.
Bleezy lands with a good body shot.
That's two minutes gone in the round.
Nice shot lands for Bleezy.
Bleezy jabs Hart to the body, keeping him at a distance.
Bleezy ducks down and throws a hook to the body.
Hart takes a really solid shot there but just smiles back and shrugs his shoulders.
Bleezy looks for a takedown. He's got it. We're now in half guard.
Bleezy is looking for a kimura here.
This has been an exciting period of action!
Hart regains full guard. Nicely done.
Bleezy trying to pass the guard but can't manage it just yet.
Bleezy is working hard here to advance position.
That's three minutes gone in the round.
Bleezy passes Hart's right leg, so he's now in half guard.
Bleezy is working hard to pass the guard. He's done it - he's now in full mount! Trouble for Hart!
Bleezy controlling his opponent.
Hart wants to hold on but Bleezy pushes him away.
Bleezy trying to control but he's not successful this time.
Hart bucks up and manages to get a nice reversal! He's in guard on the top - nicely done!
That's four minutes gone in the round.
Hart sneaks a leg through and gets to half guard. That was like a knife through butter how easily he passed Bleezy's guard.
Hart is looking for a kimura but he's never going to get it from there.
Hart trying to pass the guard but Bleezy defending well.
Hart content to control rather than advance.
Bleezy trying to hold on to Hart's head to control him but Hart postures up.
Bleezy works his way to full guard. Good work.
Fantastic stuff here - a very entertaining period of action, which has drawn cheers from the crowd.
A big thud reverberates around the arena there as Hart accidentally thumps the mat. Hopefully he's not broken his hand.
That's five minutes gone in the round.
Bleezy is looking to sinch up a triangle. Hart throws the leg off to one side though and gets in tight to Bleezy's body to avoid the submission. Bleezy has instead reached around Hart's neck and now has a guillotine! Oh, this is biiiig trouble! Bleezy arches his back and squeezes and forces the tap from his hapless opponent.
Ladies and gentlemen, after 5:20 of round 2, we have a winner by way of Submission (Guillotine). Jay Bleezy!
Jay Bleezy decided to hype himself up post fight. It was going well but he went on about it a bit too long and the crowd turned on him a little.
|
|
|
|
|
|
|
|
|
|
|
|
|
|
|
|
|
|
|
|
|
|
|
| S |
C
A |
G |
S |
C
B |
G |
|
S |
C |
G |
|
energy
A | B |
|
hype
A | B |
|
pop
A | B |
|
mgr
A | B |
|
FIGHT
RATING
52% |
|
|
|
|
|
|
