|
|
PBP Commentary |
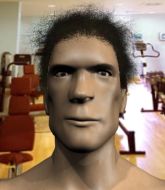
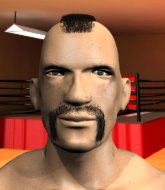
Coming up we have a middleweight MMA rules bout between Kazushi Yamazawa (ranked 0 p4p, 0 weight class) and Dereck Keen (ranked 0 p4p, 0 weight class). Yamazawa's entrance music is Avicii - Silhouettes. A fine choice. Kazushi Yamazawa has the edge in experience - let's see if he can make that count tonight.
 |
|
 |
| 191 cm
18
184 lbs
2 - 1 - 0 |
|
188 cm
20
185 lbs
0 - 0 - 0 |
BJJ Blue Belt
Counter striker
Granite chin |
|
BJJ Blue Belt
Brawler
Determined |
|
| |
|
Ladies and gentlemen. This fight is 3 rounds, in the middleweight division.
Introducing the fighter to my left, fighting out of the red corner.
With a record of
2 - 1 - 0, fighting out of Sydney, Kazushi Yamazawa!
And introducing the fighter to my right, fighting out of the blue corner.
With a record of
0 - 0 - 0, fighting out of Sydney, Dereck Keen!
The judges for this bout are John Mangel, Skip Squint and Hugh Johnson.

The bell rings for round one and we are underway!
Keen shoots in for a takedown - he's clinched up with Yamazawa but Yamazawa pushes him off and we're back to square one.
No luck with that takedown attempt from Keen.
Keen tries for a takedown but Yamazawa sees it coming a mile off and avoids it easily.
Kazushi Yamazawa has stuffed three takedown attempts in the round now. That's going to take a lot out of Dereck Keen.
Keen fails to land the takedown.
Yamazawa shoots in and drives through. Keen sprawls well.
Keen shoots in for a takedown - he's clinched up with Yamazawa but Yamazawa pushes him off and we're back to square one.

Yamazawa feints and then dives in with a takedown. That was a long way out but the feint bought him enough time to close the distance and complete the takedown. Now we'll play guard for a bit and see who can get the better of that position.
Yamazawa is breathing heavily.

That's one minute gone in the round.
The referee claps his hands together and tells the fighters to work.
Keen is trying to keep Yamazawa in close.
The ref warns both fighters not to hold the cage as they work up against the meshing.
Yamazawa distracts Keen with his right hand and drops a big elbow with his other arm.
Keen pulls Yamazawa in close to prevent any damage.
Yamazawa working some ground and pound from guard but it's not doing any damage.

Keen looking for a guillotine here but Yamazawa defends easily.
Yamazawa won't allow Keen to sweep him here.
Keen not looking particularly offensive just at the moment.
Keen manages to sweep nicely, so he's now on top. Yamazawa manages to get himself to full guard.

That's two minutes gone in the round.
Keen trying to control but Yamazawa is working from the bottom.

Yamazawa has his feet on Keen's hips. He pushes off and gets to his feet. Nice work.
A lazy left from Keen finds it's target.
Keen shoots for a double leg takedown but Yamazawa sprawls well. He's pushed Keen's face into the mat and manages to get back to his feet relatively easily.
Yamazawa fails in his attempt to clinch.

That's three minutes gone in the round.
Keen circles away from the clinch attempt.
A bone on bone clash there as Yamazawa blocks the leg kick.
Yamazawa fails with a takedown attempt.
Keen shoots in with a takedown attempt and he has Yamazawa pinned against the cage. Yamazawa gets the underhooks and manages to circle away.
Keen darts in trying to clinch
and Yamazawa counters with a driving takedown into guard. Nice work there by Yamazawa.

That's four minutes gone in the round.
Keen is looking for a triangle but Yamazawa pushes his legs off easily.
Keen wants to get back to his feet but he's too absorbed in his own little project and Yamazawa manages to pass to side control.
Yamazawa not throwing his punches with enough precision this time.
Yamazawa drops an elbow to the side of Keen's head.
The fans in attendance giving it up for the two fighters, who have really let it all hang out in the last minute or so!
Keen makes his way to full guard. A much better position for Keen.
Yamazawa working some ground and pound from guard but it's not doing any damage.
As the round comes to an end the crowd are showing their appreciation for a great round of action.
Yamazawa works over Keen with some ground and pound from guard.
Keen is active off his back here, looking for submissions.
And thats the end of the round the fighters go back to their corners.
Kazushi Yamazawa dominated that round.
The fighters' corners scream their final instructions, as the referee calls time. Here we go, back to the action!

Yamazawa displays good takedown defense there as he swats away a double leg from Keen.
Keen is looking to take this fight into the clinch.
Keen tries to clinch but is not successful on this occasion.
We've had a slow start to the round here - hopefully the action picks up.

Keen gets in close and instigates a clinch.
Yamazawa wants to stall.
Both fighters are absolutely exhausted here.

Yamazawa manages to break the clinch.
That's one minute gone in the round.
A head kick misses from Keen.
A bone on bone clash there as Yamazawa blocks the leg kick.
Yamazawa tries to close the distance and clinch up but Keen swats him away and circles back towards the center.
Dereck Keen seems to be the more aggressive standup fighter in this bout.
Keen shoots in looking for a takedown but Yamazawa manages to keep the fight standing, pushing Keen's face into the canvas for good measure before circling away.
Yamazawa showing good head movement there, avoiding the strikes from Keen.
Yamazawa tries for a takedown but Keen sees it coming a mile off and avoids it easily.
Keen tries to clinch but Yamazawa is having none of it.
Yamazawa shoots in for a takedown but doesn't get it.
That's two minutes gone in the round.
Yamazawa moves out of range as Keen throws a body kick.
Keen lands a jab followed by a nice looking cross.
Yamazawa slaps away a takedown attempt from Keen, before circling back to the center of the mat.
Kazushi Yamazawa has stuffed three takedown attempts in the round now. That's going to take a lot out of Dereck Keen.
Keen moves into the clinch successfully.

Keen successfully pulls guard.
Keen is throwing his legs up, looking for submissions. Yamazawa is aware though and is defending well.
Yamazawa trying to control the position from guard on top but Keen is wriggling around, looking for whatever he can.
Keen bucks up whilst keeping hold of a body lock, managing to reverse the position. Now he's in top in Yamazawa's guard.
Kazushi Yamazawa overall seems to be getting the better of the ground position in the fight so far.
That's three minutes gone in the round.
Keen trying to control the position from guard on top but Yamazawa is wriggling around, looking for whatever he can.
Keen trying to land body shots but he keeps hitting the mat.
The fighters are pressed up against the cage, both looking to find a bit of space to work.
Yamazawa has control of Keen's left arm, preventing Keen from doing any damage.
Yamazawa keeping moving, preventing Keen from controlling successfully.

The referee decides to stand the fighters back up, due to lack of activity on the part of Kazushi Yamazawa.
Yamazawa tries to clinch but Keen moves out of range.
That's four minutes gone in the round.
Keen tries to clinch but Yamazawa is having none of it.
Keen tries to clinch but Yamazawa moves out of range.
Keen moves into the clinch.
Keen tries a knee to the head but Yamazawa blocks it.
Yamazawa tries to jump guard but he falls flat on his backside. Keen smiles and moves away.
Keen darts in and clinches Yamazawa up against the cage.
Keen wants to break free but Yamazawa has control.
And thats the end of the round the fighters go back to their corners.
Dereck Keen showed his class in that round. I'd imagine he'll take it on all the scorecards.
The referee calls time. The cornermen exit stage left and we're back to business. Ladies and gentlemen, this is the final round!

Yamazawa moves out of range of the body kick from Keen.
Keen tries to shoot in for a takedown. He's got hold of a leg but Yamazawa swivels and escapes.
Keen clobbers Yamazawa with an overhand right that has the crowd gasping. That made a horrendous noise.

It looks like Kazushi Yamazawa has been cut.
Keen tries to shoot in for a takedown. He's got hold of a leg but Yamazawa swivels and escapes.
Yamazawa shoots for a takedown but Keen saw that one coming a mile off and avoided it easily.
Keen shoots in for a takedown. He's persisting with it as Yamazawa sprawls well. Yamazawa wins this battle and keeps the fight standing. Keen gets slowly back to his feet.
Kazushi Yamazawa has stuffed three takedown attempts in the round now. That's going to take a lot out of Dereck Keen.
Keen misses with a takedown

and Yamazawa counters by moving into the clinch.
Yamazawa is looking for a takedown up against the cage. Keen gets underhooks though and prevents the takedown attempt.

Keen breaks from the clinch.
Both fighters are breathing heavily.
That's one minute gone in the round.
Keen fails with a rather predictable takedown attempt.
Yamazawa defends well against a solid takedown attempt from Keen.
Yamazawa gets a takedown into half guard.
Yamazawa lands strikes from half guard.
Yamazawa lands a big shot. The thud that echoes around the arena is like music to the fans' ears.
Yamazawa not landing any meaningful shots this time.
Yamazawa not landing any meaningful shots this time.
That's two minutes gone in the round.
Yamazawa looks to score some points with some ground and pound.
Keen desperately trying to maintain half guard.

Yamazawa is looking for a kimura but he's never going to get it from there.
Yamazawa wants to control but Keen is keeping him busy.
Ground and pound from Yamazawa.
The crowd are loving this. Great action here.
Keen regains full guard. Nicely done.
Yamazawa postures up to throw the ground and pound strikes but they don't connect.
Keen avoiding any damage from the ground and pound.
That's three minutes gone in the round.
Keen manages to land a sweep and now he's in mount on top!
Keen misses with a series of strikes from mount. He'll no doubt be working on his ground and pound when he gets back to the gym.
Yamazawa has been looking to land a fair amount of strikes on the ground. He might be looking to soften his opponent up in order to work for a submission.
Keen goes for an armbar but he's fallen flat on his backside there and now Yamazawa is on top in guard.
Yamazawa landing some decent shots from guard.
Yamazawa throws a big right hand that misses.
That's four minutes gone in the round.
Keen is working the butterfly guard. He manages to land a nice scissor sweep and is now in half guard on the top. Nice move.
Yamazawa tries to kick Keen off but Keen keeps his base steady and stays in half guard.
Keen tries to stand but his hand is stuck under Yamazawa.
Yamazawa is trying to stand back up but Keen is controlling him
As the round comes to an end the crowd are showing their appreciation for a great round of action.
Keen sitting and controlling from the half guard.
And that's the end of the fight!
That was a close round. You could make an argument for either fighter but I would give it to Kazushi Yamazawa.
I think Yamazawa has won this one but let's see what the judges have to say. Over to the ring announcer for the scorecards.
Ladies and gentlemen, after 3 rounds of action, we go to the scorecards for a decision.
Judge John Mangel scores the fight 29:28
Judge Skip Squint scores the fight 29:28
Judge Hugh Johnson scores the fight 29:28
In favor of your winner, by unanimous decision... Kazushi Yamazawa!
Kazushi Yamazawa decided to thank the fans in attendance for making a great atmosphere. It seemed to go down pretty well.
|
|
|
|
|
|
|
|
|
|
|
|
|
|
|
|
|
|
|
|
|
|
|
| S |
C
A |
G |
S |
C
B |
G |
|
S |
C |
G |
|
energy
A | B |
|
hype
A | B |
|
pop
A | B |
|
mgr
A | B |
|
FIGHT
RATING
41% |
|
|
|
|
|
|
