|
|
PBP Commentary |
Coming up we have a lightweight MMA rules bout between Lloyd Butler (ranked 0 p4p, 0 weight class) and Tony Montana (ranked 0 p4p, 0 weight class). Montana has chosen Push it to the Limit as his entrance music. This should be fireworks!
 |
|
 |
| 180 cm
23
159 lbs
3 - 2 - 0 |
|
176 cm
20
163 lbs
2 - 0 - 0 |
BJJ Purple Belt
Solid boxing
Very quick |
|
BJJ Purple Belt
Decent boxing
Good gas tank |
|
| |
|
Ladies and gentlemen. This fight is 2 rounds, in the lightweight division.
Introducing the fighter to my left, fighting out of the red corner.
With a record of
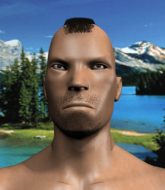
3 - 2 - 0, fighting out of Montreal, Lloyd Butler!
And introducing the fighter to my right, fighting out of the blue corner.
With a record of
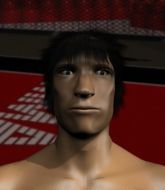
2 - 0 - 0, fighting out of Montreal, Tony Montana!
The judges for this bout are Gregory Folan, Alec Ball and Ian Loll.

The bell rings for round one and we are underway!
Butler looking to throw a kick but he's pulled out of it.
Montana lands with a cross to side of his opponent's head.
Butler missing with a left hand there. Montana was out of range so wasted energy throwing that one.
Decent striking displayed by Montana there.

It looks like Lloyd Butler has been cut.
Montana throws a right and a left that both miss.
Butler scores with a decent looking hook.
Butler misses with a hook. Montana ducked under it nicely.
Butler's jab looks to have found its range, popping Montana under the eye.
Montana misses with a double jab.
Butler lands with a cross to side of his opponent's head.
Montana slips under a jab.
Butler is looking to clinch.
Wow, both these guys are really going for it!
Wooooo! Give it up for these two warriors! They are putting on a show!
Montana looks to score with a combo but nothing lands.
Butler throws a series of punches but Montana avoids them all with ease.
Montana throws a head kick but Butler moves out of range.
Butler misses the shot to the body.
Montana swings for the body but Butler moves out of range.
Butler takes a swing at Montana's ribcage but misses.
Butler works his jab well there, keeping his opponent at a distance.
Montana misses the jab.
Butler throws a head kick but Montana moves out of range.
Butler lands a nice shot to the body.

That's one minute gone in the round.
Montana displays some good footwork, moving neatly out of range as Butler throws out the jab.
Butler loads up on a big right hand but Montana slips the punch.
Butler waving his hands out in front of him, looking to distract Montana.
Montana throws a body punch but Butler moves out of range.
Montana will need to tighten up his combinations if he doesn't want to gas himself out, swinging at thin air.
Montana throws an overhand right that lands on Butler's shoulder, as Butler tries to avoid the shot.
Butler throws a wild combination but nothing lands.
Butler looks to land a combination but Montana avoids it well.
Montana avoids the body shot from Butler.
Butler looks to throw the jab but Montana is out of range.
Montana misses with a double jab.
Montana misses with a two punch combination.
Butler misses with a right hand
and Montana counters with a straight right hand.
Montana looks to score with a jab to the body but Butler is just out of range.
Montana misses with an uppercut. Butler saw that one coming.
Butler misses with a takedown attempt - Montana sprawls well and throws a nice strike on the way out which just misses.
Butler tries to work over Montana's front leg with a kick but Montana checks it.

That's two minutes gone in the round.
Butler scores with a jab. Montana acknowledges it with a nod of the head.
Butler lands with a right hand.
Montana lands a two punch combo.
Wooooo! Give it up for these two warriors! They are putting on a show!
Montana rushes forward with a series of wild hooks but Butler moves out of range and avoids them all easily.
Montana looks to score with a combo but nothing lands.
Montana slips a straight right by Butler.
Montana avoids the head kick by Butler.
Butler misses with a wild body shot.
Butler feints a straight left to the body, then turns around with a flashy move and hits Montanas jaw with a dramatic spinning back fist!
Butler misses with a takedown attempt
and Montana connects with a straight left hand counter down the middle.
Sloppy strikes from Montana. Those never looked like landing.
Montana slips under a jab.
Butler scores with a straight right hand, right through his opponent's guard.
Montana jabbing away but nothing is landing.
Montana scores with a jab to the head.
The crowd cheers as Montana lands an impressive looking overhand right. Butler doesn't seem phased though.

Butler is rocked!
Butler throws the left hand but Montana avoids the punch easily.
Oh Butler is still all over the place! His legs are completely gone! Will he be able to recover?!!
Jab from Butler.

That's three minutes gone in the round.
Butler lands a body shot.
Montana keeps the fight standing with a nice sprawl.
That's three failed takedown attempts in the round for Lloyd Butler. That's going to take a lot out of him.
Montana smiles there as he lands a nice right hand right on the button.
Jab from Montana.
Butler displays some good footwork, moving neatly out of range as Montana throws out the jab.
Butler misses with an uppercut.
A cross from Montana lands.
Montana tries to bum rush Butler with a series of wild strikes but Butler uses good footwork to avoid the assault.
Montana keeping his hands up high there, blocking the jab from Butler.
Tony Montana is looking to keep the fight on the feet at all costs.

Montana drops Butler with a beautiful combination! Butler stares up at his opponent, who ushers him back to his feet - Montana is looking for the KO!
This has been an exciting period of action!

Butler drives through with a takedown into guard.
We must be close to a standup if these guys don't pick up the pace.
Butler tries to free his leg and advance position but Montana is retaining full guard.

Butler has gone for a leg lock! Montana slips out almost immediately though and dives into Butler's guard.
Butler is breathing heavily.
Butler working for a triangle but Montana defends it easily.

That's four minutes gone in the round.
Montana wants to control from the top but Butler keeps moving.
Butler seems to have got his legs back now.
Montana looking to control the position here, rather than advance.
Butler looking to hit a scissor sweep but Montana is one step ahead there.
Butler looking for submissions off his back, moving his hips, looking for an opening.

That's five minutes gone in the round.
Butler has his foot on Montana's thigh. He's trying to push off and get in position for a triangle, I think. Montana works his way back into a safe position though.
Montana wants to control from the top but Butler keeps moving.
Butler has a loose triangle. He'll be looking to tighten that up but Montana can see exactly what he's planning and manages to posture up and free himself.

Montana is trying to work a guillotine from the top, or something like that? Don't know how he thinks he's going to get a finish from there.
Montana trying to control but Butler is working from the bottom.
Montana engaging in some classic timewasting tactics.
Montana trying to pass the guard but can't manage it just yet.
Butler looking to hit a scissor sweep but Montana is one step ahead there.

That's six minutes gone in the round.
Montana tries to free his leg and advance position but Butler is retaining full guard.
Butler lands a beautiful switch and he's in full mount! That could spell trouble for Montana!
Butler goes for an armbar but he's fallen flat on his backside there and now Montana is on top in guard.
Montana pushes down on Butler's leg and manages to get into half guard.
Butler blocking the ground and pound attempt from Montana.
Wooooo! Give it up for these two warriors! They are putting on a show!
Montana looking for a kimura but he'll have to free his other leg if he wants to finish that. Perhaps he's just using it as a distraction technique.
Montana is trying to control the action in half guard but Butler is working away on the bottom, looking perhaps to get back to full guard.

That's seven minutes gone in the round.
Montana missing with the ground and pound from half guard.
Butler is trying to get back to full guard.
Butler actively working from the bottom here.
Montana is looking to take a break and control but Butler is keeping him honest, looking to work from the bottom.
Montana might have to switch it up a bit here because his efforts to control Butler kaven't been going to plan, at least at the current moment in time.
Butler is trying to get back to full guard.
Montana thows a huge punch but Butler dodges it nicely.
Montana throwing shots but Butler is blocking nicely.
Montana is trying to control the action in half guard but Butler is working away on the bottom, looking perhaps to get back to full guard.

That's eight minutes gone in the round.
Butler looking to work for a kimura from the bottom.
Butler is looking for a sweep. Montana is wise to his cunning plan and keeps the top position.
Montana trying to mount his opponent but Butler defends it.
The fighters are battling for position here. Butler manages to regain full guard. Nice work.
Butler looking for submissions off his back, moving his hips, looking for an opening.
Montana trying to control but Butler is working from the bottom.
Butler manages to land a sweep and now he's in mount on top!
Wooooo! Give it up for these two warriors! They are putting on a show!
Montana is looking to improve his position but Butler isn't that keen on the idea.
Montana regains half guard.

That's nine minutes gone in the round.
Montana wants to control but Butler is keeping busy.
Montana works his way to full guard. Good work.
Montana manages to land a sweep and now he's in mount on top!
Butler is desperately trying to improve his position but Montana has a good base and remains in mount.
Butler holding onto his opponent's waist for dear life, as Montana tries to land some strikes to get him to release his grip.
Montana working for a guillotine from mount but Butler is in no mood to give up.
The crowd are going absolutely nuts as the round comes to an end - what a fantastic round of action!
Montana can't quite control the action as he would like just now, as Butler is looking to escape.
And thats the end of the round the fighters go back to their corners.
Tony Montana dominated that round.
The cut man is working on Lloyd Butler's cut.
OK. That's time! The bell goes and we're back to the action. This is the final round!

Montana lands a jab, followed by a cross and another cross, as Butler backs up against the ropes.
Butler scores with a nice takedown into half guard. Let's see what he's got on the ground.
Montana gets full guard.
The fighters are trapped in the ropes so we're going to have a reposition here. The ref calls for a break and repositions the fighters in the center of the ring.
Montana is working the butterfly guard. He manages to land a nice scissor sweep and is now in half guard on the top. Nice move.
Montana wants to control but Butler is keeping him busy.
Butler is looking to sinch up a guillotine here but Montana pulls his head out easily.
Montana wants to pass the guard but Butler is defending well.
Butler looking for submissions from an awkward position here.
This has been an exciting period of action!
Butler trying to hold on to Montana's head to control him but Montana postures up.
Butler is looking to improve his position.
Both fighters are absolutely exhausted here.
That's one minute gone in the round.
Butler actively working from the bottom here.
Montana performing his best blanket impression for a moment.
Montana moves into full mount! Butler won't be happy about that!
Butler prevents Montana from taking his back.
Butler working to try and regain half guard.
Montana looking for an armbar but decides to keep the dominant position instead.
That's two minutes gone in the round.
Butler is in all sorts of trouble here.
Butler is working hard here to advance position.
Montana working for a guillotine from mount but Butler is in no mood to give up.
Montana trying to control but Butler is having none of it.
Montana working from mount. He moves in close and looks like he might be going for an arm triangle... He's hopped off to the side and he's transitioned into an Anaconda choke. Butler turning a nasty shade of purple. He's refusing to tap but he's gone! He's out! The ref rips Montana off and cradles Butler's limp body as Montana celebrates with his corner.
Ladies and gentlemen, after 3:59 of round 2, we have a winner by way of Submission (Anaconda Choke). Tony Montana!
Tony Montana really struggled to get his t-shirt on before his hand was raised. Making sure that Vitality logo gets some air time is pretty tricky when you're all sweaty.
|
|
|
|
|
|
|
|
|
|
|
|
|
|
|
|
|
|
|
|
|
|
|
| S |
C
A |
G |
S |
C
B |
G |
|
S |
C |
G |
|
energy
A | B |
|
hype
A | B |
|
pop
A | B |
|
mgr
A | B |
|
FIGHT
RATING
100% |
|
|
|
|
|
|

