|
|
PBP Commentary |
Coming up we have a bantamweight MMA rules bout between Bestial Rage (ranked 0 p4p, 0 weight class) and Tsutomu Miyazaki (ranked 0 p4p, 0 weight class). Tsutomu Miyazaki acknowledges the crowd's support as he enters the cage.
 |
|
 |
| 165 cm
25
145 lbs
0 - 1 - 0 |
|
165 cm
18
140 lbs
2 - 0 - 0 |
BJJ White Belt
Excellent boxer
Cuts easily |
|
Good wrestler
Counter fighter
Granite chin |
|
| |
|
Ladies and gentlemen. This fight is 3 rounds, in the bantamweight division.
Introducing the fighter to my left, fighting out of the red corner.
With a record of
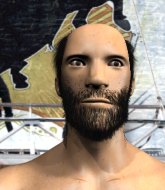
0 - 1 - 0, fighting out of Helsinki, Bestial Rage!
And introducing the fighter to my right, fighting out of the blue corner.
With a record of
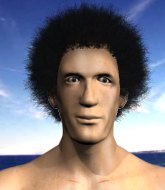
2 - 0 - 0, fighting out of Helsinki, Tsutomu Miyazaki!
The judges for this bout are Anni Minnemäki, Johanna Lukiainen and Marco Blurström.

The bell rings for round one and we are underway!
Rage moves in looking to clinch but Miyazaki pushes him off.
Miyazaki staying out of range there.

Miyazaki looking for a takedown here - he's got it.
Miyazaki throwing elbows and punches but not connecting, as Rage works some decent striking defense from the bottom.
Miyazaki is sitting in guard, working some ground and pound.
Miyazaki throwing strikes from guard but Rage blocks nicely.
Rage utilising some decent striking defenses from the guard, preventing the ground and pound.
Miyazaki is working Rage over from the guard. He should look to pass the guard and do a little more damage with these strikes.
Miyazaki trying to pass the guard but can't manage it just yet.
Rage is working from a closed guard but he's struggling to control his opponent.
Miyazaki chips away with some ground and pound.
Rage wants to get back to his feet but Miyazaki is in a dominant position and won't allow it.

That's one minute gone in the round.
Miyazaki postures up to throw the ground and pound strikes but they don't connect.
A big thud reverberates around the arena there as Miyazaki accidentally thumps the mat. Hopefully he's not broken his hand.
Miyazaki postures up and lands some nice ground and pound.
Miyazaki with a flurry of punches that miss.
Miyazaki stands up over Rage, holding his feet. He dives back in and lands a decent shot to the head.
Miyazaki is looking to work some ground and pound but Rage has wrist control.
Miyazaki landing some decent shots from guard.
Miyazaki working some ground and pound from guard but it's not doing any damage.
Miyazaki works a leg free and moves into half guard.
Nice strikes from Miyazaki there.

That's two minutes gone in the round.
The two fighters exchange a few words. I couldn't hear what they were saying but maybe it's more fun if you make it up yourself. Miyazaki connects with a nice short shot to Rage's temple.
Miyazaki missing with the ground and pound from half guard.
The crowd are loving this. Great action here.
Miyazaki winds up and cracks Rage with a swinging punch to the side of the head.
The referee walks around the fighters to get a better view of the action. Miyazaki lands a nice short elbow.
Miyazaki throwing punches and elbows but they're not doing any damage.
Miyazaki thows a huge punch but Rage dodges it nicely.
Miyazaki slips a nice elbow through Rage's hands, connecting with Rage's forehead.
Miyazaki not landing any meaningful shots this time.
The ref warns both fighters not to hold the cage as they work up against the meshing.
Rage is breathing heavily.
Miyazaki takes advantage of the dominant position to land a couple of big hammer fists.
Miyazaki throwing shots but they're hitting the canvas more than the man.
Miyazaki sitting in half guard, looking to land shots. Rage defending well though.
Miyazaki throwing punches and elbows but they're not doing any damage.

That's three minutes gone in the round.
Rage avoiding damage under a succession of punches from Miyazaki.
Miyazaki is trying to control the action in half guard but Rage is working away on the bottom, looking perhaps to get back to full guard.
Miyazaki slips a nice elbow through Rage's hands, connecting with Rage's forehead.
Rage avoiding damage under a succession of punches from Miyazaki.
Rage on his back here. We all know that wrestlers don't like being on their back so let's see if Rage tries to get out of the position.
Miyazaki throwing shots but they're hitting the canvas more than the man.
The referee walks around the fighters to get a better view of the action. Miyazaki lands a nice short elbow.
Miyazaki thows a huge punch but Rage dodges it nicely.
Miyazaki thows a huge punch but Rage dodges it nicely.
Ground and pound from Miyazaki.
Rage on the receiving end of some nice ground and pound.
Miyazaki missing with the ground and pound from half guard.
Miyazaki lands with a punch from half guard.

That's four minutes gone in the round.
Miyazaki takes advantage of the dominant position to land a couple of big hammer fists.
Rage knows he needs to get back to his feet asap. He's simply no match for Miyazaki on the ground.
The crowd are loving this. Great action here.
The two fighters exchange a few words. I couldn't hear what they were saying but maybe it's more fun if you make it up yourself. Miyazaki connects with a nice short shot to Rage's temple.
Miyazaki works his way into full mount!
Miyazaki dominating with strikes here.
Miyazaki breaks from Rage's wrist control and lands an elbow.
Miyazaki scores with a couple of good head shots there.
Miyazaki is still in mount, landing shots to his trapped opponent. Rage can't stay in a position like this for much longer.
The crowd are going absolutely nuts as the round comes to an end - what a fantastic round of action!
Miyazaki lands a couple of nice shots there from mount.
Miyazaki lands a big shot there that rocks Rage but he's holding on and managing to survive for now.

Rage is rocked!
Miyazaki lands a nice shot to the head.
And thats the end of the round the fighters go back to their corners.
Tsutomu Miyazaki dominated that round.
OK. That's time! The bell goes and we're back to the action.

Rage is moving around nicely and scores here with a single head shot.
Miyazaki shoots in for a takedown. "I don't think so" says Rage as he avoids it easily.
Good standup being displayed there by Rage as he connects with a hook.
Rage leaves Miyazaki with his face pressed against the mat as he sprawls beautifully, defending against a solid takedown attempt.

Rage rushes Miyazaki and pushes him back against the cage in a clinch.
Rage lands a right hand that snaps the head of Miyazaki backwards.
Miyazaki blocks a couple of punches on the inside.
A short uppercut from Rage.
Rage has Miyazaki pressed against the cage.
A quick uppercut on the inside from Rage.
Rage stalling here - the referee won't stand for too much of that.
That's one minute gone in the round.
Rage lands a nice uppercut.
Rage lands with a right to the head.
Miyazaki blocks a punch to the side of the head.
A short uppercut from Rage.
Rage gets underhooks to prevent Miyazaki's takedown attempt.
Bestial Rage has stuffed three takedown attempts in the round now. That's going to take a lot out of Tsutomu Miyazaki.
Rage lands a hook that snaps the head of Miyazaki backwards.
Rage lands on the inside with an uppercut.
Rage working hard to break the clinch.
Rage works on Miyazaki's body with a couple of short punches.
Miyazaki is trying to work for a single leg takedown but Rage pulls him back up using the underhooks.
Rage softening up his opponent with strikes, against the cage.
A quick uppercut on the inside from Rage.
That's two minutes gone in the round.
Rage works for underhooks and lands a body shot in the process.
Rage gets double underhooks to prevent a takedown attempt from Miyazaki.
Rage is looking to break free of the clinch but Miyazaki has double underhooks.
Rage has had enough of the clinch and is looking to separate.
Rage gets through Miyazaki's defenses to land a nice punch to the side of the head.
The fans in attendance giving it up for the two fighters, who have really let it all hang out in the last minute or so!
Rage pushes Miyazaki back against the cage and lands a hook to the side of the head.
Rage tries a shoulder strike but it doesn't do any damage.
Rage misses with some punches.

Rage breaks the clinch and we're back to striking at distance.
That's three minutes gone in the round.
Miyazaki shoots in with a takedown attempt and he has Rage pinned against the cage. Rage gets the underhooks and manages to circle away.
Rage leaves Miyazaki with his face pressed against the mat as he sprawls beautifully, defending against a solid takedown attempt.
Miyazaki shoots for a takedown but Rage saw that one coming a mile off and avoided it easily.
Rage comes forward and lands a shot to the body, then darts back out of range.
Bestial Rage is looking to keep the fight on the feet at all costs.
Rage with a body punch. A glancing blow.
Miyazaki gets the takedown into side control.
Miyazaki throws a knee to the body but it doesn't do much damage.
Miyazaki in side control lands a decent elbow.
Miyazaki throws a strike aimed at the side of Rage's head but Rage avoids it well.
Miyazaki scores with a couple of short elbows.
That's four minutes gone in the round.
Miyazaki scores with a couple of short elbows.
The fans in attendance giving it up for the two fighters, who have really let it all hang out in the last minute or so!
Miyazaki lands a few punches from side control.
The fighters are pressed up against the cage, both looking to find a bit of space to work.
Rage is trying to stand back up. He's worked his way up against the cage but Miyazaki has just dragged him back down to the mat.
Tsutomu Miyazaki has got the better of the ground game so far.
Both fighters are absolutely exhausted here.
Miyazaki landing strikes.
Miyazaki postures up a little and throws a couple of hammerfists but they don't connect properly.
Miyazaki creates some space and throws a big elbow, but Rage sees it coming and moves his head just enough to avoid the strike.
Miyazaki cracks Rage with a big right hand but Rage just smiles back at him and invites him to have another go.
Miyazaki throws a strike aimed at the side of Rage's head but Rage avoids it well.
As the round comes to an end the crowd are showing their appreciation for a great round of action.
Rage can't do much from the bottom here.
Miyazaki creates some space and throws a big elbow, but Rage sees it coming and moves his head just enough to avoid the strike.
And thats the end of the round the fighters go back to their corners.
That was a close second round but I would say that Bestial Rage will probably get the nod.
OK. That's time! The bell goes and we're back to the action. And we move into the final round!

Rage defends well against a solid takedown attempt from Miyazaki.
A looping hook to the body misses from Rage. Miyazaki does a little dance to reset his feet.
Rage throws a hook but Miyazaki avoids it easily.
Bestial Rage seems to be the more aggressive standup fighter in this bout.
Rage connects with a lovely right hand, straight down the pipe.
Rage throws a hook but Miyazaki avoids it easily.
Miyazaki shoots in for a takedown. "Ole!" shouts Rage as he jumps to the side.
Rage connects with a right hand. Miyazaki shakes it off.
Rage stuffs a takedown. It's all about dictating where the fight takes place and Rage wants it to stay on the feet.
Bestial Rage has stuffed three takedown attempts in the round now. That's going to take a lot out of Tsutomu Miyazaki.
Rage scores with a nice looking left hook and follows it up with an uppercut!
Rage throws a nice looking combination but Miyazaki bobs and weaves to avoid any damage.
Miyazaki steps to the side to avoid the strikes from Rage.
Rage fails to land with a series of punches.
Both fighters are breathing heavily.
Miyazaki shoots in for a takedown but Rage shows good takedown defense.
That's one minute gone in the round.
Rage leaves Miyazaki with his face pressed against the mat as he sprawls beautifully, defending against a solid takedown attempt.
Rage displays good takedown defense there as he swats away a double leg from Miyazaki.
Miyazaki shoots in for a takedown but Rage shows good takedown defense there and keeps this one on the feet.
Miyazaki dodges the punch combination from Rage.
Miyazaki fails with the takedown.
Miyazaki shoots in but Rage avoids the takedown attempt easily.
Rage scores with a punch to the head.
That's two minutes gone in the round.
Rage keeps the fight standing with a nice sprawl.
Rage lands a jab-cross combination.
Miyazaki shoots in for a takedown. "I don't think so" says Rage as he avoids it easily.
Rage lands a pitter patter jab to the forehead of his opponent.
Nice sprawl there from Rage as Miyazaki shoots in.
Miyazaki shoots in looking for a takedown. Rage tries to sprawl out of it but Miyazaki keeps driving through. The fighters are pinned against the cage. Rage manages to get underhooks and after a bit of a struggle, circles away and we're back to standing.
Rage is looking to land body kicks.
Rage wants to clinch up but Miyazaki keeps it at a distance.
Left hook, right uppercut from Rage.
Bestial Rage is winning the standup battle so far.
Fantastic stuff here - a very entertaining period of action, which has drawn cheers from the crowd.
Rage lands a vicious shot with the stealth of a sniper and the strength of a viper. Are vipers that strong? I can think of lots of things that are stronger than a viper - not many rhyme with sniper though.
That's three minutes gone in the round.
Miyazaki closes this distance looking for a takedown but Rage circles away.
Rage tries to clinch there but Miyazaki circles away.
Rage connects with a nice looking jab.
Rage tries to close the distance and clinch up but Miyazaki swats him away and circles back towards the center.
Rage lands with a cross.
The crowd cheers as Rage lands an impressive looking overhand right. Miyazaki doesn't seem phased though.
Miyazaki misses with a takedown attempt - Rage sprawls well and throws a nice strike on the way out which just misses.
Miyazaki gets cracked with a nice right hand there by Rage.
Miyazaki avoids a punch combination nicely.
Miyazaki looks for a takedown here. Will he get it? Rage is fending him off so far but Miyazaki persists. Nope, Rage circles away and we're back to standing.
Rage is really head hunting here, hardly looking to strike to the body at all.
That's four minutes gone in the round.
Rage digs a good hook to Miyazaki's body.
Miyazaki shoots in looking for a takedown but Rage manages to keep the fight standing, pushing Miyazaki's face into the canvas for good measure before circling away.
Rage throws a monster uppercut resembling something out of street fighter but it doesn't land.
Rage lands a slapping body shot.
Miyazaki closes this distance looking for a takedown but Rage circles away.
Rage listening to his corner there, landing a nice uppercut.
Rage fakes a head punch and goes low to the body. Nicely done.
Rage scores with a nice strike.
This is a great period of action - very entertaining stuff!
Miyazaki gets his head snapped back by a nice shot there.
As the round comes to an end the crowd are showing their appreciation for a great round of action.
Miyazaki walks into a jab.
Nice shot lands for Rage.
And that's the end of the fight!
Bestial Rage showed his dominance in that final round.
I think Rage has won this one but let's see what the judges have to say. Over to the ring announcer for the scorecards.
Ladies and gentlemen, after 3 rounds of action, we go to the scorecards for a decision.
Judge Anni Minnemäki scores the fight 28:28
Judge Johanna Lukiainen scores the fight 28:28
Judge Marco Blurström scores the fight 28:28
The fight is ruled a draw!
|
|
|
|
|
|
|
|
|
|
|
|
|
|
|
|
|
|
|
|
|
|
|
| S |
C
A |
G |
S |
C
B |
G |
|
S |
C |
G |
|
energy
A | B |
|
hype
A | B |
|
pop
A | B |
|
mgr
A | B |
|
FIGHT
RATING
87% |
|
|
|
|
|
|
