|
|
PBP Commentary |
Coming up we have a lightweight MMA rules bout between James Madness (ranked 0 p4p, 0 weight class) and Tim Riggins (ranked 0 p4p, 0 weight class). Madness comes to the ring accompanied by SHOWDOWN . Buckle up people - heeeeeeeeeere we go!
 |
|
 |
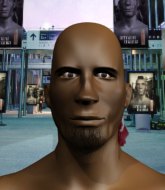
| 190 cm
23
155 lbs
6 - 4 - 0 |
|
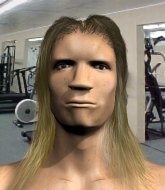
180 cm
25
163 lbs
3 - 5 - 0 |
Powerful takedowns
Basic striking
Very strong |
|
Good wrestler
Decent boxing
Solid chin |
|
| |
|
Ladies and gentlemen. This fight is 2 rounds, in the lightweight division.
Introducing the fighter to my left, fighting out of the red corner.
With a record of
6 - 4 - 0, fighting out of Hilo, James Madness!
And introducing the fighter to my right, fighting out of the blue corner.
With a record of
3 - 5 - 0, fighting out of Hilo, Tim Riggins!
The judges for this bout are Roger Salmon, Paul Gruel and Jeff Smith.

The bell rings for round one and we are underway!
Riggins tries to bum rush Madness with a series of wild strikes but Madness uses good footwork to avoid the assault.
A punch combination from Riggins misses.
Riggins misses with a wild combination.
Madness pivots as if he's going to throw a leg kick but stops half way.
Madness throws a nice looking combination but Riggins bobs and weaves to avoid any damage.
Madness shoots in and drives through. Riggins sprawls well.
Riggins throws a hook but Madness blocks it.
No luck with that takedown attempt from Madness.
Madness steps to the side to avoid the strikes from Riggins.
Riggins just misses with a punch to the body.
Madness looks for a takedown here. Will he get it? Riggins is fending him off so far but Madness persists. Nope, Riggins circles away and we're back to standing.
That's three failed takedown attempts in the round for James Madness. That's going to take a lot out of him.
Riggins stuffs the takedown.
Madness needs to keep his hands up - Riggins had a free shot at his head there.
Madness defending well as Riggins loads up on a big left hand.
Madness wants to clinch.
Madness keeping a good distance there, avoiding the body shot.
Riggins rushes forward with a series of wild hooks but Madness moves out of range and avoids them all easily.
Riggins stuffs the takedown.

That's one minute gone in the round.
Riggins throws a combination but comes up with nothing but fresh air.
Nice shot lands for Riggins.
Riggins throws a nice looking combination but Madness bobs and weaves to avoid any damage.
Madness shoots for a takedown but Riggins saw that one coming a mile off and avoided it easily.
Riggins lands a glancing blow to the side of Madness's head.
Wow, both these guys are really going for it!

Madness throws a loose over hand right and dives in with a double leg takedown. Riggins tries to sprawl but it's too late and the fighters hit the mat. Madness is in Riggins's guard.

Riggins scrambles and gets back to his feet.
Riggins throws a right hand that Madness ducks under and follows up with a left that Madness also avoids with ease.
Madness closes the distance and looks for a trip takedown... aaaand he's got it - Madness lands in his opponent's guard.
This has been an exciting period of action!

Madness is trying to work a guillotine from the top, or something like that? Don't know how he thinks he's going to get a finish from there.
Riggins is trying to stand up but he's not managed so far.
Madness is trying to work a guillotine from the top, or something like that? Don't know how he thinks he's going to get a finish from there.
Riggins keeping full guard, as Madness tries to pass.

That's two minutes gone in the round.
The fighters are trapped in the ropes so we're going to have a reposition here. The ref calls for a break and repositions the fighters in the center of the ring.
Madness won't allow Riggins to get back to his feet.
Madness wants to pass the guard but Riggins is keeping the position.
Madness is trying to work a guillotine from the top, or something like that? Don't know how he thinks he's going to get a finish from there.
Madness pushing down on Riggins's thigh, trying to pass to half guard. He's managed it... Nice work.
Riggins is trying to stand back up but Madness is controlling him
Madness trying to pass the guard but Riggins defending well.
Madness is working for a kimura but Riggins is defending it quite comfortably.
Riggins wants to get back to his feet.

That's three minutes gone in the round.
Madness looking for a kimura but he'll have to free his other leg if he wants to finish that. Perhaps he's just using it as a distraction technique.
Riggins wants to get back to his feet.
Riggins pushes Madness off and gets back to his feet.
Riggins misses with a wild combination.
Madness shoots for a takedown but Riggins saw that one coming a mile off and avoided it easily.
Riggins clobbers Madness with an overhand right that has the crowd gasping. That made a horrendous noise.
Madness avoids a punch combination nicely.
Riggins moves out of range as Madness throws a body kick.

That's four minutes gone in the round.
Madness fails with a takedown attempt.
Madness throws a wild combination but nothing lands.
Riggins scores with a jab to the jaw of his opponent.
Riggins works over Madness's head and body with a nice combination.
This has been an exciting period of action!
Riggins throws a wild combination but nothing lands.
Riggins tries to sprawl but Madness drives through with a takedown into half guard.
Madness wants to work for an arm triangle but Riggins is really keeping half guard well and defending the submission attempt.
Madness is working for submissions here but there's nothing on.
Madness is breathing heavily.
Madness is looking for a kimura here.
Riggins kicks off Madness and gets to his feet.
A punch combination from Riggins misses.
Riggins looks to land a combination but Madness avoids it well.

That's five minutes gone in the round.
Riggins swings for the body but Madness moves out of range.
Riggins throws a hook to the side of Madness's head but Madness sees it coming and ducks under it beautifully.
Riggins misses with a few strikes there.
Madness shoots in but no luck this time.
Riggins swings and misses with a hook to the body.
Riggins steps to the side to avoid the strikes from Madness.
Riggins throws a combination but comes up with nothing but fresh air.
Riggins throws a body punch but Madness moves out of range.
Riggins avoids the body shot from Madness.
Tim Riggins seems to be the more aggressive standup fighter in this bout.
Riggins thows a body shot but no joy.
Riggins throws a combination but comes up with nothing but fresh air.
Madness fails with a takedown attempt.
Madness shoots in and drives through. Riggins sprawls well.
Madness shoots in for a takedown but doesn't get it.
Riggins scores with a nice strike.
Madness slips a jab from Riggins.
Riggins misses with a double jab.

That's six minutes gone in the round.
Riggins throws a hook to the body but it doesn't connect.
Madness changes levels and looks for a double leg takedown. Riggins tries to avoid it but Madness manages to keep hold of a leg and drag Riggins to the ground. Riggins escapes though and pops straight back up to his feet.
Madness takes a punch right to his stomach. That took the wind out of him momentarily.
Riggins looks to score with a combo but nothing lands.
Madness slips under a jab from Riggins.
Riggins misses the shot to the body.
This is a great period of action - very entertaining stuff!
Riggins stuffs the takedown attempt from Madness. Madness gets slowly back to his feet.
Riggins thows a body shot but no joy.
Riggins misses with a few strikes there.
Riggins moves out of range of the leg kick from Madness.
Nice takedown defense from Riggins. No joy for Madness on that attempt.
Madness really does look like a pencil wearing a pair of gloves. Let's hope he has a gameplan to suit that ridiculous body shape.
Riggins leaves Madness with his face pressed against the mat as he sprawls beautifully, defending against a solid takedown attempt.
Riggins slaps away a takedown attempt from Madness, before circling back to the center of the mat.
Madness misses with an uppercut.
Riggins lands with a right hand.

That's seven minutes gone in the round.
Riggins fails to land with a series of punches.
Madness has a takedown stuffed.
Some wild striking there from Riggins.
Riggins rushes forward with a series of wild hooks but Madness moves out of range and avoids them all easily.
Riggins leaves Madness with his face pressed against the mat as he sprawls beautifully, defending against a solid takedown attempt.
Madness throws a hook to the body but it doesn't connect.
No joy there for Riggins, who threw a few shots but didn't land.
Riggins lands with an overhand left.
Riggins rushes forward with a series of wild hooks but Madness moves out of range and avoids them all easily.
Riggins throws a nice looking combination but Madness bobs and weaves to avoid any damage.
Madness moves out of range as Riggins strikes.
Madness misses with a double jab.
Madness looking to score a takedown here. Riggins is defending well but Madness drives through and ends up in Riggins's guard.
Madness looking to pass the guard.

That's eight minutes gone in the round.
Madness forces his way into half guard.
Riggins tries to kick Madness off but Madness keeps his base steady and stays in half guard.
This has been an exciting period of action!
Madness is trying a forearm choke
I don't think that's going to do much at this level of the game.
Madness wants to work for an arm triangle but Riggins is really keeping half guard well and defending the submission attempt.
Riggins pushes Madness off looking to stand but Madness dives back in and keeps control.
Riggins tries to push off, looking to stand up, but Madness manages to move to mount!
Riggins is looking to get back to his feet - it's going to be hard from this position.

That's nine minutes gone in the round.
Madness looks like he's working for a submission but he's not found anything just yet.
Both fighters really going for it on the ground here!
Madness wants to take his opponent's back but he's not managed it.
Madness is working for a guillotine from mount but Riggins frees his head quite easily.
Riggins is trying to stand up.
Riggins somehow manages to escape the mount and get back to his feet!
The crowd are going absolutely nuts as the round comes to an end - what a fantastic round of action!
Madness tries to score a power double leg takedown but Riggins sees that one coming and sprawls well. That will dishearten Madness somewhat.
Riggins takes one on the chin but keeps coming.
And thats the end of the round the fighters go back to their corners.
A close round but Tim Riggins will probably get the nod.
The referee calls time. The cornermen exit stage left and we're back to business. And we move into the final round!

Riggins throws a lazy right hand but Madness sees it coming a mile off and sidesteps it easily.
Madness uses decent footwork to sidestep a right hand from Riggins.
Riggins swings for the body but Madness moves out of range.
Madness shoots for a double leg takedown but Riggins sprawls well. He's pushed Madness's face into the mat and manages to get back to his feet relatively easily.
Madness feints and as Riggins raises his hands in defense, Madness changes levels and drives through with a takedown into guard.
Madness advances position into side control!
Madness tries for a kimura but Riggins is defending well.
Riggins wants to escape from the position here - easier said than done!
Madness tries to move into full mount but can't pass Riggins's legs.
Riggins is trying to escape and get back to his feet.
That's one minute gone in the round.
Madness is trying to land an Americana. He has the arm isolated but Riggins is keeping cool and he's avoided the danger for now.
Both fighters are absolutely exhausted here.
Riggins explodes and escapes back to his feet! Nice escape there!
Riggins displays good takedown defense there as he swats away a double leg from Madness.
Madness misses with a looping left.
Madness gets cracked there but stands up to it.
Riggins misses with a few strikes there.
Riggins fails to land with a series of punches.
Sloppy strikes from Madness. Those never looked like landing.
Riggins rushes forward with a series of wild hooks but Madness moves out of range and avoids them all easily.
Madness misses with a few strikes there.
A punch combination from Riggins misses.
Madness swings for the body but Riggins moves out of range.
That's two minutes gone in the round.
Madness manages to get an easy takedown there - catching Riggins on his heels. He'll look to pass Riggins's guard now, I'm sure.
Riggins wants to stand but Madness is controlling the position.
We've seen a great period of action over the last minute or so - credit to both fighters for going all out!
Madness drops back looking for a leg! Riggins is in trouble here! The fighters roll with the hold and Riggins manages to kick Madness off! Madness jumps back into Riggins's guard.
Madness pushing down on Riggins's thigh, trying to pass to half guard. He's managed it... Nice work.
James Madness overall seems to be getting the better of the ground position in the fight so far.
Madness prevents Riggins from standing back up.
Madness is looking for a kimura here.
Riggins is trying to stand up here but Madness is controlling him well.
Madness is looking for a kimura but Riggins is holding onto that half guard position, so it's hard for Madness to get the leverage.
Riggins tries to kick Madness off but Madness keeps his base steady and stays in half guard.
That's three minutes gone in the round.
The fighters are tangled up in the ropes here. We might need a restart if the fighters can't break free themselves.
Madness is trying a forearm choke
I don't think that's going to do much at this level of the game.
Madness seems to be looking for submissions.
Riggins is trying to stand up here but Madness is controlling him well.
Madness trying to mount his opponent but Riggins defends it.
Riggins is trying to stand.
Madness is trying for a kimura here. Riggins looks like he's in a lot of pain... and he's tapping out! Madness wins by kimura!
Ladies and gentlemen, after 4:59 of round 2, we have a winner by way of Submission (Kimura). James Madness!
James Madness really struggled to get his t-shirt on before his hand was raised. Making sure that Pirates Powder logo gets some air time is pretty tricky when you're all sweaty.
|
|
|
|
|
|
|
|
|
|
|
|
|
|
|
|
|
|
|
|
|
|
|
| S |
C
A |
G |
S |
C
B |
G |
|
S |
C |
G |
|
energy
A | B |
|
hype
A | B |
|
pop
A | B |
|
mgr
A | B |
|
FIGHT
RATING
95% |
|
|
|
|
|
|
