|
|
PBP Commentary |
Coming up we have a featherweight MMA rules bout between Timmy Crain (ranked 0 p4p, 0 weight class) and Alistair Pearson (ranked 0 p4p, 0 weight class). Timmy Crain has the edge in experience - let's see if he can make that count tonight.
 |
|
 |
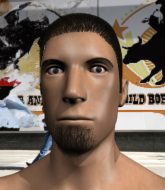
| 185 cm
18
145 lbs
3 - 2 - 0 |
|
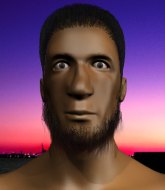
171 cm
20
150 lbs
1 - 3 - 0 |
BJJ Blue Belt
Counter fighter
Cuts easily |
|
BJJ Blue Belt
Solid Muay Thai
Solid chin |
|
| |
|
Ladies and gentlemen. This fight is 3 rounds, in the featherweight division.
Introducing the fighter to my left, fighting out of the red corner.
With a record of
3 - 2 - 0, fighting out of Amsterdam, Timmy Crain!
And introducing the fighter to my right, fighting out of the blue corner.
With a record of
1 - 3 - 0, fighting out of Amsterdam, Alistair Pearson!
The judges for this bout are Aafke Stam, Daniel Blasius and Radbod Blank.

The bell rings for round one and we are underway!
Crain misses with an uppercut. Pearson saw that one coming.
Crain closes this distance looking for a takedown but Pearson circles away.
Crain shoots in for a takedown but Pearson shows good takedown defense.
Crain dives in and grabs Pearson's left leg, looking for a takedown. Pearson pushes down on Crain's head and hops out.
That's three failed takedown attempts in the round for Timmy Crain. That's going to take a lot out of him.
Crain shoots in for a takedown. "Ole!" shouts Pearson as he jumps to the side.
Crain shoots in and drives through. Pearson sprawls well.
Pearson stuffs the takedown.
Crain throws a wild combination but nothing lands.

Pearson clinches up with Crain and pushes him back against the cage.
Crain swings away with an uppercut that misses.

Pearson manages to break the clinch.
Pearson tries to clinch up.

That's one minute gone in the round.
Crain misses with a takedown attempt - Pearson sprawls well and throws a nice strike on the way out which just misses.
Crain fails miserably with a takedown attempt.
Pearson forces Crain back against the cage and clinches.
With the fighters clinched against the cage, Pearson creates a bit of distance for himself and scores with a nice uppercut.
Pearson connects with a nasty looking knee right to Crain's face.
Pearson stalls.

Crain escapes the clinch and we're back to striking.
Pearson moves into the clinch.

That's two minutes gone in the round.
Pearson is working for a takedown up against the cage. He can't get it on this occasion though.
Crain tries to work over Pearson's body with a swooping hook but it only glances the target.
Crain wants to break free. God knows he wants to breaaaak freeee.
Crain wants to break free but Pearson has control.
Pearson has hold of a leg and is looking for a trip takedown. Crain avoids it nicely though and we remain in the clinch.
Crain really does look like a pencil wearing a pair of gloves. Let's hope he has a gameplan to suit that ridiculous body shape.
Pearson controlling the action here for a moment.
Pearson looks winded!
Crain looks like he'd prefer to be striking at range right now.
Pearson misses with a knee to the head.
Crain misses with a shot to the kidneys.
Crain is trying to break the clinch but Pearson is controlling him.
Crain is trying to break free.
Crain has had enough of the clinch and is looking to separate.
Pearson misses with a knee to the head.

That's three minutes gone in the round.
Pearson blocks a punch to the side of the head.
Crain has had enough of the clinch but Pearson keeps him there for the moment.
Crain tries to land a shot to the body but it's blocked.
Crain can't find room to land a body shot as Pearson controls the action.
Crain breaks the clinch and we're back to striking at distance.
Crain smiles there as he lands a nice right hand right on the button.
Pearson displays good takedown defense there as he swats away a double leg from Crain.
Pearson tries to clinch but Crain moves out of range.
Pearson tries to clinch up.
Crain fails with a takedown attempt from distance.
Pearson closes the distance but Crain moves to the side
and Crain counters with a nice body shot.

That's four minutes gone in the round.
Crain shoots for a double leg takedown but Pearson sprawls well. He's pushed Crain's face into the mat and manages to get back to his feet relatively easily.
Crain dives in and grabs Pearson's left leg, looking for a takedown. Pearson pushes down on Crain's head and hops out.
Crain connects with a lovely right hand, straight down the pipe.
Pearson misses with a double jab.
Crain shoots in for a takedown. "Ole!" shouts Pearson as he jumps to the side.
No luck with that takedown attempt from Crain.
The fans in attendance giving it up for the two fighters, who have really let it all hang out in the last minute or so!
As the round comes to an end the crowd are showing their appreciation for a great round of action.
Pearson fails in his attempt to clinch.
Crain fakes high and swings low for a body shot but Pearson manages to avoid it.
And thats the end of the round the fighters go back to their corners.
That was a close round but I would say that Timmy Crain will probably get the nod.
Well, the break between rounds is over. Let's get back to the scrappin!

Crain thows a body shot but no joy.
A big right from Crain misses.
Crain misses with a right hand
and Pearson counters into the clinch. Nicely done.
Crain stalling here - the referee won't stand for too much of that.
The pace slowing considerably in the clinch, as Pearson takes a break from that fighting nonsense to think about the finer things in life.
Crain misses with a punch on the inside.
Crain wants to push off and get back to the center of the mat but Pearson has him pressed against the cage.
Crain breaks the clinch.
Crain throws a shot to the body.
Crain fails miserably with a takedown attempt.
Pearson tries to clinch there but Crain circles away.
Pearson is breathing heavily.
That's one minute gone in the round.
Pearson takes a jab on the nose. He smiles like he loves it and keeps coming.
Crain keeps the fight on the outside.
Crain fakes high and swings low for a body shot but Pearson manages to avoid it.
Crain looks for a takedown but Pearson sprawls well.
Pearson slips a jab from Crain.
Crain shoots in for a takedown - he's clinched up with Pearson but Pearson pushes him off and we're back to square one.
That's three failed takedown attempts in the round for Timmy Crain. That's going to take a lot out of him.
Pearson takes a jab on the nose there. A little bit of blood seems to be coming out. Hopefully that won't affect his breathing.
That's two minutes gone in the round.
Pearson tries to clinch but Crain moves out of range.
Pearson shoots in for a double leg but Crain sprawls well. That's going to sap some energy.
Crain circles away from the clinch attempt
and Crain connects with a straight left hand counter down the middle.
Timmy Crain is winning the standup battle so far.
Crain swats away the attempt to clinch by Pearson.
Pearson avoids the body shot from Crain.
Pearson tries to clinch but Crain moves out of range.
Pearson tries to close the distance and clinch up against the cage but Crain paws at him with a jab and circles away.
Crain tries to shoot in for a takedown. He's got hold of a leg but Pearson swivels and escapes.
That's three minutes gone in the round.
The fighters circling - Crain throws out the jab but it was never going to land.
Nice sprawl there from Pearson as Crain shoots in.
Crain shoots in for a takedown but Pearson shows good takedown defense.
Pearson tries to clinch but Crain moves out of range.
Pearson ducks under an overhand right and circles away with a smile on his face.
Pearson tries to close the distance and clinch up against the cage but Crain paws at him with a jab and circles away.
Pearson uses some good footwork to avoid the body shot by Crain.
Crain throws a hard body shot but it just misses.
Crain is using his reach advantage well here, landing the more effective single shots from range.
A looping hook to the body misses from Crain. Pearson does a little dance to reset his feet.
Crain avoids the clinch attempt nicely.
That's four minutes gone in the round.
A really sloppy takedown attempt there from Crain.
A low kick from Crain misses
and Pearson counters with a stiff right hand.
Pearson fails in his attempt to clinch.
Alistair Pearson is looking to throw some combinations by the looks of things.
Pearson wants to clinch up but Crain keeps it at a distance.
Pearson tries to close the distance and clinch but Crain swats him to one side with an open hand palm strike and circles away.
Pearson tries to grapple but his opponent circles
and Crain counters with a nice body kick.
The crowd applaud the fighters efforts here as the round comes to an end.
Crain throws a decent looking leg kick but it doesn't land clean.
Pearson uses good head movement to avoid the hook from Crain.
And thats the end of the round the fighters go back to their corners.
Timmy Crain dominated that second round.
The fighters' corners scream their final instructions, as the referee calls time. Here we go, back to the action! This is the final round!

Crain misses the shot to the body.
Pearson slips a straight right by Crain.

Crain shoots in from a long way out. He's driving through with the takedown attempt and he eventually gets it, landing in Pearson's guard.
Pearson utilising some decent striking defenses from the guard, preventing the ground and pound.
Crain advances to half guard.

Pearson is defending against the submission attempts here by Crain.
Pearson tries to roll over but Crain keeps him under control.
Pearson takes a big intake of breath there - he's definitely tired.
Crain wants to work for an arm triangle but Pearson is really keeping half guard well and defending the submission attempt.
That's one minute gone in the round.
Crain moves nicely into side control.
Crain is looking for a kimura. He might have it! No, Pearson has escaped the position, nice work there.
A bit of a lull in the action here.
Pearson looking for a sweep but Crain has passed into full mount! Oh no!
Pearson reaches up to try and control the position but Crain seems to have an arm triangle now! Uh oh! Pearson rolls and tries to escape and now Crain has his back!
That's two minutes gone in the round.
Crain looking for the RNC.
Crain is working for the choke. I would put my money on him to finish from this position. He's rolled onto his back and has dragged Pearson with him. Pearson is trying to defend but Crain has an arm under the chin now! Pearson grimaces and is forced to tap out!
Ladies and gentlemen, after 2:31 of round 3, we have a winner by way of Submission (RNC). Timmy Crain!
|
|
|
|
|
|
|
|
|
|
|
|
|
|
|
|
|
|
|
|
|
|
|
| S |
C
A |
G |
S |
C
B |
G |
|
S |
C |
G |
|
energy
A | B |
|
hype
A | B |
|
pop
A | B |
|
mgr
A | B |
|
FIGHT
RATING
64% |
|
|
|
|
|
|
