|
|
PBP Commentary |
Coming up we have a lightweight MMA rules bout between Maito Kaishi (ranked 0 p4p, 0 weight class) and No Mad (ranked 0 p4p, 0 weight class). Well, I have no idea who's going to take this one!
 |
|
 |
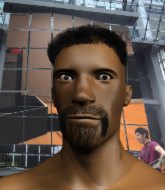
| 175 cm
18
164 lbs
0 - 0 - 0 |
|
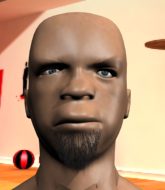
172 cm
19
155 lbs
1 - 2 - 0 |
BJJ Purple Belt
Counter striker
Big heart |
|
Good takedowns
Brawler
Experienced |
|
| |
|
Ladies and gentlemen. This fight is 3 rounds, in the lightweight division.
Introducing the fighter to my left, fighting out of the red corner.
With a record of
0 - 0 - 0, fighting out of Tokyo, Maito Kaishi!
And introducing the fighter to my right, fighting out of the blue corner.
With a record of
1 - 2 - 0, fighting out of Tokyo, No Mad!
The judges for this bout are Tatsuya Matsuyama, Sosuke Kotani and Taro Takaoka.

The bell rings for round one and we are underway!

Kaishi closes the distance, clinches up and gets a nice trip takedown into side control. Very smooth.

Kaishi is looking for a kimura. He might have it! No, Mad has escaped the position, nice work there.
The ref warns both fighters not to hold the cage as they work up against the meshing.
Mad is trying to get back to half guard.
Kaishi working the head with strikes.
Mad is looking for a sweep.
Mad is persisting with the attempt to improve his position.

The referee decides to stand the fighters back up.
Mad misses with a takedown
and Kaishi counters with a single leg into guard. Mad didn't expect that.
Kaishi is trying to work a guillotine from the top, or something like that? Don't know how he thinks he's going to get a finish from there.
Mad is trying to control the position from the bottom.

That's one minute gone in the round.
Kaishi trying to control but Mad is working from the bottom.
Mad is working actively off his back, looking to secure an arm or perhaps work for a triangle.
Kaishi looking to pass the guard.
Mad had isolated an arm as going for an omaplata. Kaishi is defending the submission well but is in a very vulnerable position. Mad Is leaning forward trying to finish the omaplata but decides to abandon it, and take Kaishi's back instead.
Kaishi manages to reverse the position and now he's in Mad's guard. Nice work there by Kaishi.
Kaishi trying to control but Mad is working from the bottom.
Mad looking to sweep here. No luck so far.

That's two minutes gone in the round.
Mad has a loose triangle. He'll be looking to tighten that up but Kaishi can see exactly what he's planning and manages to posture up and free himself.
Mad looks gassed!
Kaishi stands up and looks to throw the legs aside to pass to side control. Mad swivels though and keeps the full guard.
Mad working a defensive guard here.
Kaishi drops back for a leg but he's not going to get it - he lets go and Mad dives on top into guard.
Mad drops back for a leg! It's a sloppy attempt though and Mad jumps back into guard quickly, to retain the dominant position.
Kaishi is active off his back here, looking for submissions.
Mad avoids a guillotine attempt easily.
Mad passes Kaishi's right leg, so he's now in half guard.

That's three minutes gone in the round.
Kaishi actively working from the bottom here.
Kaishi moves into full guard.
Mad throwing elbows and punches but not connecting, as Kaishi works some decent striking defense from the bottom.
Kaishi is working the butterfly guard. He manages to land a nice scissor sweep and is now in half guard on the top. Nice move.
Kaishi trying to control from half guard but Mad is working away.
Mad won't allow Kaishi to pass to mount.
Mad is looking to improve his position.
The fighters are pressed up against the cage, both looking to find a bit of space to work.
Mad actively working from the bottom here.
Kaishi lands with an elbow from half guard - that looked like it hurt.

That's four minutes gone in the round.
A lull in the action here being met with boos from the crowd.
Kaishi seems to be looking for submissions.
Kaishi is looking for a kimura here.
Kaishi trying to pass the guard but Mad defending well.
Mad wants to get back to full guard.
Mad is looking to sinch up a gullotine here but Kaishi pulls his head out easily.
Kaishi wants to work for an arm triangle but Mad is really keeping half guard well and defending the submission attempt.
And thats the end of the round the fighters go back to their corners.
Maito Kaishi dominated that round.
That's time! Back to the action!

Kaishi decides to change it up a bit and drives through with a nice takedown into half guard.
Mad trying to control from the bottom.
Mad is looking for a sweep. Kaishi is wise to his cunning plan and keeps the top position.
Mad keeping control of the leg, stopping his opponent passing to mount.
Mad avoiding damage under a succession of punches from Kaishi.
Kaishi is thinking about going for an arm triangle but he can't free his leg.
Mad is pressing down on Kaishi's left leg trying to get back to full guard. He's managed it.
Mad looking for a guillotine here but Kaishi defends easily.
Mad looking for submissions from the bottom but instead Kaishi passes into half guard.
Both fighters are absolutely exhausted here.
That's one minute gone in the round.
Kaishi has freed up his trapped foot and advances to mount.
Mad slips a leg in and gets back to half guard.
Kaishi is just content to waste time from the top position. Mad takes advantage of the situation and regains full guard.
Mad is trying to keep Kaishi in close.
Kaishi avoids a guillotine attempt easily.
Mad looking for submissions off his back, moving his hips, looking for an opening.
That's two minutes gone in the round.
Mad had isolated an arm as going for an omaplata. Kaishi is defending the submission well but is in a very vulnerable position. Mad Is leaning forward trying to finish the omaplata but decides to abandon it, and take Kaishi's back instead.
Kaishi won't enjoy being in this position. Mad looking for the choke. Oh... he's slipped the arm under the neck - Kaishi is tapping - it's over boys! Mad picks up the submission victory!
Ladies and gentlemen, after 2:35 of round 2, we have a winner by way of Submission (RNC). No Mad!
|
|
|
|
|
|
|
|
|
|
|
|
|
|
|
|
|
|
|
|
|
|
|
| S |
C
A |
G |
S |
C
B |
G |
|
S |
C |
G |
|
energy
A | B |
|
hype
A | B |
|
pop
A | B |
|
mgr
A | B |
|
FIGHT
RATING
54% |
|
|
|
|
|
|

