|
|
PBP Commentary |
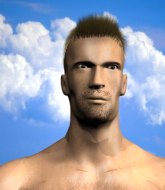
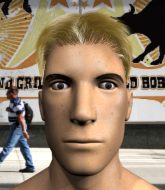
Coming up we have a welterweight MMA rules bout between Chip Freedom (ranked 0 p4p, 0 weight class) and Slim Shady (ranked 0 p4p, 0 weight class). Freedom comes to the cage accompanied by Star Spangled Banner. The fight MMA fans around the world have waited their entire lives for!
 |
|
 |
| 175 cm
37
162 lbs
18 - 22 - 3 |
|
185 cm
27
176 lbs
10 - 7 - 1 |
BJJ Purple Belt
Excellent boxer
KO power |
|
Good wrestler
Decent boxing
Heavy handed |
|
| |
|
Ladies and gentlemen. This fight is 3 rounds, in the welterweight division.
Introducing the fighter to my left, fighting out of the red corner.
With a record of
18 - 22 - 3, fighting out of New York, Chip Freedom!
And introducing the fighter to my right, fighting out of the blue corner.
With a record of
10 - 7 - 1, fighting out of Rio de Janeiro, Slim Shady!
The judges for this bout are Richard Clark, Donald Grub and James Glass.

The bell rings for round one and we are underway!
Freedom throws the left hand but Shady avoids the punch easily.
Freedom lunges in with swinging rights and lefts but Shady circles away quickly and effectively.
Shady has his takedown stuffed
and Freedom counters with a nice uppercut.

Shady throws a loose over hand right and dives in with a double leg takedown. Freedom tries to sprawl but it's too late and the fighters hit the mat. Shady is in Freedom's guard.
Freedom avoiding any damage from the ground and pound.
Shady trying to control but Freedom is working from the bottom.
The fighters are pressed up against the cage, both looking to find a bit of space to work.
Shady trying to pass the guard but can't manage it just yet.
Shady wants to control from the top but Freedom keeps moving.
Shady trying to pass the guard but can't manage it just yet.
Freedom has his hands on Shady's head, controlling the position.

OK we're going to have a standup here. Slim Shady hasn't been effective enough on the ground and the referee wants a restart.
Nice uppercut there from Shady.
Shady keeping a good distance there, avoiding the body shot.
This fight brought to you by 5M nutrition - it's mmmmm tasty. Nice jab by Shady.

That's one minute gone in the round.
Freedom fails in his attempt to clinch.
Shady looks for a takedown. He's got it. We're now in half guard.
Freedom pushes Shady off but Shady dives into side control.
Shady tries to move into full mount but can't pass Freedom's legs.
Freedom gets one leg under and gets the fight to half guard.
Freedom has no desire to be mounted, so is trying to control. Shady is working away from the top position though.
Freedom is pressing down on Shady's left leg trying to get back to full guard. He's managed it.
Shady scoring with punches to the head and body.
Freedom keeping moving, preventing Shady from controlling successfully.
Shady is taking a break and basically stalling. The referee will not allow him to do that for long.
Shady won't allow Freedom to sweep him here.

That's two minutes gone in the round.
This has been an exciting period of action!

Shady is holding a leg here, probably looking for an ankle lock - he drops back and goes for it! Freedom is in trouble! Is it all over??? No! Freedom has escaped and now he's on top!
Shady controls Freedom momentarily but Freedom frees himself.
Freedom won't allow Shady to sweep him here.
A real slowdown in the pace of the fight for a moment, as Shady holds on and takes a little breather.
Shady looking to sweep here. No luck so far.
Shady pulls Freedom in to control the position.
Both fighters really going for it on the ground here!
The ref calls for a clean break and stands the fighters back up. Slim Shady wasn't active enough on the ground.
Shady shoots in but Freedom avoids the takedown attempt easily.
Chip Freedom is looking to keep the fight on the feet at all costs.
Freedom slaps away a takedown attempt from Shady, before circling back to the center of the mat.
Chip Freedom has stuffed three takedown attempts in the round now. That's going to take a lot out of Slim Shady.
A jab from Shady does it's job there.

That's three minutes gone in the round.
Freedom just misses with a punch to the body.
Freedom slaps away a takedown attempt from Shady, before circling back to the center of the mat.
Freedom tries to score with a leg kick but it misses it's target.
Shady connects with a looping right hand.
An inside leg kick lands from Freedom.
Shady shoots in but no luck this time.
Shady listening to his corner there, landing a nice uppercut.
Shady feints and then dives in with a takedown. That was a long way out but the feint bought him enough time to close the distance and complete the takedown. Now we'll play guard for a bit and see who can get the better of that position.
Freedom manages to land a sweep and now he's in mount on top!
Freedom with shots to the head and body - Shady looks very uncomfortable down there.
The fans in attendance giving it up for the two fighters, who have really let it all hang out in the last minute or so!
Shady keeping his composure momentarily, calmly looking to get back to half guard.
Freedom pausing momentarily but resumes with a couple of decent strikes that do a bit of damage.

That's four minutes gone in the round.
Shady really trying hard to get back to half guard here.
Shady wants to hold on but Freedom pushes him away.
Shady regains half guard.
Shady looking for submissions from an awkward position here.
Freedom wants to control but Shady is keeping him busy.
Nice strikes from Freedom there.
Shady is staying active underneath Freedom, who seems content to just control the action from this position.
Shady looking for submissions off his back.
Shady actively working from the bottom here.
The crowd are going absolutely nuts as the round comes to an end - what a fantastic round of action!
Freedom wants to take a breather but Shady is having none of it.
Shady slips a foot under and gets full guard. Nice work.
Freedom working from the guard for now, landing some ground and pound.
And thats the end of the round the fighters go back to their corners.
Slim Shady dominated that round.
Well, the break between rounds is over. Let's get back to the scrappin!

Shady fakes high and swings low for a body shot but Freedom manages to avoid it.
Shady closes this distance looking for a takedown but Freedom circles away.
A jab from Freedom finds it's way through Shady's defenses.
Freedom throws a head kick that misses and slips in the process. He scrambles back to his feet and the fighters circle.
Shady shoots in looking for a takedown. Freedom tries to sprawl out of it but Shady keeps driving through. The fighters are pinned against the cage. Freedom manages to get underhooks and after a bit of a struggle, circles away and we're back to standing.
Shady just misses with a punch to the body.
Freedom swings and misses with a hook to the body.
Freedom gets caught flat footed, as Shady shoots in with a quick takedown into guard.
Freedom trying to control the position here.
Freedom manages to land a sweep and now he's in mount on top!
Shady tries to hold on but Freedom pushes him away.
The ref warns both fighters not to hold the cage as they work up against the meshing.
Shady tries to get back to half guard but can't.
That's one minute gone in the round.
Shady bucks up and manages to get a nice reversal! He's in guard on the top - nicely done!
Shady postures up and scores with a shot to the body and a follow up elbow to the head.
Shady thinks about going for a leg but decides against it, in order to maintain the position.
Freedom managing to control the position.
Shady trying to control but Freedom is working from the bottom.
Shady chips away with some ground and pound.
Shady postures up to throw the ground and pound strikes but they don't connect.
Shady wants to control from the top but Freedom keeps moving.
Shady is looking to work some ground and pound but Freedom has wrist control.
That's two minutes gone in the round.
Shady won't allow Freedom to get back to his feet.
Freedom looking to control.
Shady preventing the sweep.

Neither fighter is doing enough for the referee's liking and he's decided to stand them back up.
Shady fakes high and shoots in for a takedown but Freedom avoids it really well and circles away.
Chip Freedom has stuffed three takedown attempts in the round now. That's going to take a lot out of Slim Shady.
Shady moves forwards but Freedom connects with a nice, crisp jab.
The fans in attendance giving it up for the two fighters, who have really let it all hang out in the last minute or so!
A jab from Freedom misses.
Wow, both these guys are really going for it!
Shady scores with a nice strike.
Shady throws a body kick but he was well out of range there.
Shady shoots in for a double leg but Freedom sprawls well. That's going to sap some energy.
Shady shoots in for a takedown but Freedom shows good takedown defense.
Freedom jabbing away but nothing is landing.
Shady has used his reach advantage pretty well so far tonight.
Shady blocks a leg kick.
Shady uses good footwork to avoid the strikes from Freedom.
Shady misses with a takedown attempt - Freedom sprawls well and throws a nice strike on the way out which just misses.
That's three minutes gone in the round.
Shady misses with a takedown attempt - Freedom sprawls well and throws a nice strike on the way out which just misses.
Freedom misses with the combination.
Shady fails to land the takedown.
Shady looks for a takedown here. Will he get it? Freedom is fending him off so far but Shady persists. Nope, Freedom circles away and we're back to standing.
Freedom looks to score with a jab to the body but Shady is just out of range.
Shady scores with a big left there. The judges will like that one.
Freedom takes a shot to the nose. Hopefully that hasn't broken it.
Freedom connects with a looping right hand.
Freedom jabs at Shady's body.
Freedom thows a body shot but no joy.
Freedom scores with a push kick.
Shady closes the distance and clinches up, looking for a takedown. He shifts his weight and gets a nice trip into half guard.
Shady is working for a kimura but Freedom is defending it quite comfortably.
Shady is breathing heavily.
Shady is working for submissions here but there's nothing on.
That's four minutes gone in the round.
This has been an exciting period of action!
Freedom keeping his head moving to avoid the ground and pound.
Freedom is looking to regain full guard. Not this time though.
Shady is looking for a kimura here.
Shady is looking for a kimura but Freedom is holding onto that half guard position, so it's hard for Shady to get the leverage.
As the round comes to an end the crowd are showing their appreciation for a great round of action.
Freedom wants to get back to full guard.
Shady wants to pass the guard but Freedom is defending well.
And thats the end of the round the fighters go back to their corners.
Slim Shady showed his class in that round. I'd imagine he'll take it on all the scorecards.
The fighters' corners scream their final instructions, as the referee calls time. Here we go, back to the action! This is the final round!

Freedom throws a nice inside leg kick.
Shady is trying hard to land a takedown here. Freedom sprawls well and keeps this one on the feet.
Shady throws a looping left and ducks down for a takedown. He's got his arms around Freedom's waist but Freedom gets an underhook and avoids the takedown by throwing Shady off to one side.
Shady lands a vicious shot with the stealth of a sniper and the strength of a viper. Are vipers that strong? I can think of lots of things that are stronger than a viper - not many rhyme with sniper though.
Nice sprawl there from Freedom as Shady shoots in.
Chip Freedom has stuffed three takedown attempts in the round now. That's going to take a lot out of Slim Shady.
Freedom lunges in with swinging rights and lefts but Shady circles away quickly and effectively.
Freedom leaves Shady with his face pressed against the mat as he sprawls beautifully, defending against a solid takedown attempt.
Freedom throws a looping overhand right but Shady ducks down to avoid it.
Freedom swings and misses with a hook to the body.
Shady fails with a takedown attempt from distance.
Freedom tried to score with a low kick but Shady checks it.
Shady defending well as Freedom loads up on a big left hand.
Shady fails with the takedown.
Shady takes a big intake of breath there - he's definitely tired.
Freedom looks to score with a combo but nothing lands.
Freedom is the aggressor but that punch slipped nicely by Shady.
Freedom misses with a body shot. Nice footwork from Shady.
That's one minute gone in the round.
Well, he's not going to score with shots like that. A lazy body kick attempt from Freedom.
Freedom feints a straight left to the body, then turns around with a flashy move and hits Shadys jaw with a dramatic spinning back fist!
Freedom throws a shot to the body.
Shady lands a nice shot that snaps Freedom's head back.
Chip Freedom is winning the standup battle so far.
Shady bobs and weaves well there to avoid the strikes.
Shady fakes high and shoots in for a takedown but Freedom avoids it really well and circles away.
Freedom tries to clinch but Shady moves out of range.
Shady moves out of range of the strikes.
Shady fails with a takedown attempt.
Shady drives through with a takedown into guard.
Shady stands and throws Freedom's legs to the side, diving into side control.
Shady landing with strikes to the head and body from side control.
Shady is trying to land an Americana. He has the arm isolated but Freedom is keeping cool and he's avoided the danger for now.
Chip Freedom has stepped it up - he knows he needs a finish here!
That's two minutes gone in the round.
Freedom is not content to let Shady control the position.
The crowd are loving this. Great action here.
Freedom gets back to half guard.
Freedom tries to roll over but Shady keeps him under control.
Freedom is not content to let Shady control the position.
Freedom wants to improve his position but Shady is controlling well.
Shady takes advantage of the dominant position to land a couple of big hammer fists.
That's three minutes gone in the round.
Shady has hold of the far side arm. He's working for the Kimura, can Freedom defend it? Shady steps over the head and cranks it - Freedom is tapping out! That was textbook stuff right there - nice submission victory for Shady!
Ladies and gentlemen, after 3:07 of round 3, we have a winner by way of Submission (Kimura). Slim Shady!
Slim Shady tried to hype himself up post fight but didn't word it too well and it ended up with him sounding like a bit of a tool.
|
|
|
|
|
|
|
|
|
|
|
|
|
|
|
|
|
|
|
|
|
|
|
| S |
C
A |
G |
S |
C
B |
G |
|
S |
C |
G |
|
energy
A | B |
|
hype
A | B |
|
pop
A | B |
|
mgr
A | B |
|
FIGHT
RATING
100% |
|
|
|
|
|
|
