|
|
PBP Commentary |
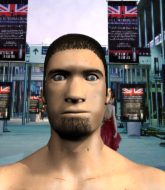
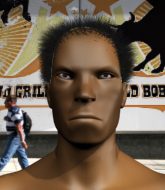
Coming up we have a light heavyweight MMA rules bout between Rick Wellington (ranked 0 p4p, 0 weight class) and Mirza Ceman (ranked 0 p4p, 0 weight class). Wellington comes to the cage accompanied by Zebra Katz - Y I Do. Rick Wellington has the edge in experience - let's see if he can make that count tonight.
 |
|
 |
| 199 cm
18
205 lbs
1 - 0 - 0 |
|
182 cm
18
190 lbs
1 - 0 - 0 |
BJJ White Belt
Basic striking
Likes comics |
|
BJJ Blue Belt
Brawler
Solid chin |
|
| |
|
Ladies and gentlemen. This fight is 3 rounds, in the light heavyweight division.
Introducing the fighter to my left, fighting out of the red corner.
With a record of
1 - 0 - 0, fighting out of Rio de Janeiro, Rick Wellington!
And introducing the fighter to my right, fighting out of the blue corner.
With a record of
1 - 0 - 0, fighting out of Rio de Janeiro, Mirza Ceman!
The judges for this bout are Thiago Cunha, Leandro Rodrigues and Luis Engracia.

The bell rings for round one and we are underway!

Wellington tries to keep at a distance but Ceman has taken the fight into the clinch.
Ceman looks really tired already! That doesn't bode well for a good, competitive fight!
Wellington changes levels and goes for a takedown here. Ceman fights it off and pushes away nicely.

Wellington forces Ceman back against the cage and clinches.
Ceman tries to land a knee to the head but Wellington blocks with his arms.
Wellington lands a body shot.
Ceman takes a knee right on the jaw!
Wellington misses with a body punch.
Wellington lands a shoulder strike.
An uppercut to the body lands inside from Wellington.
The crowd are loving this. Great action here.
Ceman on the defensive, avoiding the knees to the body.

Wellington has Ceman pressed up against the cage. He's trying to work for a single leg takedown. Wellington pulls back from the cage and twists to the side, sending Ceman tumbling to the mat - Wellington dives into Ceman's guard.
Wellington prevents Ceman from getting back to his feet.

That's one minute gone in the round.
Wellington wants to get up but he can't break Ceman's closed guard. He needs to be careful trying to break the legs open, as he's open to submissions here.
The fighters are pressed up against the cage, both looking to find a bit of space to work.
Wellington trying to pass the guard but can't manage it just yet.

We're going to have a standup here because Rick Wellington wasn't active enough for the referee's liking.
Wellington has Ceman up against the cage in a clinch.
Wellington is working for takedown but Ceman is calmly controlling the position for now.
Ceman gets underhooks to prevent Wellington's takedown attempt.
That's three failed takedown attempts in the round for Rick Wellington. That's going to take a lot out of him.
Ceman prevents a body shot from Wellington.
A body shot lands from Wellington.

That's two minutes gone in the round.
Wellington with the Thai clinch, lands a knee to the head.
Wellington lands with a good tight uppercut to the head.
Ceman blocks a knee to the body. He'll have a nicely bruised forearm in the morning.
Ceman's head jolts backwards as he takes an uppercut right on the button!
Wellington misses with a hook to the ribs.
Ceman prevents a body shot from Wellington.
A short body shot lands from Wellington as the two fighters clinch.
Wellington landing some nice looking knees to the body.
Wellington lands a knee to the body.
Fantastic stuff here - a very entertaining period of action, which has drawn cheers from the crowd.
An uppercut to the body lands inside from Wellington.
Wellington working Ceman over with knees to the body.
Wellington is working Ceman over against the cage.

Wellington breaks the clinch.
Mirza Ceman is looking to keep the fight on the feet at all costs.
Wellington clinches up against the cage.
Wellington is working on a leg, looking for a takedown but Ceman is defending well.

That's three minutes gone in the round.
Wellington's corner calls for him to break the clinch, which he does.
Wellington clinches with his opponent.
A short left from Wellington.
Wellington missing with knees to the body.
Ceman gets double underhooks to prevent a takedown attempt from Wellington.
Ceman tries a knee to the head but Wellington blocks it.
Wellington tries for a takedown. No joy.
Ceman managing to block the knees to the body from Wellington.
Wellington tries to land a knee to the body but he is off balance and Ceman avoids it.
Wellington is looking to score with knees to the body. Maybe he'll change it up and go body then head. Ceman is defending well for now.
Ceman with an attempt at a knee that misses.

That's four minutes gone in the round.
Wellington wants a takedown.
Wellington has double underhooks and is working for a body lock takedown. He's got it. The fighters land in half guard but Ceman regains guard immediately.
Wellington wants to stand but Ceman has a closed guard, so he can't escape.

Ceman has his feet on Wellington's hips. He pushes off and gets to his feet. Nice work.
We've seen a great period of action over the last minute or so - credit to both fighters for going all out!
The crowd are going absolutely nuts as the round comes to an end - what a fantastic round of action!
Wellington moves into range and clinches up with Ceman.
Ceman tries to land a knee to the head but misses.
And thats the end of the round the fighters go back to their corners.
Rick Wellington dominated that round.
The fighters' corners scream their final instructions, as the referee calls time. Here we go, back to the action!

No luck for Wellington with that takedown attempt.
Wellington moves into range and clinches up with Ceman.
Wellington is clearly stalling here... Pick up the pace son.
Ceman wants to push off and get back to the center of the mat but Wellington has him pressed against the cage.
Ceman misses the knee to the body. Nice hip positioning from Wellington.
Wellington lands a body shot in the clinch.
Wellington misses the knee to the body. Nice hip positioning from Ceman.
Rick Wellington has scored more points in the clinch so far.
Both fighters working to control the clinch.

Ceman breaks the clinch.
Wellington gets to the clinch - let's see what his plan is here.
Both fighters are absolutely exhausted here.
Wellington tightens his grip and picks Ceman up, before dumping him to the ground. Ceman manages to land in guard.
Wellington slows down the pace of the fight for a moment. He'll need to remain active if he doesn't want to see the fight stood back up.
We could do with one of the fighters taking the initiative a bit more on the ground - they're both waiting to capitalize on a mistake.
That's one minute gone in the round.
We may be looking at a referee standup if the pace doesn't pick up soon.
Rick Wellington has forced the referee to step in and bring the fight back to the feet.
Wellington closes the distance and clinches.
Ceman tries to land knees in the clinch but Wellington avoids the damage to the body.
Wellington lands a right uppercut that snaps the head of Ceman backwards.
Wellington makes some space for himself and lands an uppercut.
Wellington wants to take the fight to the mat but Ceman manages to get underhooks and keep the fight in the clinch.
Good body shot from Wellington.
Ceman gets double underhooks to prevent a takedown attempt from Wellington.
That's three failed takedown attempts in the round for Rick Wellington. That's going to take a lot out of him.
Ceman takes an elbow to the temple.
Ceman managing to block the knees to the body from Wellington.
Wellington misses with a shot to the kidneys.
That's two minutes gone in the round.
Wellington dodges an elbow strike from Ceman.
Ceman tries to land a knee to the head but Wellington blocks with his arms.
Wellington lands a knee to the body.
Ceman prevents a takedown attempt there.
Ceman lands a nice knee to the body.
Wellington has a body lock and is looking for a takedown. Ceman is bouncing around trying to prevent the takedown and somehow he has indeed managed to stay on his feet.
Wellington lands with a short punch from the clinch.
Ceman avoiding damage as Wellington throws knees to the body.
Wellington keeps the fight in the clinch, despite Ceman's efforts to push away.
Ceman tries to land a knee to the head but misses.
Wellington struggles to land a body shot inside as Ceman controls his hands.
That's three minutes gone in the round.
Wellington lands a shoulder strike.
Wellington lands a right uppercut that snaps the head of Ceman backwards.
Ceman blocks a knee to the body. He'll have a nicely bruised forearm in the morning.
Ceman gets double underhooks to prevent a takedown attempt from Wellington.
Wellington tries to land knees in the clinch but Ceman avoids the damage to the body.
Ceman throws a knee to the head but misses.
Ceman can't break the clinch.
Wellington on the defensive, avoiding the knees to the body.
Wellington scores with a hook to the body.
Wellington misses with a shot to the kidneys.
Wellington is looking to take this one to the mat.
Wellington can't find room to land a body shot as Ceman controls the action.
That's four minutes gone in the round.
Wellington putting his Muay Thai to good use. He has Ceman in a tight clinch and is doing some damage with knees to the body.
Wellington struggles to land a body shot inside as Ceman controls his hands.
Ceman comes over the top with an elbow. That landed flush.
Ceman crunches a lovely knee into Wellington's ribcage.
Wellington unloads a knee to the mid-section.
Ceman pushes off and fires off an elbow that misses, before clinching up again, against the cage.
Wellington lands a shoulder strike that jolts his opponent's head backwards.
Wellington wants a takedown.
Wellington working aggressively here.
Wellington on the defensive, avoiding the knees to the body.
The crowd applaud the fighters efforts here as the round comes to an end.
Wellington goes for a body shot but it's blocked.
Wellington wants to take the fight to the mat but Ceman manages to get underhooks and keep the fight in the clinch.
Ceman escapes the clinch and we're back to striking.
And thats the end of the round the fighters go back to their corners.
Rick Wellington dominated that second round.
Well, the break between rounds is over. Let's get back to the scrappin! Let's hear some noise people - this is the final round!

Wellington closes the distance and clinches.
Ceman with an attempt at a knee that misses.
Wellington taking a break, stalling in the clinch.
Wellington can't find room to land a body shot as Ceman controls the action.
Ceman on the defensive, avoiding the knees to the body.
Wellington's corner calls for him to break the clinch, which he does.
We are yet to see a takedown attempt from Ceman in the fight. On paper you would think he is the more dominant ground fighter so let's see if these unusual tactics pay off.
Wellington takes the fight into the clinch.
Ceman blocks a body shot from Wellington.
Ceman blocks the elbow strike.
Ceman is looking to break free of the clinch but Wellington has double underhooks.
Both fighters are breathing heavily.
Wellington trying to stall but Ceman improves his position.
That's one minute gone in the round.
Wellington lands a body shot.
Wellington misses the knee to the body. Nice hip positioning from Ceman.
Wellington scores with a hook to the body.
Wellington is really dominating this fight. Is there anything that Ceman can do to turn this around?
Wellington breaks from the clinch.
Wellington fakes with an overhand right and moves in to clinch with Ceman, pushing him back against the cage.
A hook to the body from Wellington.
Wellington landing some nice looking knees to the body.
Wellington lands a left hand that snaps the head of Ceman backwards.
A hook to the body from Wellington.
Wellington looking to slow down the pace here.
Ceman is defending well against a takedown attempt.
Wellington is looking to control Ceman's arms but Ceman gets an underhook and turns him. Now Wellington has his back to the cage.
That's two minutes gone in the round.
Wellington misses with a punch to the body.
Wellington looking to throw knees to the head but Ceman is blocking nicely.
Wellington tries to land a knee to the body but he is off balance and Ceman avoids it.
Wellington is trying to stall.
Ceman is looking to break free of the clinch but Wellington has double underhooks.
Ceman throws a vicious knee straight up the middle but Wellington blocks it with crossed arms.
Wellington is looking to take this one to the mat.
This has been an exciting period of action!
Wellington avoiding damage as Ceman throws knees to the body.
Knees in the clinch landing for Ceman.
A quick uppercut on the inside from Wellington.
Wellington tries to land a knee to the body but he is off balance and Ceman avoids it.
Wellington tries to land knees in the clinch but Ceman avoids the damage to the body.
Wellington pushes Ceman back against the cage and lands a hook to the side of the head.
That's three minutes gone in the round.
Ceman is trying to break the clinch but Wellington is controlling him.
Wellington on the defensive, avoiding the knees to the body.
Wellington with a knee to the head.
Ceman pushes off and fires off an elbow that misses, before clinching up again, against the cage.
Wellington keeps control of Ceman as he tries to wriggle out of the double underhooks.
Wellington blocks a knee to the body. He'll have a nicely bruised forearm in the morning.
Ceman tries to land knees in the clinch but Wellington avoids the damage to the body.
Wellington is clearly stalling here... Pick up the pace son.
Ceman looks like he'd prefer to be striking at range right now.
Ceman wants to break the clinch but can't.
Wellington avoiding damage as Ceman throws knees to the body.
That's four minutes gone in the round.
Wellington has Ceman pressed against the cage, preventing Ceman from circling away and getting back to striking at range.
Wellington lands an elbow inside that Ceman shrugs off.
Wellington is trying to slow down the pace of the fight but Ceman is keeping busy.
Wellington unloads a knee to the mid-section.
Wellington's corner calls for him to break the clinch, which he does.
Wellington fakes with an overhand right and moves in to clinch with Ceman, pushing him back against the cage.
A knee to the head by Ceman.
Ceman is trying to break the clinch but Wellington has him pressed against the cage.
Wellington misses with a knee strike.
Wellington looking to slow down the pace here.
The crowd applaud the fighters efforts here as the round comes to an end.
Wellington's corner calls for him to break the clinch, which he does.
Mirza Ceman has stepped it up - he knows he needs a finish here!
Rick Wellington is fighting for a decision here - he's started to take the cautious approach.
Ceman looks for the body kick but Wellington saw that one coming.
And that's the end of the fight!
Rick Wellington showed his dominance in that final round.
Well Wellington has outscored his opponent in every aspect of the fight today. Only a scarily incompetent judge or two will keep him from a well deserved win... Over to the ring announcer for the scorecards.
Ladies and gentlemen, after 3 rounds of action, we go to the scorecards for a decision.
Judge Thiago Cunha scores the fight 30:27
Judge Leandro Rodrigues scores the fight 30:27
Judge Luis Engracia scores the fight 30:27
In favor of your winner, by unanimous decision... Rick Wellington!
In his post fight interview, Rick Wellington started talking himself up. Luckily his charisma kept the crowd on side and gave him a good reception.
|
|
|
|
|
|
|
|
|
|
|
|
|
|
|
|
|
|
|
|
|
|
|
| S |
C
A |
G |
S |
C
B |
G |
|
S |
C |
G |
|
energy
A | B |
|
hype
A | B |
|
pop
A | B |
|
mgr
A | B |
|
FIGHT
RATING
62% |
|
|
|
|
|
|
