|
|
PBP Commentary |
Coming up we have a heavyweight MMA rules bout between Anton Heynes (ranked 0 p4p, 0 weight class) and John White (ranked 0 p4p, 0 weight class). Well, the cameraman is lingering on a pretty young lady for a bit too long there. Keep your eyes on the prize buddy or you'll miss the fighter intros!
 |
|
 |
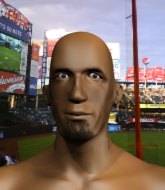
| 187 cm
25
255 lbs
4 - 0 - 0 |
|
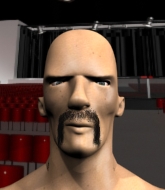
196 cm
22
245 lbs
1 - 0 - 0 |
BJJ Blue Belt
Excellent MT
Very strong |
|
BJJ Blue Belt
Brawler
Solid chin |
|
| |
|
Ladies and gentlemen. This fight is 3 rounds, in the heavyweight division.
Introducing the fighter to my left, fighting out of the red corner.
With a record of
4 - 0 - 0, fighting out of Sydney, Anton Heynes!
And introducing the fighter to my right, fighting out of the blue corner.
With a record of
1 - 0 - 0, fighting out of Sydney, John White!
The judges for this bout are John Mangel, Eliza Hachem and Bruno Hogan.

The bell rings for round one and we are underway!
Heynes tries to close the distance and clinch but White swats him to one side with an open hand palm strike and circles away.

White gets a clinch.
Heynes prevents White from breaking the clinch.
Heynes stops a takedown attempt from White.
White has Heynes pressed up against the cage and is working for takedown. Heynes manages to improve position though and keeps the fight standing.
White has hold of a leg and is looking for a trip takedown. Heynes avoids it nicely though and we remain in the clinch.
Anton Heynes has stuffed three takedown attempts in the round now. That's going to take a lot out of John White.
Heynes stalls.
White has dropped down and is looking to force the takedown but it's defended by Heynes after a bit of a struggle.
Heynes lands a nice elbow from the clinch.
White is looking to break free of the clinch but Heynes has double underhooks.

That's one minute gone in the round.
White has dropped down and is looking to force the takedown but it's defended by Heynes after a bit of a struggle.
Heynes is defending well against a takedown attempt.
White jumps guard but Heynes turns him against the cage and keeps the fight standing.
Heynes is pushing White up against the cage, for a bit of lean and pray action. Action being used the in the loosest possible sense of the word.
Heynes gets an overhook and lands an elbow to the side of the head.

It looks like John White has been cut.
White tries for a takedown. No joy.
Heynes will no doubt start fighting again in a minute but for now he's just having a little rest, leaning White up against the cage.
Heynes connects with a knee to the head.

That's two minutes gone in the round.
White goes for a takedown in the clinch but Heynes prevents it.
Heynes unloads a knee to the mid-section. White lets out a prehistoric sounding urrrrgh.
White takes a knee to the side of the body.
White looks winded!
This is a great period of action - very entertaining stuff!
Heynes is stalling here.
White has hold of a leg and is looking for a trip takedown. Heynes avoids it nicely though and we remain in the clinch.
Heynes landing knees to the body.

That's three minutes gone in the round.
Heynes crunches a lovely knee into White's ribcage.
Heynes leaning against his opponent.
White wants to push off and get back to the center of the mat but Heynes has him pressed against the cage.
Heynes stalling.
Heynes gets an overhook and lands an elbow to the side of the head.
White wants to break free. God knows he wants to breaaaak freeee.
Heynes content to slow the pace in the clinch.
White tries to circle away but Heynes has him pinned against the cage.
Heynes stalling in the clinch.

That's four minutes gone in the round.
White jumps guard but Heynes turns him against the cage and keeps the fight standing.
White tries for a takedown but Heynes manages to get underhooks.
Heynes stalling here - the referee won't stand for too much of that.
Heynes lands a good knee to the midsection. White won't want to take too many of those.
White jumps guard but his hands slip and he falls flat on his back. Well, he's made himself look a right mug there, as Heynes walks away with a smile on his face. White gets slowly back to his feet and shakes his head.

Heynes gets in close and instigates a clinch.
This is a great period of action - very entertaining stuff!
White tries to pull guard but Heynes won't allow it.
As the round comes to an end the crowd are showing their appreciation for a great round of action.
White tries to pull guard but can't drag his opponent to the mat. Heynes just stands there and leans against the cage.
Heynes unloads a knee to the mid-section. White lets out a prehistoric sounding urrrrgh.
And thats the end of the round the fighters go back to their corners.
Anton Heynes dominated that round.
The cut man is working on John White's cut.
The fighters' corners scream their final instructions, as the referee calls time. Here we go, back to the action!

White keeps the fight on the outside.
Heynes closes the distance and presses his opponent up against the cage.
White takes a knee to the side of the body.
White wants to take the fight to the mat but Heynes manages to get underhooks and keep the fight in the clinch.
Knees in the clinch landing for Heynes.
Knees in the clinch landing for Heynes.
This is a great period of action - very entertaining stuff!
Heynes connects with a knee to the head.
Heynes lands an elbow inside that White shrugs off.
The fighters are pressed against the cage, as the pace of the fight slows.
White is breathing heavily.
That's one minute gone in the round.
Heynes landing knees to the body. They look like they could hurt.
Heynes lands a good knee to the midsection. White won't want to take too many of those.
Heynes is trying to wear down his opponent with knees to the body.
Heynes is stalling here.
Heynes lands a nice elbow from the clinch.
That's two minutes gone in the round.
Heynes stops a takedown attempt from White.
Anton Heynes has scored more points in the clinch so far.
Heynes putting his Muay Thai to good use. He has White in a tight clinch and is doing some damage with knees to the body.
Heynes working White over with knees to the body.
The crowd are loving this. Great action here.
Heynes manages to get underhooks and slows down the pace for a moment.
White goes for a takedown attempt but Heynes pushes him away and we're back to fighting at a distance.
Anton Heynes has stuffed three takedown attempts in the round now. That's going to take a lot out of John White.
Heynes tries to clinch up but White circles away and keeps his distance.
That's three minutes gone in the round.
White lunges in with swinging rights and lefts but Heynes circles away quickly and effectively.
Heynes doesn't manage to clinch there - White circles away.
Heynes wants to clinch.
Anton Heynes seems to be the more aggressive standup fighter in this bout.
Heynes tries to clinch but White moves out of range.
The fight moves into the clinch position.
Heynes has White pushed against the cage.
White wants to strike at distance but he can't break free of the clinch.
Heynes's corner are urging him to control the action in the clinch for a moment, rather than mount any serious offense. I'm sure the crowd appreciate those instructions... not.
That's four minutes gone in the round.
Nice elbow from Heynes.
Heynes stops a takedown attempt from White.
Heynes taking a break, stalling in the clinch.
As the round comes to an end the crowd are showing their appreciation for a great round of action.
The ref breaks the fighters up, due to lack of action by Anton Heynes.
Nice straight punches there by Heynes. You know Roy Jones Jr respects the hands of Heynes.
Heynes fakes with an overhand right and moves in to clinch with White, pushing him back against the cage.
And thats the end of the round the fighters go back to their corners.
Anton Heynes dominated that second round.
The cut man is working on John White's cut.
The minute break is over - no more time for sponges and pep talks - back to the action! This is the final round!

Heynes throws a head kick that misses.
John White is looking to throw some combinations by the looks of things.
Heynes scores with a jab. White acknowledges it with a nod of the head.
Heynes thows a left - swing and a miss!
Heynes is looking to clinch.
Heynes tries to close the distance and clinch up against the cage but White paws at him with a jab and circles away.
White shoots in looking for a double leg takedown. Heynes defends it nicely.
White throws a hook to the body but it doesn't connect.
Heynes takes the fight into the clinch.
Heynes is really dominating this fight. Is there anything that White can do to turn this around?
White is working on a leg, looking for a takedown but Heynes is defending well.
Heynes prevents a takedown attempt there.
Anton Heynes has stuffed three takedown attempts in the round now. That's going to take a lot out of John White.
White takes a big intake of breath there - he's definitely tired.
White takes an elbow to the temple.
That's one minute gone in the round.
White letting Heynes take a breather here.
A nice glancing elbow lands by Heynes.
White trying to stall but Heynes improves his position.
Heynes comes over the top with an elbow. That landed flush.
White being controlled against the cage.
Knees in the clinch landing for Heynes.
That's two minutes gone in the round.
Heynes prevents a takedown attempt there.
Heynes lands an elbow inside.
White tries to pull guard but can't drag his opponent to the mat. Heynes just stands there and leans against the cage.
Heynes scores a nice knee to the body.
Heynes displaying some good clinch control by pressing White up against the cage.
Knees to the body from Heynes.
That's three minutes gone in the round.
White tries for a takedown. No joy.
Heynes effectively controlling the action here.
Heynes using the Thai clinch to land knees to the body.
Heynes holding his opponent close, against the cage.
Heynes unloads a knee to the mid-section.
That's four minutes gone in the round.
The pace really dropping off here, momentarily.
White takes an elbow to the forehead.
Heynes is stalling here. The referee will be looking to step in if he doesn't pick up the pace.
The crowd applaud the fighters efforts here as the round comes to an end.
The ref breaks the fighters up, due to lack of action by Anton Heynes.
The fight stays on the outside here - Heynes looks like he's thinking about clinching though.
John White has stepped it up - he knows he needs a finish here!
Anton Heynes is fighting for a decision here - he's started to take the cautious approach.
White drops his hands and takes a jab to the jaw for his troubles.
And that's the end of the fight!
Anton Heynes showed his dominance in that final round.
Well Heynes has outscored his opponent in every aspect of the fight today. Only a scarily incompetent judge or two will keep him from a well deserved win... Over to the ring announcer for the scorecards.
Ladies and gentlemen, after 3 rounds of action, we go to the scorecards for a decision.
Judge John Mangel scores the fight 30:27
Judge Eliza Hachem scores the fight 30:27
Judge Bruno Hogan scores the fight 30:27
In favor of your winner, by unanimous decision... Anton Heynes!
|
|
|
|
|
|
|
|
|
|
|
|
|
|
|
|
|
|
|
|
|
|
|
| S |
C
A |
G |
S |
C
B |
G |
|
S |
C |
G |
|
energy
A | B |
|
hype
A | B |
|
pop
A | B |
|
mgr
A | B |
|
FIGHT
RATING
45% |
|
|
|
|
|
|
