|
|
PBP Commentary |
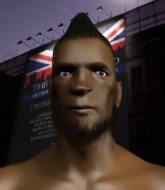
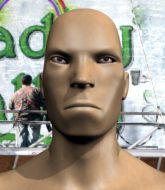
Coming up we have a light heavyweight MMA rules bout between Captain Beefheart (ranked 0 p4p, 0 weight class) and Robert Lundin (ranked 0 p4p, 0 weight class). These two fighters really are very evenly matched on the feet - it will be fascinating to see who can assert themselves in that aspect of the fight.
 |
|
 |
| 182 cm
27
223 lbs
14 - 11 - 0 |
|
210 cm
32
221 lbs
11 - 11 - 0 |
Good wrestling
World class boxer
Cardio machine |
|
Good wrestler
World class boxer
Good gas tank |
|
| |
|
Ladies and gentlemen. This fight is 3 rounds, in the light heavyweight division.
Introducing the fighter to my left, fighting out of the red corner.
With a record of
14 - 11 - 0, fighting out of Tokyo, Captain Beefheart!
And introducing the fighter to my right, fighting out of the blue corner.
With a record of
11 - 11 - 0, fighting out of Hilo, Robert Lundin!
The judges for this bout are , Don Winkell and Jack Bonds.

The bell rings for round one and we are underway!
Lundin keeps his opponent at a distance with a nice jab.
Lundin uses some good footwork to avoid the body shot by Beefheart.
Lundin shoots in but no luck this time.
Beefheart throws a head kick but Lundin moves out of range.
Lundin with a jab.
Lundin on the wrong end of a vicious looking body shot.
Beefheart throws a hook to the body but it doesn't connect.

Lundin shoots in and gets a takedown into half guard. Lundin showed some decent athleticism there.
Lundin sitting in half guard, looking to land shots. Beefheart defending well though.
Beefheart is trying to defend against the ground and pound but Lundin scores with a couple of nice shots.
We've seen a great period of action over the last minute or so - credit to both fighters for going all out!
Beefheart is looking to improve his position.
Lundin throwing punches and elbows but they're not doing any damage.

That's one minute gone in the round.
Lundin throwing shots but they're hitting the canvas more than the man.
Beefheart wants to improve his position but Lundin is controlling well.
Lundin not throwing his punches with enough precision this time.
Beefheart keeping his head moving to avoid the ground and pound.
Lundin is a painfully thin specimen of a man. You do wonder whether a good body kick would snap him clean in two.
Lundin prevents Beefheart from improving his position.
Beefheart avoiding damage under a succession of punches from Lundin.
Lundin trying to control from half guard but Beefheart is working away.
Beefheart keeping his head moving to avoid the ground and pound.

Lundin is looking for a kimura. It's going to be difficult to finish that from half guard though and Beefheart defends it well.

That's two minutes gone in the round.
Lundin looks over to his corner - he wants some instructions but his corner are not responding.
Lundin with the ground and pound but Beefheart uses the opportunity to regain guard.
Beefheart keeping moving, preventing Lundin from controlling successfully.
Lundin landing with the ground and pound.
Lundin trying to control the position from guard on top but Beefheart is wriggling around, looking for whatever he can.
Lundin pressing down on his opponent's thigh, looking to pass guard. Beefheart is keeping the position for now.
The ref warns both fighters not to hold the cage as they work up against the meshing.

That's three minutes gone in the round.
Beefheart looking to hit a scissor sweep but Lundin is one step ahead there.
Lundin trying to control the position from guard on top but Beefheart is wriggling around, looking for whatever he can.

Lundin stands up and waves to Beefheart to follow him.
Lundin shoots for a double leg takedown but Beefheart sprawls well. He's pushed Lundin's face into the mat and manages to get back to his feet relatively easily.
Beefheart lands a leg kick. The shin dug right into the meat of the thigh.
Lundin fails with a takedown attempt from distance.
Captain Beefheart has stuffed three takedown attempts in the round now. That's going to take a lot out of Robert Lundin.
Lundin avoids the clinch attempt nicely.

That's four minutes gone in the round.
Lundin has his front leg slapped to the side - a nice low kick landing there from Beefheart.
Beefheart fakes with a right hand and throws a good leg kick, right into the thigh. That had to hurt Lundin.
Beefheart dodges the punch combination from Lundin.
Lundin fails with a takedown attempt from distance.
Beefheart moves in looking to clinch but Lundin pushes him off.
Lundin scores with a nice takedown into half guard. Let's see what he's got on the ground.
This has been an exciting period of action!
Beefheart trying to hold on to Lundin's head to control him but Lundin postures up.
Lundin is looking to take a break and control but Beefheart is keeping him honest, looking to work from the bottom.
As the round comes to an end the crowd are showing their appreciation for a great round of action.
Beefheart blocking the ground and pound attempt from Lundin.
Beefheart strikes from the bottom but Lundin uses the opportunity to move to side control.
And thats the end of the round the fighters go back to their corners.
Robert Lundin dominated that round.
Well, the break between rounds is over. Let's get back to the scrappin!

Beefheart ducks down and throws a hook to the body but Lundin moves away.
Beefheart throws a body punch but Lundin moves out of range.
Lundin checks a low kick. Bone on bone - not my idea of a good time.

Lundin gets tackled into the cage by Beefheart. Beefheart maintains the clinch.
Lundin takes an elbow to the forehead.

It looks like Robert Lundin has been cut.
Lundin successfully pulls guard.
Lundin wants to control but Beefheart passes easily into half guard.
Lundin looking to work for a kimura from the bottom.
Robert Lundin has got the better of the ground game so far.
Beefheart passes into side control, despite Lundin's attempt to control the position.
That's one minute gone in the round.
Lundin is looking to regain half guard here but Beefheart keeps moving and retains side control.
Beefheart avoids the strikes from the bottom by Lundin.

Beefheart stands up and beckons Lundin to his feet.
Beefheart on the receiving end of a decent leg kick there by Lundin. Lundin obviously looking to wear him down.
Beefheart missing with a left hand there. Lundin was out of range so wasted energy throwing that one.
Lundin shoots for a takedown but Beefheart saw that one coming a mile off and avoided it easily.
Lundin will have to do better than that with his takedown attempts.
Beefheart throws a hard body shot but it just misses.
That's two minutes gone in the round.
Beefheart tries a head kick but it misses.
Lundin shoots in but no luck this time.
Captain Beefheart has stuffed three takedown attempts in the round now. That's going to take a lot out of Robert Lundin.
Beefheart misses with an uppercut. Lundin saw that one coming.
Beefheart throws the left hand but Lundin avoids the punch easily.
Beefheart stuffs the takedown.
Lundin shoots for a double leg takedown but Beefheart sprawls well. He's pushed Lundin's face into the mat and manages to get back to his feet relatively easily.
Beefheart throws a hard body shot but it just misses.
Captain Beefheart is looking to keep the fight on the feet at all costs.
Beefheart works Lundin's body with a nice hook.
The fans in attendance giving it up for the two fighters, who have really let it all hang out in the last minute or so!
Beefheart tries to clinch up.
Beefheart moves into range and lands a nice leg kick.
Beefheart motions for Lundin to come forward. Beefheart throws a leg kick but it misses it's target.
Beefheart closes the distance looking to clinch
and Lundin decides to take the opportunity to score a takedown. He's landed in Beefheart's guard.
That's three minutes gone in the round.
Lundin throws a strike but Beefheart rolls with it and manages to sweep. Now he's in guard on top.
Lundin looking for submissions from the bottom here. Moving his hips around, possibly looking for an armbar.
Beefheart lands a couple of digs.
Lundin looking for a guillotine here but Beefheart defends easily.
Lundin looking for a guillotine here but Beefheart defends easily.
That's four minutes gone in the round.
Beefheart advances position into side control!
Lundin is looking to regain half guard here but Beefheart keeps moving and retains side control.
Lundin is persisting with the attempt to improve his position.
As the round comes to an end the crowd are showing their appreciation for a great round of action.
Lundin takes a couple of big shots there - the referee warns him that he has to defend himself better.
And thats the end of the round the fighters go back to their corners.
That was a close second round but I would say that Captain Beefheart will probably get the nod.
The cut man is working on Robert Lundin's cut.
The fighters' corners scream their final instructions, as the referee calls time. Here we go, back to the action! Ladies and gentlemen, this is the final round!

Beefheart misses with a jab to the body
and Lundin counters with a takedown into side control.
Beefheart manages to get back to half guard.
Lundin is nestled in close to Beefheart, controlling him well. He's worked in a nice elbow to the side of the head as well, for good measure.
Lundin wants to free his trapped foot but Beefheart is holding on for dear life with his legs.
Lundin thows a wild elbow that connects with the canvas.
Lundin lands with a punch from half guard.
The fans in attendance giving it up for the two fighters, who have really let it all hang out in the last minute or so!
Lundin trying to control the action but Beefheart is working from the bottom.
Beefheart lands with a few short shots to the body.
Beefheart is looking to regain full guard. Not this time though.
Lundin throwing shots but Beefheart is blocking nicely.
That's one minute gone in the round.
Lundin throwing punches and elbows but they're not doing any damage.
Lundin is trying to control. Beefheart wants to improve his position but can't escape this time.
The two fighters exchange a few words. I couldn't hear what they were saying but maybe it's more fun if you make it up yourself. Lundin connects with a nice short shot to Beefheart's temple.
Beefheart is looking to improve his position.
Lundin not landing any meaningful shots this time.
Beefheart keeping his head moving to avoid the ground and pound.
Lundin throwing shots but Beefheart is blocking nicely.
Lundin thows a huge punch but Beefheart dodges it nicely.
Lundin missing with some ground and pound from the half guard.
That's two minutes gone in the round.
Lundin landing with strikes to the body and head, softening up his opponent.
Lundin has the superior BJJ but he's also working some ground strikes into his gameplan.
Lundin drops an elbow to the side of Beefheart's head.
Lundin wants to control but Beefheart is keeping him busy.
Lundin wants to pass the guard but Beefheart is defending well.
Lundin not throwing his punches with enough precision this time.
This is a great period of action - very entertaining stuff!
Lundin is looking for a kimura here.
Lundin throwing shots but Beefheart is blocking nicely.
That's three minutes gone in the round.
Lundin not throwing his punches with enough precision this time.
Lundin not throwing his punches with enough precision this time.
Lundin throws a strike but Beefheart avoids it easily and moves to full guard.
Beefheart is trying to keep Lundin in close.
Lundin throws a big right hand that misses.
Lundin lands a nice shot whilst sitting in his opponent's guard.
Beefheart is trying to control the position but Lundin postures up.
Lundin with a flurry of punches that miss.
Beefheart might be looking to lock onto one of his opponent's long limbs for a submission, whilst we're on the ground.
Lundin distracts Beefheart with his right hand and drops a big elbow with his other arm.
That's four minutes gone in the round.
A big thud reverberates around the arena there as Lundin accidentally thumps the mat. Hopefully he's not broken his hand.
Lundin stands up over Beefheart, holding his feet. He dives back in and lands a decent shot to the head.
Lundin trying to land body shots but he keeps hitting the mat.
Lundin trying to land body shots but he keeps hitting the mat.
Lundin trying to control the position from guard on top but Beefheart is wriggling around, looking for whatever he can.
Fantastic stuff here - a very entertaining period of action, which has drawn cheers from the crowd.
Beefheart throwing some rather feeble looking strikes off his back.
Lundin with a couple of shots to the head there. Not particularly brutal.
The fighters are pressed up against the cage, both looking to find a bit of space to work.
Lundin wants to control from the top but Beefheart keeps moving.
As the round comes to an end the crowd are showing their appreciation for a great round of action.
Lundin is looking to pass into half guard but Beefheart pushes him away with his feet and jumps on top - now Beefheart is in guard.
And that's the end of the fight!
Robert Lundin comfortably won the final round on my scorecard.
I think Lundin has won this one but let's see whether the judges agree with me. Over to the ring announcer for the scorecards.
Ladies and gentlemen, after 3 rounds of action, we go to the scorecards for a decision.
Judge Percy O'Donnell scores the fight 28:29
Judge Don Winkell scores the fight 27:30
Judge Jack Bonds scores the fight 27:30
In favor of your winner, by unanimous decision... Robert Lundin!
|
|
|
|
|
|
|
|
|
|
|
|
|
|
|
|
|
|
|
|
|
|
|
| S |
C
A |
G |
S |
C
B |
G |
|
S |
C |
G |
|
energy
A | B |
|
hype
A | B |
|
pop
A | B |
|
mgr
A | B |
|
FIGHT
RATING
75% |
|
|
|
|
|
|

