|
|
PBP Commentary |
Coming up we have a featherweight MMA rules bout between Keita Aoki (ranked 0 p4p, 0 weight class) and Kalle Kula (ranked 0 p4p, 0 weight class). Kula is bouncing up and down as he enters the arena, backed by Bullet - Bite the Bullet. Buckle up people - heeeeeeeeeere we go!
 |
|
 |
| 165 cm
32
144 lbs
11 - 8 - 0 |
|
158 cm
21
133 lbs
7 - 3 - 0 |
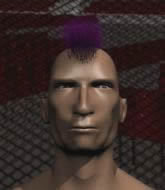
Abu Dhabi Champ
Solid boxing
Insanely flexible |
|
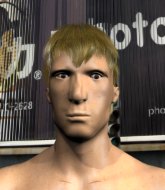
TWGC Champion
Basic striking
Determined |
|
| |
|
Ladies and gentlemen. This fight is 5 rounds, for the featherweight championship of the world!
Introducing the champion to my left, fighting out of the red corner.
With a record of
11 - 8 - 0, fighting out of Hilo, Keita Aoki!
And introducing the challenger to my right, fighting out of the blue corner.
With a record of
7 - 3 - 0, fighting out of Rio de Janeiro, Kalle Kula!
The judges for this bout are Matheus Silva, Felipe Paraventi and Luis Engracia.

The bell rings for round one and we are underway!
Kula looks for a takedown here. Will he get it? Aoki is fending him off so far but Kula persists. Nope, Aoki circles away and we're back to standing.

Kula tries to keep at a distance but Aoki has taken the fight into the clinch.

Kula tightens his grip and picks Aoki up, before dumping him to the ground. Aoki manages to land in guard.
We must be close to a standup if these guys don't pick up the pace.
Kula prevents Aoki from getting back to his feet.

Kula postures up as if he's going to throw some strikes but drops back for an ankle! Aoki is in big trouble! He looks ready to tap! But no, he's escaped and dives on top of Kula, into his guard.
Aoki won't allow Kula to sweep him here.
Kula keeping moving, preventing Aoki from controlling successfully.
Kula isolates an arm and boxes in a triangle. Aoki stacks Kula on his neck as he steps over and passes to the side. He's now in a much more dominant position where he can look to do some serious damage. Nice move by Aoki!
Aoki wants to stand but Kula is controlling his arm.

That's one minute gone in the round.

Aoki is trying to get an arm triangle but Kula is defending well.
Aoki tries to get to his feet but he's trapped momentarily.
Aoki trying desperately to get back to his feet here but he's not having any joy at all. He's going to tire himself out if he's not careful.
Aoki is moving around in side control but his primary objective seems to be to maintain the position.
Kula sneaks back into half guard.

That's two minutes gone in the round.
Kula is looking to improve his position.
Aoki trying to control the pace.
Aoki is trying to work for a kimura but Kula is defending well.
Aoki prevents Kula from improving his position.
The ref warns both fighters not to hold the cage as they work up against the meshing.

That's three minutes gone in the round.
Aoki is looking to take a break and control but Kula is keeping him honest, looking to work from the bottom.
Kula is working for an escape here. He's hooked one of Aoki's legs and he's managed to sneak out and take Aoki's back!
Kula has his opponent's back and is working for the choke.
Aoki tries to escape the position - he's now mounted. Is that better or worse? Hard to tell!
Aoki is in all sorts of trouble here.
Kula goes for an armbar but Aoki turns quickly into his guard - lovely anticipation from Aoki.
Aoki engaging in some classic timewasting tactics.

That's four minutes gone in the round.
Kula throws his legs up looking for a submission but Aoki uses it to pass to side control.
Kula is looking to reverse the position.
This has been an exciting period of action!
Aoki wants to stand but Kula is controlling his arm.
Kula tries to buck Aoki off but Aoki is having none of it.
As the round comes to an end the crowd are showing their appreciation for a great round of action.
Kula gets one leg under and gets the fight to half guard.
Aoki is pressing down on Kula's thigh, looking to free his foot. Kula is holding on for now.
And thats the end of the round the fighters go back to their corners.
That was a close round but I would say that Keita Aoki will probably get the nod.
That's the end of the interval. I'm sure that seemed a lot quicker than a minute for our two fighters! Back to the action.

Aoki darts in and clinches Kula up against the cage.
Aoki has a couple of punches blocked by Kula.
Aoki throws a hook to the body. More of an arm punch but it's all scoring with the judges.
Aoki gets underhooks to prevent Kula's takedown attempt.
Kula changes levels and goes for a takedown here. Aoki fights it off and pushes away nicely.
Aoki misses with a double jab.
Aoki gets a clinch.
Kula on the defensive, avoiding the knees to the body.
Aoki missing with knees to the body.
Kula goes for a takedown attempt but Aoki pushes him away and we're back to fighting at a distance.
Keita Aoki has stuffed three takedown attempts in the round now. That's going to take a lot out of Kalle Kula.
Aoki defends well against a solid takedown attempt from Kula.

Aoki is looking for a takedown here. He's shot in and has managed to get it, finishing up in Kula's half guard.
Aoki is trying a forearm choke
I don't think that's going to do much at this level of the game.
That's one minute gone in the round.
Aoki wants to stand but Kula has hold of a leg and an arm, so he's trapped for now.
Aoki is keen to just control but Kula is a slippery customer.
Kula wants to improve his position but Aoki is controlling well.
Kula is staying active underneath Aoki, who seems content to just control the action from this position.
Kula looking to work for a kimura from the bottom.
That's two minutes gone in the round.
Aoki looking for a kimura but he'll have to free his other leg if he wants to finish that. Perhaps he's just using it as a distraction technique.
Kula tries to get to full guard but Aoki has control of the leg.
Kula keeps trying to improve his position.
Aoki seems to be looking for submissions.
That's three minutes gone in the round.
Aoki is looking to pass the guard... He's managed it - he's now in full mount!
Kula tries to reverse the position but Aoki maintains control.
Keita Aoki overall seems to be getting the better of the ground position in the fight so far.
Aoki is trying to stand up but he's being controlled by his opponent.
Aoki seems to be looking to move to his opponent's back but Kula is holding on tight.
Aoki tries to stand up but he's trapped just for the moment.
Kula is trying to escape the mount.
Aoki looking to secure an arm triangle but Kula defends it well.
That's four minutes gone in the round.
Kula is squirming around, avoiding Aoki's attempts to control the action.
Kula bucks up and manages to get a nice reversal! He's in guard on the top - nicely done!
Kula is holding a leg here, probably looking for an ankle lock - he drops back and goes for it! Aoki is in trouble! Is it all over??? No! Aoki has escaped and now he's on top!
The crowd applaud the fighters efforts here as the round comes to an end.
Aoki wants to stand but Kula has a closed guard, so he can't escape.
And thats the end of the round the fighters go back to their corners.
Keita Aoki dominated that second round.
The minute break is over - no more time for sponges and pep talks - back to the action!

Kula shoots in for a takedown. "I don't think so" says Aoki as he avoids it easily.
Keita Aoki is looking to throw some combinations by the looks of things.
Kula shoots for a takedown but Aoki saw that one coming a mile off and avoided it easily.
Aoki gets a clinch.
Kula has a body lock and is looking for a takedown. Aoki is bouncing around trying to prevent the takedown and somehow he has indeed managed to stay on his feet.
Keita Aoki has stuffed three takedown attempts in the round now. That's going to take a lot out of Kalle Kula.
Aoki missing with knees to the body.
Aoki misses with an elbow strike.
A body shot lands from Aoki.
Aoki lands with a quick shot inside that doesn't really do much damage.
Kula tries to score a body lock takedown but Aoki shows good agility there to stay on his feet.
Aoki misses with a body punch.
Aoki misses with a shot to the kidneys.
Aoki pushes Kula back against the cage and unloads with a body punch.
Aoki presses Kula against the cage and delivers a mid-strength body shot.
Kula drops down looking for an ankle pick but Aoki pulls his leg out and moves away.
Aoki moves into range and clinches up with Kula.
That's one minute gone in the round.
Aoki misses with a knee strike.
Aoki pushes off and fires off an elbow that misses, before clinching up again, against the cage.
Aoki connects with a knee to the head.
Aoki trying to stall but Kula improves his position.
Aoki landing some nice looking knees to the body.
Aoki misses with a knee strike.
Aoki lands a knee to the body.
Aoki connects with a nasty looking knee right to Kula's face.
Kula is trying to work for a single leg takedown but Aoki pulls him back up using the underhooks.
Kula takes a big intake of breath there - he's definitely tired.
Aoki jumps guard and drags Kula to the mat. He's obviously going to be looking for submissions off his back.
Aoki has a loose triangle. He'll be looking to tighten that up but Kula can see exactly what he's planning and manages to posture up and free himself.
Kula pressing down on his opponent's thigh, looking to pass guard. Aoki is keeping the position for now.
Kula slips nicely into half guard.
That's two minutes gone in the round.
Wooooo! Give it up for these two warriors! They are putting on a show!
Aoki wants to control but Kula is keeping busy.
Aoki looking for submissions from an awkward position here.
Aoki makes his way to full guard. A much better position for Aoki.
Aoki can't keep his opponent in guard - Kula advances to half guard, no doubt looking to mount.
Kula is working for a submission of some sort.
Aoki trying to control but Kula postures up.
That's three minutes gone in the round.
Kula stops Aoki from getting back to his feet.
Aoki gets full guard.
Kula stands up and looks to throw the legs aside to pass to side control. Aoki swivels though and keeps the full guard.
Aoki has Kula pulled in close to control his posture.
Kula pushes down on Aoki's leg and manages to get into half guard.
Kula is looking for the mount but instead finds himself back in full guard.
Kula has gone for a leg lock! Aoki slips out almost immediately though and dives into Kula's guard.
Aoki has decided he wants to stand but the closed guard of Kula is proving hard to escape from.
That's four minutes gone in the round.
Aoki tries to free his leg and advance position but Kula is retaining full guard.
Aoki pushing down on Kula's thigh, trying to pass to half guard. He's managed it... Nice work.
Kula is pressing down on Aoki's left leg trying to get back to full guard. He's managed it.
Aoki trying to control but Kula is working from the bottom.
The crowd cheering loudly, showing their appreciation for the quality fight we're seeing here.
As the round comes to an end the crowd are showing their appreciation for a great round of action.
Kula has a loose triangle. He'll be looking to tighten that up but Aoki can see exactly what he's planning and manages to posture up and free himself.
And thats the end of the round the fighters go back to their corners.
Keita Aoki clearly takes that round.
The minute break is over - no more time for sponges and pep talks - back to the action!

Kula misses with a takedown attempt. He shot from a bit too far out.
Aoki drives through with a takedown into Kula's guard. Let's see what he can do from the top position.
Aoki wants to stand but Kula has a closed guard, so he can't escape.
Kula is working actively from the bottom, looking for submissions. He's escaped his hips to the side and he's going for an armbar! Aoki has his hands clasped together but Kula extends and breaks Aoki's desperate grasp, forcing a tap out due to armbar! Nice BJJ displayed there by Kula.
Ladies and gentlemen, after 0:53 of round 4, we have a winner by way of Submission (Armbar). Kalle Kula!
Kalle Kula is the new featherweight champion!
Kalle Kula seemed lost for words in his post fight interview but he remembered to thank his fans and directed everyone to his website.
|
|
|
|
|
|
|
|
|
|
|
|
|
|
|
|
|
|
|
|
|
|
|
| S |
C
A |
G |
S |
C
B |
G |
|
S |
C |
G |
|
energy
A | B |
|
hype
A | B |
|
pop
A | B |
|
mgr
A | B |
|
FIGHT
RATING
100% |
|
|
|
|
|
|
