|
|
PBP Commentary |
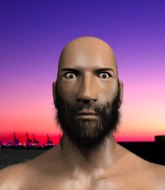
Coming up we have a light heavyweight MMA rules bout between Kyle Babcock (ranked 0 p4p, 0 weight class) and Hiroyuki Yamasaki (ranked 0 p4p, 0 weight class). Kyle Babcock has the edge in experience - let's see if he can make that count tonight.
 |
|
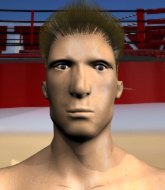 |
| 175 cm
22
213 lbs
5 - 4 - 0 |
|
190 cm
22
214 lbs
1 - 0 - 0 |
BJJ Blue Belt
Basic striking
Experienced |
|
BJJ Blue Belt
Brawler
Intelligent |
|
| |
|
Ladies and gentlemen. This fight is 3 rounds, in the light heavyweight division.
Introducing the fighter to my left, fighting out of the red corner.
With a record of
5 - 4 - 0, fighting out of Rio de Janeiro, Kyle Babcock!
And introducing the fighter to my right, fighting out of the blue corner.
With a record of
1 - 0 - 0, fighting out of Tokyo, Hiroyuki Yamasaki!
The judges for this bout are Daniel Cesar, Emerson Jorge and Thiago Cunha.

The bell rings for round one and we are underway!
Babcock showing good head movement there, avoiding the strikes from Yamasaki.
Yamasaki swings away but doesn't land with a series of punches.
Yamasaki is looking to take this fight into the clinch.
Yamasaki is looking to clinch but Babcock is avoiding it.
Yamasaki throws a leg kick that misses.
Babcock shoots for a takedown but Yamasaki saw that one coming a mile off and avoided it easily.

Yamasaki closes the distance and presses his opponent up against the cage.
Yamasaki jumps guard but his hands slip and he falls flat on his back. Well, he's made himself look a right mug there, as Babcock walks away with a smile on his face. Yamasaki gets slowly back to his feet and shakes his head.
Yamasaki misses with a right hand
and Yamasaki takes a counter punch right on the button for his troubles.
Yamasaki misses with a body kick.
Yamasaki moves away from the strike by Babcock.
Hiroyuki Yamasaki seems to be the more aggressive standup fighter in this bout.
Babcock fails with a takedown attempt.
Yamasaki lands a nice shot that snaps Babcock's head back.
Babcock looks to land a right hand but Yamasaki moved out of range.

Babcock drives through and clinches with Yamasaki against the cage.
A frustrated look appears on Yamasaki's face as he tries to break the clinch.

That's one minute gone in the round.

Babcock works for the underhooks and manages to get a trip takedown into guard.
Yamasaki is working the butterfly guard. He manages to land a nice scissor sweep and is now in half guard on the top. Nice move.
Babcock moves his hips nicely and gets into full guard.
Yamasaki scoring with punches to the head and body.
Babcock wants to sweep but no luck.
Yamasaki throwing strikes from guard but Babcock blocks nicely.
Yamasaki in full guard, throwing the ground and pound. No damage this time.
Babcock controls Yamasaki momentarily but Yamasaki frees himself.
Babcock looking to hit a scissor sweep but Yamasaki is one step ahead there.

Babcock throwing his legs up looking for a triangle.

That's two minutes gone in the round.
The crowd cheering loudly, showing their appreciation for the quality fight we're seeing here.
Babcock working from the bottom, still in full guard. He's managed to get a loose triangle. Yamasaki doesn't seem to be doing much to defend here, obviously he feels comfortable in the position. Yamasaki manages to throw the legs off his shoulder and he's back into guard - no problem.
Yamasaki wants to stand but Babcock is controlling his posture from full guard.
Yamasaki is fighting to break Babcock's control of his arms but Babcock is doing a good job of controlling the position at the moment.
The ref warns both fighters not to hold the cage as they work up against the meshing.
Yamasaki preventing the sweep.
Yamasaki must be cautious of submissions here, given that his opponent has the superior Jiu Jitsu.
Yamasaki working some ground and pound from guard but it's not doing any damage.

That's three minutes gone in the round.
Yamasaki wants to stand but Babcock is controlling his posture from full guard.
Yamasaki with a couple of shots to the head there. Not particularly brutal.
Babcock is active off his back here, looking for submissions.
Babcock is working from a closed guard but he's struggling to control his opponent.
Babcock working from the bottom, still in full guard. He's managed to get a loose triangle. Yamasaki doesn't seem to be doing much to defend here, obviously he feels comfortable in the position. Yamasaki manages to throw the legs off his shoulder and he's back into guard - no problem.
Babcock has his foot on Yamasaki's thigh. He's trying to push off and get in position for a triangle, I think. Yamasaki works his way back into a safe position though.
Yamasaki preventing the sweep.

That's four minutes gone in the round.
Yamasaki throwing strikes from guard but Babcock blocks nicely.
Babcock has his foot on Yamasaki's thigh. He's trying to push off and get in position for a triangle, I think. Yamasaki works his way back into a safe position though.
Yamasaki would like to get this fight back to the feet but can't get free from the closed guard.
Fantastic stuff here - a very entertaining period of action, which has drawn cheers from the crowd.
Babcock is looking for a guillotine. You can't force these things though and Yamasaki defends well.

Yamasaki stands up and waves to Babcock to follow him.
Yamasaki throws a right hand that Babcock ducks under and follows up with a left that Babcock also avoids with ease.
As the round comes to an end the crowd are showing their appreciation for a great round of action.
Babcock takes a shot to the eye socket. That's gotta hurt.

It looks like Kyle Babcock has been cut.
Babcock smiles there as he lands a nice right hand right on the button.
Babcock drops down and drives through with a powerful takedown into guard.
And thats the end of the round the fighters go back to their corners.
Kyle Babcock dominated that round.
The cut man is working on Kyle Babcock's cut.
The fighters' corners scream their final instructions, as the referee calls time. Here we go, back to the action!

Babcock looks to score with a jab to the body but Yamasaki is just out of range.
Danga de danga de dang - Yamasaki scores with a four punch combination!
Yamasaki gets a clinch.
Babcock has had enough of the clinch but Yamasaki keeps him there for the moment.
Yamasaki throws a head punch that misses.

Babcock pushes off and circles away, back to the middle of the mat.
Yamasaki slips a jab from Babcock.
Yamasaki throws a combination but comes up with nothing but fresh air.
Yamasaki fails to land with a series of punches.
Yamasaki throws a combination but it was largely blocked by Babcock.
Yamasaki doesn't manage to clinch there - Babcock circles away.
Babcock tries to land with a swinging hook to the body but Yamasaki was well out of range. Poor timing from Babcock.
A telegraphed right hand from Yamasaki misses the target.
Babcock dips down and scores with a jab to the body.
The crowd are loving this. Great action here.
A head kick misses from Yamasaki.
No luck for Babcock with that takedown attempt.
That's one minute gone in the round.
Babcock dodges the punch combination from Yamasaki.
The fighters circling - Yamasaki throws out the jab but it was never going to land.
This fight brought to you by 5M nutrition - it's mmmmm tasty. Nice jab by Babcock.
Yamasaki fails in his attempt to clinch.
Babcock walks into a jab.
Babcock misses with a wild body shot.
Yamasaki misses with a looping right.
Nice sprawl there from Yamasaki as Babcock shoots in.
Babcock moves into the clinch successfully.
Babcock is pushing Yamasaki up against the cage, for a bit of lean and pray action. Action being used the in the loosest possible sense of the word.
Yamasaki can't find room to land a body shot as Babcock controls the action.
That's two minutes gone in the round.
Babcock gets a nice trip takedown into half guard.
The crowd cheering loudly, showing their appreciation for the quality fight we're seeing here.
Yamasaki is looking to regain full guard. Not this time though.
Yamasaki really doesn't want to stay on the ground with Babcock. If he can't get it back to his feet, it's only a matter of time before he'll be tapping out.
Babcock is scoring with some nice ground and pound from the dominant position.
Yamasaki trying to control from the bottom.
Babcock takes advantage of the dominant position to land a couple of big hammer fists.
Babcock is trying to work for a kimura but Yamasaki is defending well.
Babcock seems to be working for a kimura but Yamasaki defends the submission attempt.
Yamasaki is trying to escape back to his feet but Babcock uses the scramble to pass into side control.
That's three minutes gone in the round.
Yamasaki is trying to improve his position.
You can see the frustration on Yamasaki's face, being in this tough position on the bottom.
Babcock wants to lay and pray for a moment but Yamasaki keeps working.
The fighters are pressed up against the cage, both looking to find a bit of space to work.
Yamasaki is being controlled here.
Babcock working the ground and pound.
Babcock tries for a kimura. Not really close to a finish though.
Kyle Babcock overall seems to be getting the better of the ground position in the fight so far.
Yamasaki is looking to regain half guard here but Babcock keeps moving and retains side control.
That's four minutes gone in the round.
Babcock tries for an arm triangle. That looks pretty tight to me. Is this one over!?! Possibly, maybe, no Babcock has let go of the choke. Obviously it wasn't as tight as we thought!
Yamasaki is trying to buck Babcock off.
Babcock trying to control the position but Yamasaki is working away.
As the round comes to an end the crowd are showing their appreciation for a great round of action.
And thats the end of the round the fighters go back to their corners.
That was a close second round but I would say that Kyle Babcock will probably get the nod.
The cut man is working on Kyle Babcock's cut.
OK. That's time! The bell goes and we're back to the action. And we move into the final round!

Yamasaki throws a series of strikes that have Babcock backpedaling.
Babcock misses with a few strikes there.
Yamasaki takes one to the chin there.
Yamasaki gets taken down but at least he's managed to land in guard.
Babcock controlling from the top position.
Babcock works over Yamasaki with some ground and pound from guard.
Babcock might be looking to lock onto one of his opponent's long limbs for a submission, whilst we're on the ground.
Babcock sitting in guard here, content to control.
Babcock loading up with the ground and pound but he's missing more than he's landing in this flurry.
That's one minute gone in the round.
Babcock with a couple of shots to the head there. Not particularly brutal.

Yamasaki has an omoplata and is looking to use it perhaps as a submission or perhaps to transition. Babcock is in a bit of discomfort here, but he's managed to free himself and has dived into side control! That didn't work out too well for Yamasaki.
Yamasaki throws a couple of punches but he's in a bad position and they don't land.
Yamasaki wants to control the position but that's not easy when your opponent is in side control! Babcock seems to be going for some sort of submission here. Hard to say what - oh, it's a Brabo choke! He's got it! Yamasaki is tapping! Wow, great finish!
Ladies and gentlemen, after 1:48 of round 3, we have a winner by way of Submission (Brabo Choke). Kyle Babcock!
Kyle Babcock thanked the fans post fight for their support.
|
|
|
|
|
|
|
|
|
|
|
|
|
|
|
|
|
|
|
|
|
|
|
| S |
C
A |
G |
S |
C
B |
G |
|
S |
C |
G |
|
energy
A | B |
|
hype
A | B |
|
pop
A | B |
|
mgr
A | B |
|
FIGHT
RATING
100% |
|
|
|
|
|
|
