|
|
PBP Commentary |
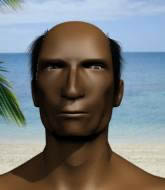
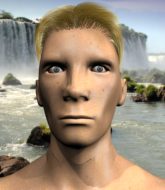
Coming up we have a lightweight MMA rules bout between Ba Lil III (ranked 0 p4p, 0 weight class) and Christian Birchmont (ranked 0 p4p, 0 weight class). These two fighters really are very evenly matched on the feet - it will be fascinating to see who can assert themselves in that aspect of the fight.
 |
|
 |
| 180 cm
28
160 lbs
16 - 3 - 0 |
|
177 cm
29
147 lbs
20 - 13 - 0 |
Abu Dhabi Champ
Excellent boxer
Insanely flexible |
|
Good wrestler
Excellent MT
Granite chin |
|
| |
|
Ladies and gentlemen. This fight is 5 rounds, for the lightweight championship of the world!
Introducing the champion to my left, fighting out of the red corner.
With a record of
16 - 3 - 0, fighting out of Sydney, Ba Lil III!
And introducing the challenger to my right, fighting out of the blue corner.
With a record of
20 - 13 - 0, fighting out of Sydney, Christian Birchmont!
The judges for this bout are Eliza Hachem, Damien Edna and Hugh Johnson.

The bell rings for round one and we are underway!
Birchmont tries to clinch up.
Lil III throws a hook but Birchmont blocks it.
Birchmont slips under a jab.
Christian Birchmont seems to be the more aggressive standup fighter in this bout.
Birchmont tries to clinch but Lil III is having none of it.
Birchmont takes a solid shot to the body. That one hurt him but he's trying not to show it.
Birchmont avoids the body shot from Lil III.

Birchmont moves into the clinch successfully.
Birchmont working some nice short punches in the clinch.
Lil III lands a body punch in the clinch.
Birchmont is trying to maintain a safe position but Lil III gets an underhook and turns Birchmont into the cage.
Birchmont gets underhooks to prevent Lil III's takedown attempt.
Lil III tried to land a shot to the body but connects with Birchmont's elbow.

Birchmont jumps guard.
The referee must be thinking about standing these guys back up.

Birchmont is active off his back here, looking for submissions.
Lil III wants to pass the guard but Birchmont is keeping the position.
Birchmont is working from a closed guard but he's struggling to control his opponent.
Birchmont is throwing his legs up, looking for submissions. Lil III is aware though and is defending well.
The crowd cheering loudly, showing their appreciation for the quality fight we're seeing here.
Birchmont keeping moving, preventing Lil III from controlling successfully.

That's one minute gone in the round.
Birchmont had isolated an arm as going for a kimura. Lil III defends it easily.
Birchmont keeping moving, preventing Lil III from controlling successfully.
Birchmont throwing his legs up looking for a triangle.
Birchmont utilising some decent striking defenses from the guard, preventing the ground and pound.
Lil III throwing strikes but missing.
Birchmont looking for submissions off his back, moving his hips, looking for an opening.
Birchmont looking for a sweep. Not yet Birchmont, not yet.
Lil III keeps in close for a moment and lands a decent shot to the side of Birchmont's head.
Birchmont keeping moving, preventing Lil III from controlling successfully.
Birchmont trying to control the position.

That's two minutes gone in the round.
Birchmont has his foot on Lil III's thigh. He's trying to push off and get in position for a triangle, I think. Lil III works his way back into a safe position though.
Lil III with a nice head shot there.
Lil III trying to land body shots but he keeps hitting the mat.
Birchmont is looking for a triangle but Lil III pushes his legs off easily.
Birchmont not looking particularly offensive just at the moment.
Wooooo! Give it up for these two warriors! They are putting on a show!
Lil III stands and throws Birchmont's legs to the side, diving into side control.
Lil III controls the position from side control.
Both fighters really going for it on the ground here!

Lil III wants to work for a kimura but he's foiled early by Birchmont, who protects the arm well.
Birchmont tries to get back to half guard but can't.
Lil III throwing shots but missing, from side control.
Birchmont tries to get back to half guard but can't.

That's three minutes gone in the round.
Lil III goes for an armbar here - this could be all over! But no, Birchmont has escaped beautifully and is now on top in side control! Oh, that's unlucky for Lil III but great work by Birchmont.
Lil III is looking to regain half guard here but Birchmont keeps moving and retains side control.
Birchmont is trying to land an Americana. He has the arm isolated but Lil III is keeping cool and he's avoided the danger for now.
Birchmont is trying to land an Americana. He has the arm isolated but Lil III is keeping cool and he's avoided the danger for now.
Lil III tries to bench press Birchmont off him but Birchmont keeps the position.
Lil III manages to land a sweep and he's now on top! Lovely Jiu Jitsu!
Lil III wants to pass to mount but Birchmont is defending the position.
Birchmont is looking for a sweep. Lil III is wise to his cunning plan and keeps the top position.
Birchmont works his way to full guard. Good work.
Lil III got a little sloppy there for a moment and Birchmont has worked his way into a loose triangle - can he finish it?! No, Lil III has managed to get both his arms back between Birchmont's legs - danger averted.

That's four minutes gone in the round.
Birchmont has a loose triangle. He'll be looking to tighten that up but Lil III can see exactly what he's planning and manages to posture up and free himself.
Birchmont keeping moving, preventing Lil III from controlling successfully.
Lil III is going to have to think about doing something other than just controlling because Birchmont is managing to avoid having the position dictated to him.
Lil III looking to pass the guard.
We've seen a great period of action over the last minute or so - credit to both fighters for going all out!
Lil III is frustrating his opponent with some stalling tactics from top position.
Birchmont keeping full guard, as Lil III tries to pass.
As the round comes to an end the crowd are showing their appreciation for a great round of action.
Lil III trying to control the position from guard on top but Birchmont is wriggling around, looking for whatever he can.

The referee decides to stand the fighters back up, due to lack of activity on the part of Ba Lil III.
Lil III throws a poor cross that misses
and Birchmont counters with a good right hand that lands right on the jaw.
Birchmont fails with an attempt to clinch.
And thats the end of the round the fighters go back to their corners.
A close round but Christian Birchmont will probably get the nod.
The minute break is over - no more time for sponges and pep talks - back to the action!

Birchmont doesn't manage to clinch there - Lil III circles away.
Birchmont connects with a lovely jab that went straight through the gap between Lil III's hands.
Birchmont checks a leg kick.
Lil III defending well as Birchmont loads up on a big left hand.
Birchmont wants to clinch up but Lil III keeps it at a distance.
Birchmont leaves Lil III with his face pressed against the mat as he sprawls beautifully, defending against a solid takedown attempt.
Birchmont is looking to take this fight into the clinch.
Lil III looks for the body kick but Birchmont saw that one coming.
A telegraphed takedown attempt from Lil III is defended easily by Birchmont.
Birchmont fails in his attempt to clinch.
Birchmont scores with a jab to the jaw of his opponent.
Birchmont fails with an attempt to clinch.
That's one minute gone in the round.
Birchmont throws a series of punches but Lil III avoids them all with ease.
Christian Birchmont is looking to keep the fight on the feet at all costs.
No luck for Lil III with that takedown attempt.
That's three failed takedown attempts in the round for Ba Lil III. That's going to take a lot out of him.
Birchmont closes the distance but Lil III moves to the side
and Lil III counters with an inside leg kick.
Lil III keeps the fight on the outside.
Birchmont has his hands up protecting his head but a hook from Lil III finds it's way round the side to connect with Birchmont's head.
Birchmont checks the leg kick.
Birchmont swings for the body but Lil III moves out of range.
Lil III looks to throw the jab but Birchmont is out of range.
Birchmont has Lil III up against the cage in a clinch.
Birchmont is trying to pull guard but Lil III turns him against the cage and we stay in the clinch.
Lil III lands with a light punch inside.
Birchmont is trying to pull guard but Lil III has him pressed against the cage.
Lil III misses with the head strike.
Lil III throws a hook to the body. More of an arm punch but it's all scoring with the judges.
Lil III trying to land knees to the body.
That's two minutes gone in the round.
Birchmont ties up his opponent against the cage and manages to drag the fight down to the ground. Birchmont no doubt will be looking to work submissions from his guard.
Hammerfist, elbow! yells Lil III's corner. There ya go! There ya go!
Fantastic stuff here - a very entertaining period of action, which has drawn cheers from the crowd.
Birchmont working the defensive guard well to avoid strikes from Lil III.
Birchmont is working the butterfly guard. He manages to land a nice scissor sweep and is now in half guard on the top. Nice move.
Birchmont wants to lay and pray for a moment but Lil III keeps working.
Lil III is trying to control but can't.
Christian Birchmont has got the better of the ground game so far.
Lil III wants to get back to full guard.
Birchmont is working for submissions here but there's nothing on.
Birchmont is trying to work for a kimura but Lil III is defending well.
Lil III is pressing down on Birchmont's left leg trying to get back to full guard. He's managed it.
That's three minutes gone in the round.
Birchmont avoids a guillotine attempt easily.
Lil III escapes his hips to the side and looks to be working for an armbar. Birchmont gives him a little smile and shakes his head. No chance.
The ref warns both fighters not to hold the cage as they work up against the meshing.
Birchmont trying to control the position from guard on top but Lil III is wriggling around, looking for whatever he can.
Lil III isolates an arm and boxes in a triangle. Birchmont stacks Lil III on his neck as he steps over and passes to the side. He's now in a much more dominant position where he can look to do some serious damage. Nice move by Birchmont!
Birchmont is looking to take a break and control but Lil III is keeping him honest, looking to work from the bottom.
Birchmont wants to stand but Lil III is controlling his arm.
That's four minutes gone in the round.
Lil III struggling a bit here.
Lil III manages to get back to half guard.
Lil III moves into full guard.
Lil III has his foot on Birchmont's thigh. He's trying to push off and get in position for a triangle, I think. Birchmont works his way back into a safe position though.
Birchmont drops back for a leg! It's a sloppy attempt though and Birchmont jumps back into guard quickly, to retain the dominant position.
The fighters are pressed up against the cage, both looking to find a bit of space to work.
Birchmont tries to free his leg and advance position but Lil III is retaining full guard.
Birchmont passes easily into side control. Nice work.
The fans in attendance giving it up for the two fighters, who have really let it all hang out in the last minute or so!
Birchmont working away.
As the round comes to an end the crowd are showing their appreciation for a great round of action.
Lil III is looking to reverse the position.
Lil III wants to control but Birchmont postures up.
Lil III sneaks a leg under to get back to half guard.
And thats the end of the round the fighters go back to their corners.
That was a close second round but I would say that Ba Lil III will probably get the nod.
The fighters get back to their feet, the hooter sounds and we're back to the action!

Birchmont takes a hook to the side of the head. I wonder if that's got his ears ringing.
Good standup being displayed there by Birchmont as he connects with a hook.
Birchmont moves to clinch but Lil III breaks away
and Lil III counters with a stiff right hand.
The fight stays on the outside here - Birchmont looks like he's thinking about clinching though.
Birchmont moves in looking to clinch but Lil III pushes him off.
Lil III throws a shot to the body.
Lil III throws a lazy uppercut
and Lil III takes a counter punch right on the button for his troubles.
Birchmont getting the better of the striking in that exchange.
Birchmont avoids a lazy jab quite easily.
The fight stays on the outside here - Birchmont looks like he's thinking about clinching though.
A shot to the body from Lil III misses
and Birchmont connects with a straight left hand counter down the middle.
Lil III misses with a takedown attempt. He shot from a bit too far out.
Birchmont wants to clinch up but Lil III keeps it at a distance.
That's one minute gone in the round.
Birchmont darts in and clinches Lil III up against the cage.
Birchmont ties up his opponent against the cage and manages to drag the fight down to the ground. Birchmont no doubt will be looking to work submissions from his guard.
Lil III postures up to throw the ground and pound strikes but they don't connect.
Birchmont keeping full guard, as Lil III tries to pass.
Birchmont wants to stand up but Lil III is controlling him.
Lil III trying to control but Birchmont is working from the bottom.
Birchmont wants to sweep but no luck.
Lil III trying to control the position from guard on top but Birchmont is wriggling around, looking for whatever he can.
Lil III lands a nice shot whilst sitting in his opponent's guard.
Lil III trying to control the position from guard on top but Birchmont is wriggling around, looking for whatever he can.
Lil III looking to pass the guard.
That's two minutes gone in the round.
Lil III throwing shots from guard but he's hitting more mat than opponent.
Lil III is working Birchmont over from the guard. He should look to pass the guard and do a little more damage with these strikes.
Birchmont tries to land a sweep but no joy.
Birchmont working from the bottom, still in full guard. He's managed to get a loose triangle. Lil III doesn't seem to be doing much to defend here, obviously he feels comfortable in the position. Lil III manages to throw the legs off his shoulder and he's back into guard - no problem.
Lil III trying to control but Birchmont is working from the bottom.
This is a great period of action - very entertaining stuff!
Birchmont not looking particularly offensive just at the moment.
Lil III working some ground and pound from guard but it's not doing any damage.
Birchmont working a defensive guard here.
Lil III scoring with punches to the head and body.
Lil III passes easily into side control. Nice work.
Lil III working the ground and pound.
That's three minutes gone in the round.
Lil III trying to control the position but Birchmont is working away.
Lil III is working Birchmont over with some ground and pound from side control.
Lil III tries for a kimura. Not really close to a finish though.
Lil III works a knee to the body and follows up with a nice elbow to the head.
Birchmont tries to buck Lil III off but Lil III is having none of it.
Lil III working the head and body with strikes.
Birchmont regains half guard.
Lil III winds up and cracks Birchmont with a swinging punch to the side of the head.
Birchmont avoiding damage under a succession of punches from Lil III.
Lil III has been looking to land a fair amount of strikes on the ground. He might be looking to soften his opponent up in order to work for a submission.
Lil III lands with an elbow from half guard - that looked like it hurt.
Birchmont is not content to let Lil III control the position.
That's four minutes gone in the round.
Lil III is sneakily working for an arm triangle but Birchmont sees it coming and defends easily.
Wooooo! Give it up for these two warriors! They are putting on a show!
Birchmont is pressing down on Lil III's left leg trying to get back to full guard. He's managed it.
Birchmont is throwing his legs up, looking for submissions. Lil III is aware though and is defending well.
Lil III wants to control from the top but Birchmont keeps moving.
Lil III postures up to throw the ground and pound strikes but they don't connect.
Lil III trying to control but Birchmont is working from the bottom.
Birchmont working from the bottom, still in full guard. He's managed to get a loose triangle. Lil III doesn't seem to be doing much to defend here, obviously he feels comfortable in the position. Lil III manages to throw the legs off his shoulder and he's back into guard - no problem.
Birchmont trying to control the position.
As the round comes to an end the crowd are showing their appreciation for a great round of action.
Birchmont has momentary wrist control but Lil III slips an elbow through the middle.
Lil III with a flurry of punches that miss.
And thats the end of the round the fighters go back to their corners.
Ba Lil III clearly takes that round.
The minute break is over - no more time for sponges and pep talks - back to the action!

Lil III fails with a takedown attempt from distance.
A jab from Birchmont misses.
Lil III clobbers Birchmont with an overhand right that has the crowd gasping. That made a horrendous noise.
Birchmont moves in looking to clinch but Lil III pushes him off.
Birchmont moves to clinch but Lil III breaks away
and Lil III counters with a good right hand that lands right on the jaw.
Lil III shoots for a takedown but Birchmont saw that one coming a mile off and avoided it easily.
Birchmont tries to clinch but Lil III moves away
and Lil III counters with a leg kick.
Lil III misses with a takedown attempt - Birchmont sprawls well and throws a nice strike on the way out which just misses.
That's three failed takedown attempts in the round for Ba Lil III. That's going to take a lot out of him.
Birchmont moves in looking to clinch but Lil III pushes him off.
Birchmont scores with a jab.
Lil III shoots in looking for a takedown but Birchmont manages to keep the fight standing, pushing Lil III's face into the canvas for good measure before circling away.
Birchmont looks to clinch
and Lil III cracks him with a counter punch right on the button.
Lil III fails miserably with a takedown attempt.
That's one minute gone in the round.

Lil III scores with a takedown into Birchmont's guard.
It's got to the stage where if one of these guys blows hard enough, the other might fall over.
Birchmont is active off his back here, looking for submissions.
Birchmont working away from the bottom but not quite defensive enough there because Lil III has passed into half guard!
Birchmont looking for submissions from an awkward position here.
Lil III perhaps working for something from half guard, or maybe not. It looks like he's just sitting there.
Lil III is trying to control. Birchmont wants to improve his position but can't escape this time.
Birchmont wants to improve his position but Lil III is controlling well.
That's two minutes gone in the round.
Lil III is working for submissions here but there's nothing on.
Birchmont is looking to control Lil III's leg but it's slowly edging free. Can Birchmont avoid being mounted?
This is a great period of action - very entertaining stuff!
Lil III trying to pass the guard but Birchmont defending well.
Lil III works his way into full mount!
Birchmont squirming around on the bottom, looking to escape.
Lil III lands a big shot there that rocks Birchmont but he's holding on and managing to survive for now.
Lil III lands a couple of nice shots there from mount.
Birchmont is desperately trying to improve his position but Lil III has a good base and remains in mount.
Lil III looking to ground and pound his opponent to a finish here.
Lil III trying to control but Birchmont is having none of it.
That's three minutes gone in the round.
Lil III looking to finish Birchmont with some ground and pound. This is bad for Birchmont!
Lil III raining down hammerfists from mount.
Lil III is landing with some decent strikes but Birchmont is trying to advance his position so the referee is letting the fight continue.
Lil III is looking to secure an arm. He's managed it! He's pivoting for an armbar - that looks tight! But Birchmont has managed to get out of it and now he's in a dominant position. Nice work from Birchmont!
Lil III is working actively off his back, looking to secure an arm or perhaps work for a triangle.
Lil III has his foot on Birchmont's thigh. He's trying to push off and get in position for a triangle, I think. Birchmont works his way back into a safe position though.
Birchmont wants to control from the top but Lil III keeps moving.
Birchmont is looking to stand up but Lil III won't let him.
That's four minutes gone in the round.
Lil III is trying to keep Birchmont in close.
Birchmont wants to control from the top but Lil III keeps moving.
Lil III is looking for a triangle here but Birchmont uses the submission attempt to pass into side control.
Birchmont looking for an arm triangle but it's way too loose to do anything.
This has been an exciting period of action!
Birchmont is looking to finish here, going for an Americana. Lil III knows the correct defense though, so he's OK.
As the round comes to an end the crowd are showing their appreciation for a great round of action.
Lil III prevents Birchmont from moving into mount.
And thats the end of the round the fighters go back to their corners.
Ba Lil III had his way with Christian Birchmont in that round.
That's time! Back to the action! This is the final round!

The fighters circling - Lil III throws out the jab but it was never going to land.
Lil III throws a push kick but Birchmont slaps the foot to one side.
Birchmont fails in his attempt to clinch.
Birchmont tries to clinch up against the cage, rushing in to close the distance. Lil III manages to break the clinch and circles back to the middle of the mat.
Birchmont misses with an uppercut. Lil III saw that one coming.
The fight stays on the outside here - Birchmont looks like he's thinking about clinching though.
Birchmont tries to clinch up but Lil III circles away and keeps his distance.
Lil III throws out a token jab with nothing on it.
Birchmont clinches up with Lil III and pushes him back against the cage.
Birchmont misses with a punch to the body.
Lil III scores with an uppercut up the middle.
Birchmont tries to pull guard but Lil III forces him back to his feet, against the cage.
Birchmont can't find room to land a body shot as Lil III controls the action.
Lil III tries a body shot but Birchmont blocks it.
Lil III is pushing Birchmont up against the cage, for a bit of lean and pray action. Action being used the in the loosest possible sense of the word.
That's one minute gone in the round.
Birchmont wants to stall.
Lil III blocks a punch to the side of the head.
A left hand lands to the body for Lil III.
Lil III tries to pull guard but Birchmont forces him back to his feet, against the cage.
Birchmont tries to pull guard but can't drag his opponent to the mat. Lil III just stands there and leans against the cage.
Lil III lands a short shot on the inside that snaps the head of Birchmont backwards.
Birchmont lands a shot to the body.
Lil III blocks an uppercut.
Lil III misses with a hook to the ribs.
Lil III has managed to pull guard. Let's see whether he can work an aggressive guard. It will also be interesting to see what tactics Birchmont uses from the top position.
Birchmont avoids a guillotine attempt easily.
Both of our modern day gladiators look out of it here - a gruelling 5 rounds of action taking it's toll on them, no doubt.
Lil III trying to strike off his back.
The crowd cheering loudly, showing their appreciation for the quality fight we're seeing here.
Birchmont wants to control from the top but Lil III keeps moving.
That's two minutes gone in the round.
Birchmont sitting in guard here, content to control.
Birchmont avoids a guillotine attempt easily.
Lil III is looking for a guillotine. You can't force these things though and Birchmont defends well.
Birchmont passes Lil III's right leg, so he's now in half guard.
Lil III trying to control here.
Birchmont is trying to work for a kimura but Lil III is defending well.
Lil III manages to get to full guard.
That's three minutes gone in the round.
Lil III tries to strike from the bottom.
Birchmont avoids a guillotine attempt easily.
Lil III working for submissions but it's allowed Birchmont to get to half guard.
Birchmont tries to stand and escape but Lil III is controlling the position.
Ba Lil III is fighting for a decision here - he's started to take the cautious approach.
Birchmont is looking to stand up but he'll have to free his leg first. Instead, Lil III manages to get to full guard.
Birchmont drops back for a leg! It's a sloppy attempt though and Birchmont jumps back into guard quickly, to retain the dominant position.
Birchmont slips effortlessly into side control - very nice.
That's four minutes gone in the round.
Lil III can't do much from the bottom here.
Birchmont tries for a kimura. Not really close to a finish though.
Lil III gets one leg under and gets the fight to half guard.
Birchmont is trying for a guillotine from the top but the pressure isn't in the right place so Lil III is just riding it out for now. Birchmont eventually gives up the hold.
As the round comes to an end the crowd are showing their appreciation for a great round of action.
Lil III works his way to full guard. Good work.
And that's the end of the fight!
That was a close round. You could make an argument for either fighter but I would give it to Ba Lil III.
I think Lil III has won this one but let's see what the judges have to say. Over to the ring announcer for the scorecards.
Ladies and gentlemen, after 5 rounds of action, we go to the scorecards for a decision.
Judge Eliza Hachem scores the fight 49:46
Judge Damien Edna scores the fight 50:46
Judge Hugh Johnson scores the fight 49:46
In favor of your winner, by unanimous decision... Ba Lil III!
Ba Lil III is the new lightweight champion!
Ba Lil III thanked the fans post fight for their support.
|
|
|
|
|
|
|
|
|
|
|
|
|
|
|
|
|
|
|
|
|
|
|
| S |
C
A |
G |
S |
C
B |
G |
|
S |
C |
G |
|
energy
A | B |
|
hype
A | B |
|
pop
A | B |
|
mgr
A | B |
|
FIGHT
RATING
100% |
|
|
|
|
|
|
