|
|
PBP Commentary |
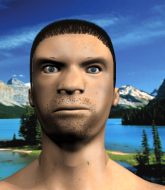
Coming up we have a heavyweight MMA rules bout between Simon Heywood (ranked 0 p4p, 0 weight class) and Tofu Fuamatufa (ranked 0 p4p, 0 weight class). Heywood comes into the arena with Fast Food Song blaring out of the sound system. Both fighters look fresh as a daisy as they make their way towards the cage.
 |
|
 |
| 172 cm
18
250 lbs
0 - 0 - 0 |
|
175 cm
20
281 lbs
1 - 3 - 0 |
BJJ Blue Belt
Basic striking
Inexperienced |
|
BJJ White Belt
Decent boxing
Intelligent |
|
| |
|
Ladies and gentlemen. This fight is 3 rounds, in the heavyweight division.
Introducing the fighter to my left, fighting out of the red corner.
With a record of
0 - 0 - 0, fighting out of The Island, Simon Heywood!
And introducing the fighter to my right, fighting out of the blue corner.
With a record of
1 - 3 - 0, fighting out of The Island, Tofu Fuamatufa!
The judges for this bout are , and .

The bell rings for round one and we are underway!
Heywood fails miserably with a takedown attempt.
Heywood shoots in for a takedown. He's persisting with it as Fuamatufa sprawls well. Fuamatufa wins this battle and keeps the fight standing. Heywood gets slowly back to his feet.
Heywood misses with a takedown attempt. He shot from a bit too far out.
That's three failed takedown attempts in the round for Simon Heywood. That's going to take a lot out of him.

Fuamatufa closes the distance and presses his opponent up against the cage.
Fuamatufa is trying to push Heywood away but Heywood has him pressed against the cage, so he's going nowhere.
Fuamatufa is trying to break the clinch but Heywood is controlling him.
Fuamatufa has had enough of the clinch but Heywood keeps him there for the moment.
Heywood wants a takedown.

Fuamatufa pushes off and circles away, back to the middle of the mat.
A punch combination from Fuamatufa misses.
Heywood tries to shoot in for a takedown. He's got hold of a leg but Fuamatufa swivels and escapes.
Fuamatufa scores with a nice looking left hook and follows it up with an uppercut!
Fantastic stuff here - a very entertaining period of action, which has drawn cheers from the crowd.
Fuamatufa gets in close and instigates a clinch.
Fuamatufa is trying to push Heywood away but Heywood has him pressed against the cage, so he's going nowhere.

That's one minute gone in the round.
Heywood wants a takedown.
Fuamatufa has had enough of the clinch but Heywood keeps him there for the moment.
Fuamatufa gets double underhooks to prevent a takedown attempt from Heywood.
Fuamatufa tries to circle away but Heywood has him pinned against the cage.
Fuamatufa can't break the clinch.
Heywood tries for a takedown. No joy.
Heywood has a body lock and is looking for a takedown. Fuamatufa is bouncing around trying to prevent the takedown and somehow he has indeed managed to stay on his feet.
Fuamatufa working hard to break the clinch.
Heywood is looking to take this one to the mat.
Heywood is breathing heavily.

That's two minutes gone in the round.
A frustrated look appears on Fuamatufa's face as he tries to break the clinch.
Heywood keeps the fight in the clinch, despite Fuamatufa's efforts to push away.
Fuamatufa is trying to force a seperation but Heywood has the dominant position.
Fuamatufa is trying to work out of this bad position, with his back against the cage.
Fuamatufa breaks the clinch.
Fuamatufa moves into the clinch.
A short uppercut from Fuamatufa.
Fuamatufa is trying to work out of this bad position, with his back against the cage.
Heywood tries to score a body lock takedown but Fuamatufa shows good agility there to stay on his feet.
Fuamatufa changes levels and goes for a takedown here. Heywood fights it off and pushes away nicely.
Wow, both these guys are really going for it!
Fuamatufa moves into the clinch.

That's three minutes gone in the round.
Fuamatufa lands with a light punch inside.
A frustrated look appears on Fuamatufa's face as he tries to break the clinch.
Heywood is working for a takedown up against the cage. He can't get it on this occasion though.
Fuamatufa wants to break the clinch but can't.
Fuamatufa is trying to break the clinch but Heywood is controlling him.
Fuamatufa lands a right uppercut that snaps the head of Heywood backwards.
Fuamatufa is trying to work out of this bad position, with his back against the cage.
Fuamatufa tries to break free but Heywood pushes him back against the cage.
Fuamatufa working hard to break the clinch.
Fuamatufa is trying to break free.
Fuamatufa tries to circle away but Heywood has him pinned against the cage.

That's four minutes gone in the round.
Fuamatufa wants to push off and get back to the center of the mat but Heywood has him pressed against the cage.
Fuamatufa wants to push off and get back to the center of the mat but Heywood has him pressed against the cage.
A nice right hand lands inside from Fuamatufa.
Fuamatufa wants to break the clinch but can't.
Fuamatufa wants to get back to striking at distance but Heywood won't allow it.
Fuamatufa is trying to break the clinch but Heywood is controlling him.
Fuamatufa breaks from the clinch.
Fuamatufa pivots as if he's going to throw a leg kick but stops half way.
As the round comes to an end the crowd are showing their appreciation for a great round of action.
Fuamatufa closes the distance and pushes Heywood back into the cage.
Fuamatufa wants to break free but Heywood has control.
Heywood drops to a knee looking for a takedown but Fuamatufa gets the underhooks and prevents it.
And thats the end of the round the fighters go back to their corners.
Tofu Fuamatufa dominated that round.
OK. That's time! The bell goes and we're back to the action.

Fuamatufa has managed to clinch.
Fuamatufa stops a takedown attempt from Heywood.
Fuamatufa tries to circle away but Heywood has him pinned against the cage.
Tofu Fuamatufa seems to be working more effectively in the clinch in the fight so far.
A short right from Fuamatufa on the inside.
Fuamatufa looks like he'd prefer to be striking at range right now.
Fuamatufa is trying to force a seperation but Heywood has the dominant position.
Fuamatufa is pushing Heywood up against the cage, for a bit of lean and pray action. Action being used the in the loosest possible sense of the word.
Heywood is looking for a takedown.
Fuamatufa wants to strike at distance but he can't break free of the clinch.
That's one minute gone in the round.
Fuamatufa has had enough of the clinch but Heywood keeps him there for the moment.
Heywood has Fuamatufa pressed against the cage, preventing Fuamatufa from circling away and getting back to striking at range.
Fuamatufa is trying to break the clinch but Heywood has him pressed against the cage.
Fuamatufa can't break the clinch.
Fuamatufa is trying to push Heywood away but Heywood has him pressed against the cage, so he's going nowhere.

Heywood tightens his grip and picks Fuamatufa up, before dumping him to the ground. Fuamatufa manages to land in guard.
It looks like the ref is thinking about a standup.
Heywood slows down the pace of the fight, as he sits in guard.
Heywood with a flurry of punches that miss.
Heywood controlling from the top position.
Heywood advances position into side control!
That's two minutes gone in the round.
Fuamatufa is letting Heywood control him for a moment.
Fuamatufa is looking to regain half guard here but Heywood keeps moving and retains side control.
Fuamatufa being controlled for a moment.
Heywood's ground tactics aren't going to win him many fans. Let's hope he's got fireworks for us if he gets back to his feet because he's not doing much on the ground.
That's three minutes gone in the round.
Fuamatufa is trying to get back to his feet.
Heywood taking a breather here.
Heywood seems to have a rather negative gameplan on the ground. He seems keen to just score the takedown and hold down Fuamatufa for as long as he can get away with.

The referee decides to stand the fighters back up, due to lack of activity on the part of Simon Heywood.
Fuamatufa clinches up against the cage.
Fuamatufa escapes the clinch and we're back to striking.
Heywood closes this distance looking for a takedown but Fuamatufa circles away.
That's three failed takedown attempts in the round for Simon Heywood. That's going to take a lot out of him.
Fuamatufa has Heywood up against the cage in a clinch.
A frustrated look appears on Fuamatufa's face as he tries to break the clinch.
That's four minutes gone in the round.
Heywood changes levels and goes for a takedown here. Fuamatufa fights it off and pushes away nicely.
Both fighters are absolutely exhausted here.
Heywood misses with a takedown attempt - Fuamatufa sprawls well and throws a nice strike on the way out which just misses.
Heywood shoots in for a takedown - he's clinched up with Fuamatufa but Fuamatufa pushes him off and we're back to square one.
Fuamatufa shoots in looking for a double leg takedown. Heywood defends it nicely.
Fuamatufa has taken the fight to the clinch.
The crowd applaud the fighters efforts here as the round comes to an end.
Heywood goes for a takedown in the clinch but Fuamatufa prevents it.
This is a great period of action - very entertaining stuff!
Fuamatufa is pressed up against the cage. Heywood has hold of a leg and is looking to drag Fuamatufa down to the mat. Fuamatufa avoids the attempt though and has circled away. We're back to striking at a distance.
And thats the end of the round the fighters go back to their corners.
That was a close second round but I would say that Simon Heywood will probably get the nod.
The referee calls time. The cornermen exit stage left and we're back to business. Ladies and gentlemen, this is the final round!

Fuamatufa gets in close and instigates a clinch.
Fuamatufa is trying to push Heywood away but Heywood has him pressed against the cage, so he's going nowhere.
Fuamatufa can't break the clinch.
Fuamatufa wants to get back to striking at distance but Heywood won't allow it.
Fuamatufa lands a body shot.
This is a great period of action - very entertaining stuff!
Fuamatufa wants to push off and get back to the center of the mat but Heywood has him pressed against the cage.
The pace really dropping off here, momentarily.
Fuamatufa lands a hook that snaps the head of Heywood backwards.
Fuamatufa is trying to break free.
Fuamatufa tries to circle away but Heywood has him pinned against the cage.
Both fighters are breathing heavily.
That's one minute gone in the round.
Fuamatufa wants to break free but Heywood has control.
A body shot lands from Fuamatufa.
Fuamatufa is trying to break the clinch but Heywood is controlling him.
Some stalling of biblical proportions here from Fuamatufa.
Fuamatufa can't break the clinch.
Fuamatufa stalls.
Heywood has Fuamatufa pressed against the cage, preventing Fuamatufa from circling away and getting back to striking at range.
The pace slowing considerably in the clinch, as Fuamatufa takes a break from that fighting nonsense to think about the finer things in life.
Fuamatufa is trying to break the clinch but Heywood has him pressed against the cage.
That's two minutes gone in the round.
Heywood prevents a takedown attempt there.
Fuamatufa wants to break the clinch but can't.
Fuamatufa working hard to break the clinch.
Fuamatufa has hold of a leg and is looking for a trip takedown. Heywood avoids it nicely though and we remain in the clinch.
Fuamatufa tries to break the clinch but Heywood is controlling the position.
Fuamatufa wants to break the clinch but can't.
Fuamatufa tries to break free but Heywood pushes him back against the cage.
Fuamatufa working hard to break the clinch.
That's three minutes gone in the round.
Heywood is looking to take this one to the mat.
Fuamatufa tries to circle away but Heywood has him pinned against the cage.
Fuamatufa looks like he'd prefer to be striking at range right now.
Heywood has Fuamatufa pressed against the cage, preventing Fuamatufa from circling away and getting back to striking at range.
Heywood has Fuamatufa pressed up against the cage and is working for takedown. Fuamatufa manages to improve position though and keeps the fight standing.
Fuamatufa is trying to push Heywood away but Heywood has him pressed against the cage, so he's going nowhere.
Fuamatufa breaks the clinch.
Fuamatufa misses with the combination.
Fuamatufa keeps his opponent at a distance with a nice jab.
Fuamatufa lands with a precision combination! Left, right, uppercut and Heywood falls flat on his face, eyes wide open but he's out!
Ladies and gentlemen, after 3:58 of round 3, we have a winner by way of KO (Punches). Tofu Fuamatufa!
An out of breath Tofu Fuamatufa thanked his loyal fans in his post fight interview, giving them credit for his success over the course of his career.
|
|
|
|
|
|
|
|
|
|
|
|
|
|
|
|
|
|
|
|
|
|
|
| S |
C
A |
G |
S |
C
B |
G |
|
S |
C |
G |
|
energy
A | B |
|
hype
A | B |
|
pop
A | B |
|
mgr
A | B |
|
FIGHT
RATING
61% |
|
|
|
|
|
|

