|
|
PBP Commentary |
Coming up we have a middleweight MMA rules bout between AJ Oker (ranked 0 p4p, 0 weight class) and Shane Baysa (ranked 0 p4p, 0 weight class). We have two fighters making their debuts here, so let's see who comes out of this one with their first professional victory.
 |
|
 |
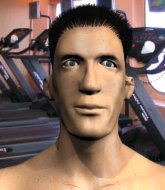
| 191 cm
25
185 lbs
0 - 0 - 0 |
|
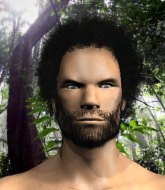
185 cm
18
185 lbs
0 - 0 - 0 |
Good takedowns
Brawler
Cuts easily |
|
BJJ Blue Belt
Counter fighter
Granite chin |
|
| |
|
Ladies and gentlemen. This fight is 3 rounds, in the middleweight division.
Introducing the fighter to my left, fighting out of the red corner.
With a record of
0 - 0 - 0, fighting out of Los Angeles, AJ Oker!
And introducing the fighter to my right, fighting out of the blue corner.
With a record of
0 - 0 - 0, fighting out of Los Angeles, Shane Baysa!
The judges for this bout are Timothy Bukovac, and Frank Antenori.

The bell rings for round one and we are underway!
Baysa shoots in for a takedown - he's clinched up with Oker but Oker pushes him off and we're back to square one.
Baysa displays good takedown defense there as he swats away a double leg from Oker.
Oker throws a wild combination but nothing lands.
Baysa throws out a leg kick but Oker moves out of range and Baysa only half commits.
Baysa slaps away a takedown attempt from Oker, before circling back to the center of the mat.
Oker is looking to clinch.
Baysa throws a sloppy head kick and Oker moves out of range easily.
No luck for Baysa with that takedown attempt.
Sloppy strikes from Baysa. Those never looked like landing.

That's one minute gone in the round.
Oker tries to clinch up.
Baysa looks frustrated there after his takedown attempt is stuffed easily.
AJ Oker has stuffed three takedown attempts in the round now. That's going to take a lot out of Shane Baysa.
Baysa tries to close the distance and clinch up against the cage but Oker paws at him with a jab and circles away.
Oker is trying hard to land a takedown here. Baysa sprawls well and keeps this one on the feet.
Oker rushes forward with a series of wild hooks but Baysa moves out of range and avoids them all easily.

Oker looks for a takedown. He's got it. We're now in half guard.
Oker is working hard to pass the guard. He's done it - he's now in full mount! Trouble for Baysa!
Oker content just to control the position here.
Oker connects with a couple of good shots from mount.

That's two minutes gone in the round.
Oker throwing shots from mount but they're not landing.
Baysa really doesn't want to stay on the ground with Oker. If he can't get it back to his feet, it's only a matter of time before he'll be tapping out.
Oker misses with a head shot.
Oker avoids the attempt from Baysa to control.
The crowd cheering loudly, showing their appreciation for the quality fight we're seeing here.
Oker working away from the top, dropping strikes.
Oker controlling his opponent.
Oker wants to stand but Baysa is holding on to him, trying to stop him posturing up.

That's three minutes gone in the round.
Oker controlling his opponent.
Baysa avoids a series of strikes thrown by Oker.
Oker postures up and cracks his opponent a couple of times before moving back into close ground control. Baysa looks a forlorn figure.
Oker sitting in mount, just looking to control for the moment.

That's four minutes gone in the round.
Baysa takes a big shot to the head but keeps on trying to improve his position.
Oker looking to control and managing it successfully.
Oker has been looking to land a fair amount of strikes on the ground. He might be looking to soften his opponent up in order to work for a submission.
The crowd applaud the fighters efforts here as the round comes to an end.
Baysa is looking to improve his position but Oker isn't that keen on the idea.
And thats the end of the round the fighters go back to their corners.
AJ Oker dominated that round.
The fighters' corners scream their final instructions, as the referee calls time. Here we go, back to the action!

Oker misses with a straight left.
Oker leaves Baysa with his face pressed against the mat as he sprawls beautifully, defending against a solid takedown attempt.
Oker shoots in and drives through. Baysa sprawls well.
Baysa shoots in for a double leg but Oker sprawls well. That's going to sap some energy.
Baysa shoots in for a takedown. He's persisting with it as Oker sprawls well. Oker wins this battle and keeps the fight standing. Baysa gets slowly back to his feet.
AJ Oker has stuffed three takedown attempts in the round now. That's going to take a lot out of Shane Baysa.
A telegraphed takedown attempt from Oker is defended easily by Baysa.
Oker tries to clinch but Baysa is having none of it.
That's one minute gone in the round.
Oker throws a body kick but he wasn't in range.
Oker tries to clinch up but Baysa circles away and keeps his distance.
Oker tries to grapple but his opponent circles
and Baysa counters with a good, hard body kick but Oker shrugs it off.
Oker blocks a head kick by Baysa.
Oker dives in and grabs Baysa's left leg, looking for a takedown. Baysa pushes down on Oker's head and hops out.
Baysa displays good takedown defense there as he swats away a double leg from Oker.
AJ Oker is looking to throw some combinations by the looks of things.
Baysa throws a nice head kick!
That's two minutes gone in the round.
Oker shoots in for a takedown but doesn't get it.
Oker fails to land the takedown.
Both fighters are absolutely exhausted here.
Oker looks for a takedown but Baysa sprawls well.
Baysa looks for a takedown here. Will he get it? Oker is fending him off so far but Baysa persists. Nope, Oker circles away and we're back to standing.
Baysa is looking to clinch.
Oker misses with a lunging right hand

and Baysa holds on and brings the fighters into a clinch.
Oker tries to pull guard but Baysa holds him up against the cage and eventually Oker drops back down to his feet.
That's three minutes gone in the round.

Baysa has Oker pressed up against the cage. He's trying to work for a single leg takedown. Baysa pulls back from the cage and twists to the side, sending Oker tumbling to the mat - Baysa dives into Oker's guard.
Oker looking to control.

Oker looking for submissions off his back, moving his hips, looking for an opening.
AJ Oker overall seems to be getting the better of the ground position in the fight so far.
Baysa wants to control from the top but Oker keeps moving.
Baysa won't allow Oker to sweep him here.
That's four minutes gone in the round.
Baysa is trying to tuck his arms in to keep them safe but Oker has managed to isolate one of them and has got a loose triangle. Baysa is looking to defend but Oker has done well to lock his legs together - this could be big trouble for Baysa! Oker pulls down on the head and a little smile comes across his face - he knows he's got it. Yep, Baysa taps out and this one is all over!
Ladies and gentlemen, after 4:20 of round 2, we have a winner by way of Submission (Triangle). AJ Oker!
|
|
|
|
|
|
|
|
|
|
|
|
|
|
|
|
|
|
|
|
|
|
|
| S |
C
A |
G |
S |
C
B |
G |
|
S |
C |
G |
|
energy
A | B |
|
hype
A | B |
|
pop
A | B |
|
mgr
A | B |
|
FIGHT
RATING
26% |
|
|
|
|
|
|
