|
|
PBP Commentary |
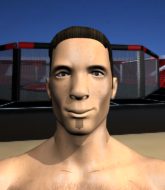
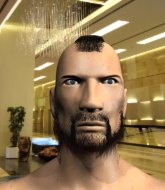
Coming up we have a light heavyweight MMA rules bout between Aarron Hamilton (ranked 0 p4p, 0 weight class) and Jack Payn (ranked 0 p4p, 0 weight class). Hamilton comes to the cage accompanied by Hands Up-Lloyd Banks. This should be a great matchup!
 |
|
 |
| 188 cm
24
210 lbs
5 - 4 - 0 |
|
190 cm
21
205 lbs
2 - 0 - 0 |
BJJ Purple Belt
Solid boxing
Good chin |
|
BJJ Brown Belt
Counter striker
Determined |
|
| |
|
Ladies and gentlemen. This fight is 3 rounds, in the light heavyweight division.
Introducing the fighter to my left, fighting out of the red corner.
With a record of
5 - 4 - 0, fighting out of Las Vegas, Aarron Hamilton!
And introducing the fighter to my right, fighting out of the blue corner.
With a record of
2 - 0 - 0, fighting out of Las Vegas, Jack Payn!
The judges for this bout are George Francis, Robert Twigg and Cecil Peabody.

The bell rings for round one and we are underway!
Payn keeps the fight on the outside.
Hamilton avoids a punch combination nicely.
Hamilton shoots in for a takedown but doesn't get it.
Hamilton swinging wilding here.

Hamilton drives through with a really nice takedown into side control.
Payn is trying to control Hamilton's posture but Hamilton avoids it.
Hamilton working the ground and pound but Payn is defending the strikes.
Payn sneaks back into half guard.
Payn is staying active underneath Hamilton, who seems content to just control the action from this position.
Payn moves his hips nicely and gets into full guard.
Both fighters really going for it on the ground here!

Payn escapes his hips to the side and looks to be working for an armbar. Hamilton gives him a little smile and shakes his head. No chance.
Hamilton stands up and looks to throw the legs aside to pass to side control. Payn swivels though and keeps the full guard.

That's one minute gone in the round.
Payn throwing his legs up looking for a triangle.
Hamilton trying to control the position from guard on top but Payn is wriggling around, looking for whatever he can.
Payn not looking particularly offensive just at the moment.
Payn working from the bottom, still in full guard. He's managed to get a loose triangle. Hamilton doesn't seem to be doing much to defend here, obviously he feels comfortable in the position. Hamilton manages to throw the legs off his shoulder and he's back into guard - no problem.
Hamilton is taking a break and basically stalling. The referee will not allow him to do that for long.
Payn is looking for a triangle but Hamilton pushes his legs off easily.
Payn working the defensive guard well to avoid strikes from Hamilton.
Hamilton stands up over Payn, holding his feet. He dives back in and lands a decent shot to the head.
Hamilton slows down the pace of the fight, as he sits in guard.
Payn looking for submissions from the bottom here. Moving his hips around, possibly looking for an armbar.
Payn looks gassed!

That's two minutes gone in the round.
Hamilton stays in close to Payn's body and controls the position.
The fighters are going at a pretty good pace and they're both starting to sweat now.
Hamilton postures up and scores with a shot to the body and a follow up elbow to the head.
Hamilton trying to control but Payn is working from the bottom.
Hamilton tries to free his leg and advance position but Payn is retaining full guard.
Hamilton scoring with some ground and pound.
Payn keeping full guard, as Hamilton tries to pass.
Payn keeping moving, preventing Hamilton from controlling successfully.

The referee has ruled that neither fighter is active enough on the ground and has stood them back up.
Hamilton shoots in for a takedown but Payn shows good takedown defense.

That's three minutes gone in the round.
Hamilton fails in his attempt to clinch.
Payn keeps the fight standing with a nice sprawl.
That's three failed takedown attempts in the round for Aarron Hamilton. That's going to take a lot out of him.
Nice takedown defense from Payn. No joy for Hamilton on that attempt.
The sound of bone on bone echoes around the arena as Hamilton checks a leg kick.
Hamilton looks to land a combination but Payn avoids it well.
Hamilton throws a series of punches but Payn avoids them all with ease.
Payn shoots in and drives through. Hamilton sprawls well.
Payn shoots in with a takedown attempt and he has Hamilton pinned against the cage. Hamilton gets the underhooks and manages to circle away.
Aarron Hamilton seems to be the more aggressive standup fighter in this bout.
Payn swats away the attempt to clinch by Hamilton.

That's four minutes gone in the round.
A lull in the action here being met with boos from the crowd.
Hamilton misses with a takedown attempt
and Payn counters with a driving takedown into guard. Nice work there by Payn.
Payn trying to control but Hamilton is working from the bottom.
Payn passes Hamilton's right leg, so he's now in half guard.
Payn is tying to control. Hamilton wants to improve his position but can't escape this time.
Payn is looking for a kimura here.
Payn trying to mount his opponent but Hamilton defends it.
Hamilton regains full guard. Nicely done.
Payn wants to control from the top but Hamilton keeps moving.
Hamilton trying to keep a closed guard but Payn is proving a slippery customer.
And thats the end of the round the fighters go back to their corners.
Jack Payn dominated that round.
The fighters' corners scream their final instructions, as the referee calls time. Here we go, back to the action!

Hamilton drives through with a takedown into guard.
Payn looking for a guillotine here but Hamilton defends easily.
Hamilton working from the guard for now, landing some ground and pound.
Payn bucks up whilst keeping hold of a body lock, managing to reverse the position. Now he's in top in Hamilton's guard.
Payn trying to pass the guard but can't manage it just yet.
Hamilton looking to sweep here. No luck so far.
Payn looking to pass the guard.
Hamilton bucks up whilst keeping hold of a body lock, managing to reverse the position. Now he's in top in Payn's guard.
Hamilton is in close to Payn's body, working some short punches and elbows.
Both fighters are absolutely exhausted here.
Hamilton slips nicely into half guard.
The fighters are pressed up against the cage, both looking to find a bit of space to work.
Payn is staying active underneath Hamilton, who seems content to just control the action from this position.
That's one minute gone in the round.
Payn avoiding damage under a succession of punches from Hamilton.
Hamilton controlling the pace.
Payn looking for submissions from an awkward position here.
Hamilton not landing any meaningful shots this time.
Hamilton winds up and cracks Payn with a swinging punch to the side of the head.
Hamilton wants to free his trapped foot but Payn is holding on for dear life with his legs.
Payn punching from the bottom.
It looks like we're going to have a standup here. Neither fight is doing enough on the ground.
Payn slips a jab and a cross from Hamilton.
Hamilton avoids a punch combination nicely.
Hamilton misses with a takedown
and Payn counters with a nice body shot.
That's two minutes gone in the round.
The crowd are getting on the fighters' backs, as the pace has dropped off in the last minute or so.
Payn shoots and misses
and Hamilton counters with a one-two to the body.
Payn changes levels and drives through with a really nice takedown into side control. Hamilton looks really pissed at himself for not defending that better.
Hamilton can't do much from the bottom here.
Payn wants to work for a kimura but he's foiled early by Hamilton, who protects the arm well.
Hamilton is trying to control Payn's posture but Payn avoids it.
Hamilton is trying to get back to half guard.
Payn has knee on belly and moves into mount.
Jack Payn has got the better of the ground game so far.
Hamilton sneaks a leg under to get to half guard.
That's three minutes gone in the round.
Hamilton is looking for a sweep. Payn is wise to his cunning plan and keeps the top position.
Payn seems to be working for a kimura but Hamilton defends the submission attempt.
Payn blocks the strikes from Hamilton.
Payn prevents Hamilton from standing back up.
Payn wants to work for an arm triangle but Hamilton is really keeping half guard well and defending the submission attempt.
Hamilton landing a few short strikes.
Payn wants to free his trapped foot but Hamilton is holding on for dear life with his legs.
Hamilton is trying to control but can't.
Payn prevents Hamilton from improving his position.
Payn works his way into full mount!
That's four minutes gone in the round.
The crowd are showing their displeasure at the lack of action as loud boos ring out around the arena.
Hamilton wants to control but Payn is having none of it.
Hamilton tries to reverse the position but Payn maintains control.
Hamilton is working hard here to advance position.
Payn is in full mount, looking to secure a guillotine but Hamilton is surviving well by controlling Payn's body position as best he can.
Payn prevents Hamilton from getting the reversal.
Payn working for a guillotine from mount but Hamilton is in no mood to give up.
Hamilton wants to control but Payn is having none of it.
And thats the end of the round the fighters go back to their corners.
Jack Payn showed his class in that round. I'd imagine he'll take it on all the scorecards.
The referee calls time. The cornermen exit stage left and we're back to business. Let's hear some noise people - this is the final round!

Hamilton shoots in for a takedown and gets it.
Payn is trying to get back to full guard.
The ref warns both fighters not to hold the cage as they work up against the meshing.
The referee walks around the fighters to get a better view of the action. Hamilton lands a nice short elbow.
Hamilton is keeping good posture, landing some ground and pound.
Hamilton passes the half guard and he's now in mount! Big trouble for Payn!
Payn bucks up and manages to get a nice reversal! He's in guard on the top - nicely done!
Both fighters are breathing heavily.
Hamilton looking to sweep here. No luck so far.
That's one minute gone in the round.
Payn looking to pass the guard.
Hamilton is looking to get back to his feet but can't, whilst Payn is controlling him.
Payn pressing down on his opponent's thigh, looking to pass guard. Hamilton is keeping the position for now.
Hamilton pulls Payn in close to prevent any damage.
Payn thinks about going for a leg but decides against it, in order to maintain the position.
The referee decides to stand the fighters back up.
Hamilton closes the distance and looks for a trip takedown... aaaand he's got it - Hamilton lands in his opponent's guard.
That's two minutes gone in the round.
Hamilton trying to control but Payn is working from the bottom.
Payn lands a beautiful switch and he's in full mount! That could spell trouble for Hamilton!
Hamilton can't escape the position.
Hamilton is trying to reverse the position but instead Payn has taken his back - oops!
Payn working for the rear naked choke here. He's got one arm under but Hamilton is defending well. A couple of punches soften him up though and Payn has tightened the hold! This one could be all over! It is! Hamilton taps out!
Ladies and gentlemen, after 2:55 of round 3, we have a winner by way of Submission (RNC). Jack Payn!
|
|
|
|
|
|
|
|
|
|
|
|
|
|
|
|
|
|
|
|
|
|
|
| S |
C
A |
G |
S |
C
B |
G |
|
S |
C |
G |
|
energy
A | B |
|
hype
A | B |
|
pop
A | B |
|
mgr
A | B |
|
FIGHT
RATING
89% |
|
|
|
|
|
|

