|
|
PBP Commentary |
Coming up we have a lightweight MMA rules bout between Karl Pilkington (ranked 0 p4p, 0 weight class) and Krilich Berglomi (ranked 0 p4p, 0 weight class). Berglomi is bobbing his head along to his entrance song: Fat Boy Slim-Push The Tempo. There are an array of beautiful celebrities at ringside tonight! I wonder if any of them paid for their tickets.
 |
|
 |
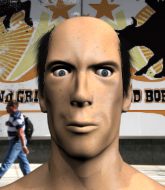
| 172 cm
27
160 lbs
3 - 0 - 0 |
|
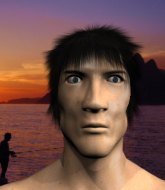
175 cm
39
160 lbs
18 - 24 - 1 |
Good wrestling
Excellent boxer
Very quick |
|
BJJ Purple Belt
Excellent boxer
Heavy handed |
|
| |
|
Ladies and gentlemen. This fight is 3 rounds, in the lightweight division.
Introducing the fighter to my left, fighting out of the red corner.
With a record of
3 - 0 - 0, fighting out of New York, Karl Pilkington!
And introducing the fighter to my right, fighting out of the blue corner.
With a record of
18 - 24 - 1, fighting out of Las Vegas, Krilich Berglomi!
The judges for this bout are Frank Dennis, Cecil Peabody and Chris Downing.

The bell rings for round one and we are underway!
Berglomi tries a head kick but it misses.
We've been hearing reports that Pilkington has been drilling takedowns in recent sessions so let's see if that has an impact on the result of this fight.
Berglomi throws a couple of head shots and lands with the final one - a decent hook, which struck Pilkington on the side of the head.

It looks like Karl Pilkington has been cut.
Pilkington lands a right hook to the body.
Pilkington throws a jab but it's blocked by Berglomi.
Berglomi tries a head kick but it misses.
Berglomi throws a nice looking combination but Pilkington bobs and weaves to avoid any damage.
A head kick misses from Pilkington.
Berglomi will need to tighten up his combinations if he doesn't want to gas himself out, swinging at thin air.
Krilich Berglomi seems to be the more aggressive standup fighter in this bout.
Pilkington avoids the head kick by Berglomi.
Berglomi throws a head kick but Pilkington moves out of range.
Berglomi throws a body punch but Pilkington moves out of range.
Pilkington lands a jab-cross combination.
This is a great period of action - very entertaining stuff!
Pilkington throws a good cross that connects.
Pilkington closes the distance and lands a one-two.
Berglomi misses the jab.
Pilkington cracks Berglomi with a good jab.

That's one minute gone in the round.
Pilkington walks forward and throws out a flicking leg kick. Berglomi checks it nicely though, as he moves to the side.
Berglomi moves out of range of the body kick.
Berglomi misses with a half-hearted attempt at a head kick.
Berglomi throws a series of punches but Pilkington avoids them all with ease.
Berglomi shoots in for a takedown but Pilkington shows good takedown defense.
Pilkington takes a step towards his opponent and connects with a left hand, before circling away.
Pilkington throws a series of punches but Berglomi moves out of range.
Berglomi throws a combination but comes up with nothing but fresh air.
Berglomi dodges the punch combination from Pilkington.
Berglomi with a lazy takedown attempt
letting Pilkington counter with a right hand.
Berglomi misses with a half-hearted attempt at a head kick.
Pilkington misses with a half-hearted attempt at a head kick.
Berglomi misses with a head kick.
Pilkington rushes forward with a series of wild hooks but Berglomi moves out of range and avoids them all easily.
Pilkington fails to land with a series of punches.

That's two minutes gone in the round.
Berglomi swings and misses with a hook to the body.
Berglomi drops his hands momentarily and Pilkington takes advantage with a crisp shot to the head.
Pilkington slips under a jab from Berglomi.
Pilkington throws a series of punches but Berglomi avoids them all with ease.
Pilkington swings away but doesn't land with a series of punches.
Pilkington swings for the body but Berglomi moves out of range.
The fans in attendance giving it up for the two fighters, who have really let it all hang out in the last minute or so!
Berglomi throws a head kick that misses and slips in the process. He scrambles back to his feet and the fighters circle.
Berglomi tries to land with a swinging hook to the body but Pilkington was well out of range. Poor timing from Berglomi.
Berglomi misses with a half-hearted attempt at a head kick.
Berglomi throws a body kick that misses.
Pilkington throws a combination but it was largely blocked by Berglomi.
Pilkington on the wrong end of a vicious looking body shot.
Berglomi throws a nice looking combination but Pilkington bobs and weaves to avoid any damage.
Pilkington throws a head kick that misses and slips in the process. He scrambles back to his feet and the fighters circle.
Pilkington ducks down and throws a hook to the body.

That's three minutes gone in the round.
A looping hook to the body misses from Berglomi. Pilkington does a little dance to reset his feet.
Berglomi is throwing a lot of body shots here, looking to wear down Pilkington rather than just go for the knockout.
A punch combination from Pilkington misses.
Berglomi throws a sloppy head kick and Pilkington moves out of range easily.
Berglomi shoots in and drives through. Pilkington sprawls well.
Karl Pilkington has stuffed three takedown attempts in the round now. That's going to take a lot out of Krilich Berglomi.
Berglomi avoids a punch combination nicely.
Pilkington ducks down and throws a hook to the body but Berglomi moves away.
Pilkington misses with a two punch combination.
Pilkington avoids the clinch attempt nicely.
Berglomi throws a sloppy head kick and Pilkington moves out of range easily.
Berglomi lands a head kick. Pilkington smiles back at him and beckons him forward.
Berglomi walks straight into an uppercut. Luckily it didn't land flush.
Pilkington throws a one two combo.
Berglomi lands a slapping body shot.

That's four minutes gone in the round.
Berglomi lands a vicious shot with the stealth of a sniper and the strength of a viper. Are vipers that strong? I can think of lots of things that are stronger than a viper - not many rhyme with sniper though.
Berglomi tries to bum rush Pilkington with a series of wild strikes but Pilkington uses good footwork to avoid the assault.
The crowd cheering loudly, showing their appreciation for the quality fight we're seeing here.
Berglomi moves out of range as Pilkington strikes.
Berglomi will need to tighten up his combinations if he doesn't want to gas himself out, swinging at thin air.
Nice shot by Pilkington.

Pilkington throws a loose over hand right and dives in with a double leg takedown. Berglomi tries to sprawl but it's too late and the fighters hit the mat. Pilkington is in Berglomi's guard.
Pilkington is looking to work some ground and pound but Berglomi has wrist control.
Berglomi keeping moving, preventing Pilkington from controlling successfully.
Pilkington controls the pace of the fight for a moment.
The crowd are going absolutely nuts as the round comes to an end - what a fantastic round of action!
Pilkington trying to pass the guard but can't manage it just yet.
And thats the end of the round the fighters go back to their corners.
Karl Pilkington dominated that round.
The cut man is working on Karl Pilkington's cut.
That's the end of the interval. I'm sure that seemed a lot quicker than a minute for our two fighters! Back to the action.

Pilkington lands with a two punch combination before moving back out of range.
Some wild striking there from Berglomi.
Pilkington does a little shimmy and throws a leg kick. The leg kick missed by a considerable margin though, making him look a little bit silly for doing the shimmy.
Pilkington dodges the punch combination from Berglomi.
A head kick misses from Berglomi.
Pilkington shoots in and scores a nice double leg takedown into half guard.

Pilkington is working for a kimura but Berglomi is defending it quite comfortably.
Pilkington trying to control the action but Berglomi is working from the bottom.
That's one minute gone in the round.
The fighters are starting to get a bit slippery now, which will make submissions a bit more difficult.
Pilkington tries to pass the half guard into mount. Berglomi knows what he's doing though and prevents the attempt.
Berglomi avoiding damage under a succession of punches from Pilkington.
Pilkington is keeping good posture, landing some ground and pound.
Berglomi trying to control from the bottom.
That's two minutes gone in the round.
Pilkington throws a big elbow that misses, also allowing Berglomi to regain full guard.
Pilkington wants to control from the top but Berglomi keeps moving.
Berglomi keeping full guard, as Pilkington tries to pass.
Pilkington prevents Berglomi from getting back to his feet.
Pilkington sitting in guard here, content to control.
Berglomi wants to get back to his feet but Pilkington is in a dominant position and won't allow it.
The fighters are pressed up against the cage, both looking to find a bit of space to work.
That's three minutes gone in the round.

The referee decides to stand the fighters back up, due to lack of activity on the part of Karl Pilkington.
Jab by Pilkington.
Berglomi throws a head kick that misses.
Berglomi takes a really solid shot there but just smiles back and shrugs his shoulders.
Pilkington feints a jab promting Berglomi to slip. Pilkington then demonstrates his capabilities by jabbing again. Berglomi slips again and ducks right into an uppercut.
Karl Pilkington is looking to throw some combinations by the looks of things.
Berglomi scores with a head kick. Pilkington tried to block it but didn't get his arm up in time.
Pilkington lands a slapping body shot.
Pilkington swinging wildly here.
Berglomi takes a swing at Pilkington's ribcage but misses.
Pilkington takes a really solid shot there but just smiles back and shrugs his shoulders.
Berglomi throws a sloppy head kick and Pilkington moves out of range easily.
This has been an exciting period of action!
Berglomi gets caught flat footed, as Pilkington shoots in with a quick takedown into guard.
That's four minutes gone in the round.
Berglomi looking to control.
Pilkington is stalling in the full guard.
Pilkington trying to pass the guard but can't manage it just yet.
Pilkington lands a couple of decent looking shots.
Pilkington wants to control from the top but Berglomi keeps moving.
As the round comes to an end the crowd are showing their appreciation for a great round of action.
Pilkington passes easily into side control. Nice work.
Pilkington is looking for a kimura. He might have it! No, Berglomi has escaped the position, nice work there.
And thats the end of the round the fighters go back to their corners.
Karl Pilkington dominated that second round.
The cut man is working on Karl Pilkington's cut.
OK. That's time! The bell goes and we're back to the action. This is the final round!

A jab from Pilkington misses.
Karl Pilkington is winning the standup battle so far.
Pilkington jabs at Berglomi's body.
A nice inside leg kick there by Berglomi. That's going to slow Pilkington down.
Berglomi slips a jab and a cross from Pilkington.
Pilkington just misses with a punch to the body.
A head kick misses from Berglomi.
Berglomi looks for a takedown here. Will he get it? Pilkington is fending him off so far but Berglomi persists. Nope, Pilkington circles away and we're back to standing.
A bone on bone clash there as Pilkington blocks the leg kick.
Nice cross by Pilkington.
Berglomi doesn't manage to clinch there - Pilkington circles away.
Pilkington looks for a takedown. He's got it. We're now in half guard.
Berglomi wants to improve his position but Pilkington is controlling well.
That's one minute gone in the round.
Pilkington wants to pass the guard but Berglomi is defending well.
Pilkington is looking for a kimura. It's going to be difficult to finish that from half guard though and Berglomi defends it well.
Pilkington thows a huge punch but Berglomi dodges it nicely.
Pilkington prevents Berglomi from improving his position.
Pilkington is trying to work for a kimura. This could be trouble! No, Berglomi has managed to free his arm - good work.
That's two minutes gone in the round.
Pilkington missing with the ground and pound from half guard.
Berglomi is looking to regain full guard. Not this time though.
Pilkington tries to pass to full mount but Berglomi defends it.
Pilkington throwing punches and elbows but they're not doing any damage.
Berglomi is looking to control Pilkington's leg but it's slowly edging free. Can Berglomi avoid being mounted?
That's three minutes gone in the round.
Pilkington throwing punches and elbows but they're not doing any damage.
Berglomi preventing any damage for now, controlling his opponent's head.
We've had a lack of effective grappling in the last minute or so, which could well see a referee standup.
Pilkington wants to lay and pray for a moment but Berglomi keeps working.
Berglomi has hold of Pilkington's hands but Pilkington slips his arm to the side and lands an elbow.
That's four minutes gone in the round.
Pilkington is nestled in close to Berglomi, controlling him well. He's worked in a nice elbow to the side of the head as well, for good measure.
Pilkington scoring with strikes to the body and head.
Pilkington not landing any meaningful shots this time.
Pilkington is controlling the pace.
Pilkington is looking for a kimura but Berglomi is holding onto that half guard position, so it's hard for Pilkington to get the leverage.
The crowd applaud the fighters efforts here as the round comes to an end.
Pilkington is trying to control the action in half guard but Berglomi is working away on the bottom, looking perhaps to get back to full guard.
Krilich Berglomi has stepped it up - he knows he needs a finish here!
Karl Pilkington is fighting for a decision here - he's started to take the cautious approach.
Karl Pilkington overall seems to be getting the better of the ground position in the fight so far.
Pilkington controlling the pace.
And that's the end of the fight!
Karl Pilkington showed his dominance in that final round.
Well Pilkington has outscored his opponent in every aspect of the fight today. Only a scarily incompetent judge or two will keep him from a well deserved win... Over to the ring announcer for the scorecards.
Ladies and gentlemen, after 3 rounds of action, we go to the scorecards for a decision.
Judge Frank Dennis scores the fight 30:27
Judge Cecil Peabody scores the fight 30:27
Judge Chris Downing scores the fight 30:27
In favor of your winner, by unanimous decision... Karl Pilkington!
|
|
|
|
|
|
|
|
|
|
|
|
|
|
|
|
|
|
|
|
|
|
|
| S |
C
A |
G |
S |
C
B |
G |
|
S |
C |
G |
|
energy
A | B |
|
hype
A | B |
|
pop
A | B |
|
mgr
A | B |
|
FIGHT
RATING
65% |
|
|
|
|
|
|
