|
|
PBP Commentary |
Coming up we have a featherweight MMA rules bout between Honey Badger (ranked 0 p4p, 0 weight class) and Edmundo Jr (ranked 0 p4p, 0 weight class). Honey Badger has the better chin. Will he look to stand and bang today?
 |
|
 |
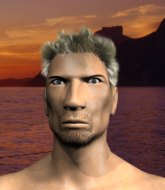
| 173 cm
26
150 lbs
12 - 4 - 0 |
|
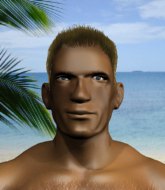
165 cm
26
158 lbs
15 - 8 - 1 |
Good wrestling
World class boxer
Granite chin |
|
Good wrestler
Excellent boxer
Good gas tank |
|
| |
|
Ladies and gentlemen. This fight is 5 rounds, in the featherweight division.
Introducing the fighter to my left, fighting out of the red corner.
With a record of
12 - 4 - 0, fighting out of Amsterdam, Honey Badger!
And introducing the fighter to my right, fighting out of the blue corner.
With a record of
15 - 8 - 1, fighting out of Rio de Janeiro, Edmundo Jr!
The judges for this bout are Paulsen Ambrosius, Wagner Zegers and Aafke Stam.

The bell rings for round one and we are underway!
Jr shoots in looking for a takedown. Badger tries to sprawl out of it but Jr keeps driving through. The fighters are pinned against the cage. Badger manages to get underhooks and after a bit of a struggle, circles away and we're back to standing.
Jr looks frustrated there after his takedown attempt is stuffed easily.
Jr shoots for a takedown but Badger saw that one coming a mile off and avoided it easily.
Honey Badger has stuffed three takedown attempts in the round now. That's going to take a lot out of Edmundo Jr.
Jr fails with a takedown attempt.

Jr looking to score a takedown here. Badger is defending well but Jr drives through and ends up in Badger's guard.
In the pre-fight buildup videos we saw Jr working his ground and pound in the gym. He isn't landing a great percentage of his ground strikes so far though.
Badger has control of Jr's left arm, preventing Jr from doing any damage.
Badger wants to sweep but no luck.
Badger working the defensive guard well to avoid strikes from Jr.
Jr has the superior BJJ but he's also working some ground strikes into his gameplan.
Jr postures up to throw the ground and pound strikes but they don't connect.
Badger is working from a closed guard but he's struggling to control his opponent.
Badger is in a tricky position. We've heard reports from his gym mates at MuscleWorks Amsterdam that he's been drilling escapes, so let's see if he can get back to his feet.

That's one minute gone in the round.
Badger avoiding any damage from the ground and pound.
The ref warns both fighters not to hold the cage as they work up against the meshing.
Jr lands a couple of elbows.
Jr chips away with some ground and pound.
Jr stands up and looks to throw the legs aside to pass to side control. Badger swivels though and keeps the full guard.
Badger working the defensive guard well to avoid strikes from Jr.
Badger keeping moving, preventing Jr from controlling successfully.
Jr looking to pass the guard.

That's two minutes gone in the round.
Badger looking to sweep here. No luck so far.
Jr trying to land body shots but he keeps hitting the mat.
Jr working from the guard for now, landing some ground and pound.
Badger preventing the ground and pound from doing any damage.
Badger looking to sweep here. No luck so far.
Jr throwing strikes from guard but Badger blocks nicely.
Jr looking to pass the guard.
The crowd cheering loudly, showing their appreciation for the quality fight we're seeing here.
Jr throws a big elbow that misses.

That's three minutes gone in the round.
Jr pushes down on Badger's leg and manages to get into half guard.
Jr thumps the canvas. Not on purpose obviously - he just missed Badger's head.
Jr is keeping good posture, landing some ground and pound.
Badger tries to roll over but Jr keeps him under control.
Jr looks to land a strike but Badger avoids it nicely and regains full guard.
Jr with a flurry of punches that miss.
Jr throwing strikes from guard but Badger blocks nicely.

That's four minutes gone in the round.
Jr throws a big elbow that misses.
Jr throwing elbows and punches but not connecting, as Badger works some decent striking defense from the bottom.
Jr missing there with some ground and pound from the guard.
Jr loading up with the ground and pound but he's missing more than he's landing in this flurry.
Jr trying to control but Badger is working from the bottom.
Jr with a couple of shots to the head there. Not particularly brutal.
As the round comes to an end the crowd are showing their appreciation for a great round of action.
Jr throwing shots from guard but he's hitting more mat than opponent.
Badger keeping moving, preventing Jr from controlling successfully.
And thats the end of the round the fighters go back to their corners.
Edmundo Jr dominated that round.
The fighters get back to their feet, the hooter sounds and we're back to the action!

Jr keeping his hands up high there, blocking the jab from Badger.
Badger throws the left hand but Jr avoids the punch easily.
Badger displays good takedown defense there as he swats away a double leg from Jr.
Jr misses with a takedown attempt
and Badger counters with a lovely shot to the body.
Edmundo Jr seems to be the more aggressive standup fighter in this bout.
Jr fails with a takedown attempt from distance.
Honey Badger has stuffed three takedown attempts in the round now. That's going to take a lot out of Edmundo Jr.
Jr darts in looking for a takedown but Badger gets double underhooks and turns Jr into the cage.

Badger escapes the clinch and we're back to striking.
Good exchange - Badger coming out on top.
Jr shoots for a takedown but Badger saw that one coming a mile off and avoided it easily.
Jr tries to drive through with a takedown attempt but Badger defends well and Jr ends up having to push Badger into the cage where they will battle it out in the clinch.
Badger manages to break the clinch.
The fighters circling - Badger throws out the jab but it was never going to land.
No luck for Jr with that takedown attempt.
Jr tries to drive through with a takedown attempt but Badger defends well and Jr ends up having to push Badger into the cage where they will battle it out in the clinch.
That's one minute gone in the round.
Jr looking for a takedown.
The fighters are pressed against the cage, as the pace of the fight slows.
Badger lands with a short shot to the head.
Badger is clearly stalling here... Pick up the pace son.
Jr is trying to pull guard but being pressed up against the cage enables Badger to keep the fight standing.
That's two minutes gone in the round.
Jr is working for a takedown up against the cage. He can't get it on this occasion though.
Jr can't get the takedown.
A short body shot lands from Badger as the two fighters clinch.
Jr is looking to take this one to the mat.
A short left from Badger.
Badger dictating the pace here, as the fighters clinch against the cage.
The crowd are getting pretty annoyed with Badger for his constant stalling in the clinch and are voicing their displeasure.
Badger lands with a short shot to the head.
That's three minutes gone in the round.
Badger is clearly stalling here... Pick up the pace son.
That's four minutes gone in the round.
A lull in the action here being met with boos from the crowd.
The ref breaks the fighters up, due to lack of action by Honey Badger.
Jr looks for a takedown but Badger sprawls well.
Jr shoots in for a double leg but Badger sprawls well. That's going to sap some energy.
Badger fakes a jab and then connects with a hook.
Jr drives through with a takedown into Badger's guard. Let's see what he can do from the top position.
Jr missing there with some ground and pound from the guard.
Jr trying to land body shots but he keeps hitting the mat.
Badger bucks up whilst keeping hold of a body lock, managing to reverse the position. Now he's in top in Jr's guard.
The crowd applaud the fighters efforts here as the round comes to an end.
Jr is trying to stand up but he's not managed so far.
Jr keeping moving, preventing Badger from controlling successfully.
And thats the end of the round the fighters go back to their corners.
Honey Badger dominated that second round.
That's time! Back to the action!

Badger is the aggressor but that punch slipped nicely by Jr.
Badger jabbing away but nothing is landing.
Badger rushes forward with a series of wild hooks but Jr moves out of range and avoids them all easily.
Well, he's not going to score with shots like that. A lazy body kick attempt from Badger.
Jr fails with a takedown attempt from distance.
Jr dives in for a single leg takedown but Badger sprawls and the fighters end up clinched against the cage.
Badger makes some space for himself and lands an uppercut.
Jr being controlled against the cage.
Badger's corner calls for him to break the clinch, which he does.
Honey Badger is looking to keep the fight on the feet at all costs.
That's one minute gone in the round.
Badger digs a good body shot into Jr's ribs.
Jr has his front leg slapped to the side - a nice low kick landing there from Badger.
Jr looks frustrated there after his takedown attempt is stuffed easily.
Honey Badger has stuffed three takedown attempts in the round now. That's going to take a lot out of Edmundo Jr.
Jr showing good head movement there, avoiding the strikes from Badger.
Jr shoots in looking for a double leg takedown. Badger defends it nicely.
Jr shoots in for a double leg but Badger sprawls well. That's going to sap some energy.
Jr fails miserably with a takedown attempt.
Jr fails with a takedown attempt.
Badger smiles there as he lands a nice right hand right on the button.
That's two minutes gone in the round.
Jr takes one to the chin there.
Badger throws a right and a left that Jr avoids nicely.
Honey Badger is winning the standup battle so far.
Horrible takedown by Jr or perhaps it was just good defense by Badger which made him look bad.
Jr slips under a jab from Badger.
Badger dances in quickly and lands a nice inside leg kick on Jr. That did some damage!
Badger misses with a wild combination.
Nice sprawl there from Badger as Jr shoots in.
The crowd cheering loudly, showing their appreciation for the quality fight we're seeing here.
Jr dives in and grabs Badger's left leg, looking for a takedown. Badger pushes down on Jr's head and hops out.
Badger with a nice cross.
Badger throws a front kick that sends Jr stumbling back into the cage.
Badger keeps Jr at a distance using the push kick.
Jr takes a big intake of breath there - he's definitely tired.
A jab from Badger misses.
Jr shoots in looking for a double leg takedown. Badger defends it nicely.
That's three minutes gone in the round.
Badger connects with a slap. Keep your fist closed son.
Badger stuffs the takedown.
Badger takes a step towards his opponent and connects with a left hand, before circling away.
Jr shoots in for a takedown. "Ole!" shouts Badger as he jumps to the side.
Jr looks for a takedown here. Will he get it? Badger is fending him off so far but Jr persists. Nope, Badger circles away and we're back to standing.
Jr looks for a takedown but Badger sprawls well.
Badger connects with a slap. Keep your fist closed son.

Jr is rocked!
Badger lands an uppercut out of nowhere! Jr falls backwards - clearly groggy! Badger dives in and finishes the fight with more strikes for a TKO finish!
Ladies and gentlemen, after 3:51 of round 3, we have a winner by way of TKO (Strikes). Honey Badger!
In his post fight interview, Honey Badger started talking himself up. Luckily his charisma kept the crowd on side and gave him a good reception.
|
|
|
|
|
|
|
|
|
|
|
|
|
|
|
|
|
|
|
|
|
|
|
| S |
C
A |
G |
S |
C
B |
G |
|
S |
C |
G |
|
energy
A | B |
|
hype
A | B |
|
pop
A | B |
|
mgr
A | B |
|
FIGHT
RATING
54% |
|
|
|
|
|
|

