|
|
PBP Commentary |
Coming up we have a welterweight MMA rules bout between James Madness (ranked 0 p4p, 0 weight class) and Bill Shadow (ranked 0 p4p, 0 weight class). Madness comes to the ring accompanied by SHOWDOWN . Both fighters look fresh as a daisy as they make their way towards the ring.
 |
|
 |
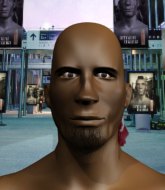
| 190 cm
25
155 lbs
10 - 7 - 0 |
|
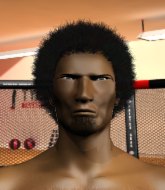
175 cm
22
170 lbs
9 - 2 - 0 |
Abu Dhabi Champ
Basic striking
Cardio machine |
|
Good wrestler
Decent boxing
Good gas tank |
|
| |
|
Ladies and gentlemen. This fight is 2 rounds, in the welterweight division.
Introducing the fighter to my left, fighting out of the red corner.
With a record of
10 - 7 - 0, fighting out of Hilo, James Madness!
And introducing the fighter to my right, fighting out of the blue corner.
With a record of
9 - 2 - 0, fighting out of Hilo, Bill Shadow!
The judges for this bout are Micheangelo Fripello, Chris Saunders and Ryoma Takatsuka.

The bell rings for round one and we are underway!

Shadow clinches with his opponent.
Shadow avoiding damage.
Shadow lands with a good tight uppercut to the head.
Madness stalling in the clinch but Shadow improves position.
Shadow lands a shoulder strike that jolts his opponent's head backwards.
A body shot lands from Shadow.
A real battle for position is taking place between these two warriors.
Shadow stalling the fight.
Madness tries to circle away but Shadow has him pinned against the ropes.

Shadow breaks from the clinch.
Madness waving his hands out in front of him, looking to distract Shadow.

Madness gets the takedown into side control.
We've had a lack of effective grappling in the last minute or so, which could well see a referee standup.
Madness tries to cartwheel into mount but he doesn't manage it.
The fighters are tangled up in the ropes here. We might need a restart if the fighters can't break free themselves.
Shadow struggling a bit here.

That's one minute gone in the round.
Shadow is looking for a sweep.
Shadow struggling a bit here.

Madness is looking to finish here, going for an Americana. Shadow knows the correct defense though, so he's OK.
Madness is looking to finish here, going for an Americana. Shadow knows the correct defense though, so he's OK.
Madness thinks about going for a far side armbar but bails out and retains the dominant position instead.

That's two minutes gone in the round.
Madness wants to lay and pray for a moment but Shadow keeps working.
Shadow gets one leg under and gets the fight to half guard.
Madness is working for a kimura but Shadow is defending it quite comfortably.
Madness is trying for a guillotine from the top but the pressure isn't in the right place so Shadow is just riding it out for now. Madness eventually gives up the hold.
Madness will need to keep those long limbs tucked in whilst he's on the ground, to prevent any submissions.

That's three minutes gone in the round.
Madness looking for a kimura but he'll have to free his other leg if he wants to finish that. Perhaps he's just using it as a distraction technique.
Madness is looking for a kimura here.

That's four minutes gone in the round.
A few boos can be heard. I'm sure they will multiply if the fighters don't pick up the pace.
Shadow tries to roll over but Madness keeps him under control.
Madness frees up his trapped foot and advances to mount.
Madness trying to control but Shadow is having none of it.
Shadow is desperately trying to improve his position but Madness has a good base and remains in mount.
Madness can't quite control the action as he would like just now, as Shadow is looking to escape.
Madness content just to control the position here.

That's five minutes gone in the round.
Shadow has worked his way to half guard, taking advantage of Madness's lack of action.
Shadow is pressing down on Madness's left leg trying to get back to full guard. He's managed it.
Madness tries to free his leg and advance position but Shadow is retaining full guard.
Our spies down at at Blitzkrieg Fighting Systems: Ground inform us that Shadow has really been working on his submissions in the buildup to this fight. Will it pay off?
Madness is fighting to break Shadow's control of his arms but Shadow is doing a good job of controlling the position at the moment.
Shadow keeping moving, preventing Madness from controlling successfully.
Madness looking to pass the guard.

That's six minutes gone in the round.
Madness trying to control the position from guard on top but Shadow is wriggling around, looking for whatever he can.
Shadow is working from a closed guard but he's struggling to control his opponent.

Neither fighter is doing enough for the referee's liking and he's decided to stand them back up.
Madness looks to land a body kick but Shadow moved away.
Madness keeping his hands up high there, blocking the jab from Shadow.
No luck for Madness with that takedown attempt.
Shadow gets in close and instigates a clinch.
Shadow breaks from the clinch.
Shadow scores with the left hand. Madness knows he should have avoided that one.
Shadow scores with a nice right hand.
The crowd are loving this. Great action here.
Madness misses with a straight right.

That's seven minutes gone in the round.
A big right from Shadow misses.
Madness misses with an uppercut.
Madness fails with a takedown attempt.
Madness swinging wildly here.
Madness uses good head movement to avoid the hook from Shadow.
Madness looks to have improved his striking defense since last time we saw him fight.
Shadow slips a jab and a cross from Madness.
Madness defending well as Shadow loads up on a big left hand.
Shadow waving his hands out in front of him, looking to distract Madness.
Madness dives in for a single leg takedown but Shadow sprawls and the fighters end up clinched against the ropes.
That's three failed takedown attempts in the round for James Madness. That's going to take a lot out of him.
Shadow lands a nice shot to the body.
Shadow tries to throw a body punch but Madness avoids it by throwing Shadow back against the ropes.

That's eight minutes gone in the round.
Madness has a couple of punches blocked by Shadow.
Shadow works for underhooks and lands a body shot in the process.
Shadow lands a left hand.
Shadow lands with a short punch from the clinch.
Shadow tried to land a shot to the body but connects with Madness's elbow.
Madness successfully pulls guard.
Shadow looking to sit in guard and control but Madness gets the butterfly guard and sweeps. He's now in the guard on the top.
Madness tries to free his leg and advance position but Shadow is retaining full guard.
Wooooo! Give it up for these two warriors! They are putting on a show!
Madness wants to control from the top but Shadow keeps moving.
The fighters are trapped in the ropes so we're going to have a reposition here. The ref calls for a break and repositions the fighters in the center of the ring.
Shadow controls Madness momentarily but Madness frees himself.

That's nine minutes gone in the round.
Shadow keeping moving, preventing Madness from controlling successfully.
Madness looking to control the position here, rather than advance.
Shadow is working the butterfly guard. He manages to land a nice scissor sweep and is now in half guard on the top. Nice move.
Shadow is controlling the pace.
The crowd applaud the fighters efforts here as the round comes to an end.

Shadow is looking for an arm triangle, whilst trying to pass to side control. Madness doesn't seem that keen to cooperate though. No luck this time Shadow.
And thats the end of the round the fighters go back to their corners.
A close round but Bill Shadow will probably get the nod.
Well, the break between rounds is over. Let's get back to the scrappin! Let's hear some noise people - this is the final round!

Shadow misses with a double jab.
Madness feints and then dives in with a takedown. That was a long way out but the feint bought him enough time to close the distance and complete the takedown. Now we'll play guard for a bit and see who can get the better of that position.
Madness trying to control but Shadow is working from the bottom.
Madness stopping the sweep attempt from Shadow.
Madness trying to control the position from guard on top but Shadow is wriggling around, looking for whatever he can.
Shadow is working from a closed guard but he's struggling to control his opponent.
That's one minute gone in the round.
Madness scores with a decent looking elbow strike.
Shadow looking for a sweep. Not yet Shadow, not yet.
Madness trying to control the position from guard on top but Shadow is wriggling around, looking for whatever he can.
Shadow working a defensive guard here.
Madness throws a big right hand that misses.
Shadow has Madness pulled in close to control his posture.
If this pace continues, the referee will definitely step in and force a standup.
It looks like we're going to have a standup here. Neither fighter is doing enough on the ground.
Madness blocks a jab.
Nice sprawl there from Shadow as Madness shoots in.
That's two minutes gone in the round.
Madness closes this distance looking for a takedown but Shadow circles away.
Madness tries to drive through with a takedown attempt but Shadow defends well and Madness ends up having to push Shadow into the ropes where they will battle it out in the clinch.
That's three failed takedown attempts in the round for James Madness. That's going to take a lot out of him.
Madness is trying to break the clinch but Shadow is controlling him.
Madness really does look like a pencil wearing a pair of gloves. Let's hope he has a gameplan to suit that ridiculous body shape.
Shadow lands a left hand.
Shadow throws a punch but it's blocked by Madness.
Shadow misses with some punches.
Madness misses with some punches.
Shadow lands a hook that snaps the head of Madness backwards.
Shadow prevents Madness from breaking the clinch.
A real battle for position is taking place between these two warriors.
Madness swings wildly with an uppercut but Shadow uses good head movement to avoid it.
Shadow doesn't land with the attempted body shot.
That's three minutes gone in the round.
The referee is keeping an eye on Shadow - much more stalling and he will separate the fighters.
Shadow lands a right hand.
Madness is trying to pull guard but Shadow turns him against the ropes and we stay in the clinch.
Shadow pushes Madness back against the ropes and lands a hook to the side of the head.
Shadow working some nice short punches in the clinch.
Madness throws a head punch that misses.
Shadow controlling the action here for a moment.
A nice left hand lands by Shadow.
That's four minutes gone in the round.
Shadow lands a right hand.
Shadow taking a breather.
Madness pulls Shadow into guard.
Madness is working actively off his back, looking to secure an arm or perhaps work for a triangle.
Shadow wants to control from the top but Madness keeps moving.
Madness can't do much from the bottom at the moment, as Shadow controls the pace.
Shadow stopping the sweep attempt from Madness.
That's five minutes gone in the round.
Madness keeping moving, preventing Shadow from controlling successfully.

The ref stands the fighters back up, due to lack of action by Bill Shadow.
Madness throws a shot from downtown. Shadow moves away and avoids it.
Shadow moves into the clinch.
Madness's head jolts backwards as he takes an uppercut right on the button!
Both guys are working to get underhooks.
Shadow scores with a shot to the side of Madness's head.
Shadow works for underhooks and lands a body shot in the process.
Shadow misses with a hook to the ribs.
Madness tries to break free but Shadow pushes him back against the ropes.
Bill Shadow seems to be working more effectively in the clinch in the fight so far.
Shadow looking to stall.
That's six minutes gone in the round.
Shadow scores with an uppercut up the middle.
Shadow misses with a hook to the ribs.
Madness misses with a hook from the clinch.
Shadow tries to throw a body punch but Madness avoids it by throwing Shadow back against the ropes.
Madness fails to land with a short punch on the inside.
Madness jumps guard.
Shadow trying to control the position from guard on top but Madness is wriggling around, looking for whatever he can.
Madness is looking for a guillotine. You can't force these things though and Shadow defends well.
Shadow stays in close to Madness's body and controls the position.
That's seven minutes gone in the round.
The referee looks like he's ready to step in and stand the fighters back up.
Shadow trying to control but Madness is working from the bottom.
The ref calls for a clean break and stands the fighters back up. Bill Shadow wasn't active enough on the ground.
Madness staying out of range there.
Shadow tries to clinch up.
Madness takes one to the side of the head.
Madness misses with a head kick.
A looping hook to the body misses from Shadow. Madness does a little dance to reset his feet.
Madness throws a big shot that misses.
Horrible takedown by Madness or perhaps it was just good defense by Shadow which made him look bad.
Shadow bobs and weaves and throws out a fast jab that snaps Madness's head backwards.
That's eight minutes gone in the round.
Shadow uses some good footwork to avoid the body shot by Madness.
Shadow throws a lazy right hand but Madness sees it coming a mile off and sidesteps it easily.
Madness jabbing away but nothing is landing.
Madness shoots in but no luck this time.
Madness thows a body shot but no joy.
Shadow checks a leg kick.
Shadow throws an overhand right that lands on Madness's shoulder, as Madness tries to avoid the shot.
Madness throws a right hand that Shadow ducks under and follows up with a left that Shadow also avoids with ease.
The fans in attendance giving it up for the two fighters, who have really let it all hang out in the last minute or so!
Shadow ducks under a wild hook from Madness.
Shadow ducks down and throws a hook to the body but Madness moves away.
Madness misses with a hook.
Madness takes one to the side of the head.
Madness thows a body shot but no joy.
That's nine minutes gone in the round.
Nice takedown defense from Shadow. No joy for Madness on that attempt.
Bill Shadow is looking to keep the fight on the feet at all costs.
Shadow throws a couple of head shots and lands with the final one - a decent hook, which struck Madness on the side of the head.

Madness is rocked!
Shadow loads up on a big right hand but Madness slips the punch.
Oh Madness is still all over the place! His legs are completely gone! Will he be able to recover?!!
Madness gets tackled into the ropes by Shadow. Shadow maintains the clinch.
Shadow escapes the clinch and we're back to striking.
Shadow throws an overhand right that lands on Madness's shoulder, as Madness tries to avoid the shot.
Madness avoids a punch combination nicely.
Shadow scores with a shot to the body.
Shadow might want to mix his strikes up a bit more. He's just going for head shots at the moment and that can become a bit predictable.
Shadow lands a glancing blow to the side of Madness's head.
Shadow drops Madness with a straight left! Oh this is bad for Madness! Shadow dives in and starts dropping bombs - the referee has no choice but to step in and save him!
Ladies and gentlemen, after 9:48 of round 2, we have a winner by way of TKO (Strikes). Bill Shadow!
Bill Shadow spent the whole post fight interview bigging himself up. It didn't go down that well with the fans after a while as they thought it was a bit arrogant.
|
|
|
|
|
|
|
|
|
|
|
|
|
|
|
|
|
|
|
|
|
|
|
| S |
C
A |
G |
S |
C
B |
G |
|
S |
C |
G |
|
energy
A | B |
|
hype
A | B |
|
pop
A | B |
|
mgr
A | B |
|
FIGHT
RATING
35% |
|
|
|
|
|
|
