|
|
PBP Commentary |
Coming up we have a heavyweight MMA rules bout between Scott Power (ranked 0 p4p, 0 weight class) and Bigdog Digdog (ranked 0 p4p, 0 weight class). Scott Power has the better chin. Will he look to stand and bang today?
 |
|
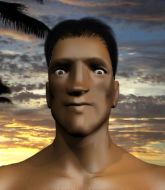 |
| 210 cm
19
273 lbs
1 - 6 - 0 |
|
195 cm
25
250 lbs
0 - 0 - 0 |
BJJ White Belt
Basic striking
Good chin |
|
BJJ White Belt
Decent boxing
Determined |
|
| |
|
Ladies and gentlemen. This fight is 3 rounds, in the heavyweight division.
Introducing the fighter to my left, fighting out of the red corner.
With a record of
1 - 6 - 0, fighting out of Las Vegas, Scott Power!
And introducing the fighter to my right, fighting out of the blue corner.
With a record of
0 - 0 - 0, fighting out of Las Vegas, Bigdog Digdog!
The judges for this bout are Cecil Peabody, Tiny Johnson and George Francis.

The bell rings for round one and we are underway!
Digdog tries to clinch but Power is having none of it.
Digdog stalks Power and leaps in with a furious combination of punches. Uppercuts and crosses smash into Power's face. Power staggers backwards, shaken.

It looks like Scott Power has been cut.

Power fakes an overhand right and shoots for a takedown. Digdog sprawls well initially but Power persists and gets the takedown into half guard.
We may be looking at a referee standup if the pace doesn't pick up soon.

Power decides to stand up.
A really sloppy takedown attempt there from Digdog.
Digdog fails with a takedown attempt from distance.
Wooooo! Give it up for these two warriors! They are putting on a show!
Digdog moves in looking to clinch but Power pushes him off.
Power dives in for a single leg takedown but Digdog sprawls and the fighters end up clinched against the cage.
Digdog prevents the takedown attempt.
Power gets double underhooks and manages to take the fight to the ground.
Power stands up from guard. Let's bang!
Power closes the distance and clinches up with Digdog, looking for a takedown. Power pushes Digdog against the cage but Digdog circles to the side and manages to break the clinch.
That's three failed takedown attempts in the round for Scott Power. That's going to take a lot out of him.
Power darts in and lands a nice takedown into half guard.
Digdog wants to control but Power is keeping busy.

That's one minute gone in the round.
Digdog is looking to escape.
Power stands up out of the half guard.
Power stuffs the takedown attempt from Digdog. Digdog gets slowly back to his feet.
No luck with that takedown attempt from Digdog.

Digdog clinches up against the cage.
Power keeps the fight in the clinch, despite Digdog's efforts to push away.
Power tries to score a body lock takedown but Digdog shows good agility there to stay on his feet.

That's two minutes gone in the round.
Digdog is trying to break the clinch but Power is controlling him.
Digdog is pressed up against the cage. Power has hold of a leg and is looking to drag Digdog down to the mat. Digdog avoids the attempt though and has circled away. We're back to striking at a distance.
Power shoots for a double leg takedown but Digdog sprawls well. He's pushed Power's face into the mat and manages to get back to his feet relatively easily.
Digdog stuffs a takedown. It's all about dictating where the fight takes place and Digdog wants it to stay on the feet.
Power is breathing heavily.
Digdog wants to clinch.
Scott Power seems to be the more aggressive standup fighter in this bout.
Digdog throws a head kick that misses and slips in the process. He scrambles back to his feet and the fighters circle.
Digdog will have to do better than that with his takedown attempts.
Digdog fails with an attempt to clinch.
Power misses with a takedown attempt. He shot from a bit too far out.
Digdog tries to grapple but his opponent circles
and Power counters with a single leg into guard. Digdog didn't expect that.
The ref warns both fighters not to hold the cage as they work up against the meshing.

That's three minutes gone in the round.
Digdog is working an open guard so Power takes the opportunity to get back to his feet.
Power has a takedown stuffed.
Digdog tries to clinch there but Power circles away.
Digdog tries to clinch but is not successful on this occasion.
Digdog misses with a takedown attempt
and Power counters with a driving takedown into guard. Nice work there by Power.
Digdog looking to hit a scissor sweep but Power is one step ahead there.
Digdog is trying to keep Power in close.
Power advances position into side control!
Power decides to stand back up.

That's four minutes gone in the round.
We've seen a great period of action over the last minute or so - credit to both fighters for going all out!
Digdog stuffs the takedown.
Power shoots in looking for a takedown. Digdog tries to sprawl out of it but Power keeps driving through. The fighters are pinned against the cage. Digdog manages to get underhooks and after a bit of a struggle, circles away and we're back to standing.
Digdog tries to close the distance and clinch but Power swats him to one side with an open hand palm strike and circles away.
Digdog is looking to clinch but Power is avoiding it.
Power defends well against a solid takedown attempt from Digdog.
Digdog looks for a takedown but Power sprawls well.
Power shoots in for a takedown but doesn't get it.
The crowd are going absolutely nuts as the round comes to an end - what a fantastic round of action!
Power slaps away a takedown attempt from Digdog, before circling back to the center of the mat.
Digdog connects with a single shot there.
And thats the end of the round the fighters go back to their corners.
Scott Power dominated that round.
The cut man is working on Scott Power's cut.
Well, the break between rounds is over. Let's get back to the scrappin!

Digdog wants to clinch up but Power keeps it at a distance.
Digdog misses with a takedown
and Power counters with a single leg into guard. Digdog didn't expect that.
Digdog is trying to stand up but he's not managed so far.
The fighters are starting to get a bit slippery now, which will make submissions a bit more difficult.
Power stands and steps away. Digdog gets to his feet too and we're back to the striking game.
Power will have to do better than that with his takedown attempts.
Power has a takedown stuffed.
Power drives through with a takedown into guard.
We've seen a great period of action over the last minute or so - credit to both fighters for going all out!
Power slips effortlessly into side control - very nice.
Both fighters are absolutely exhausted here.
Power decides to take the fight back to the feet.
That's one minute gone in the round.
Power shoots in with a takedown attempt and he has Digdog pinned against the cage. Digdog gets the underhooks and manages to circle away.
That's three failed takedown attempts in the round for Scott Power. That's going to take a lot out of him.
Digdog scores with a body shot.
Digdog misses with a takedown attempt. He shot from a bit too far out.
Digdog tries to clinch but is not successful on this occasion.
Power tries to drive through with a takedown attempt but Digdog defends well and Power ends up having to push Digdog into the cage where they will battle it out in the clinch.
Power avoiding damage as Digdog throws knees to the body.
Power drops down for a takedown but doesn't get it.
Power keeps control of Digdog as he tries to wriggle out of the double underhooks.
That's two minutes gone in the round.
Digdog is trying to pull guard but being pressed up against the cage enables Power to keep the fight standing.
Digdog jumps guard but his hands slip and he falls flat on his back. Well, he's made himself look a right mug there, as Power walks away with a smile on his face. Digdog gets slowly back to his feet and shakes his head.
A solid leg kick lands there for Digdog.
Power closes this distance looking for a takedown but Digdog circles away.
Digdog throws a looping left and ducks down for a takedown. He's got his arms around Power's waist but Power gets an underhook and avoids the takedown by throwing Digdog off to one side.
Digdog tries to drive through with a takedown attempt but Power defends well and Digdog ends up having to push Power into the cage where they will battle it out in the clinch.
Power has dropped down and is looking to force the takedown but it's defended by Digdog after a bit of a struggle.
Digdog tries for a takedown but Power manages to get underhooks.
Digdog is trying to force a seperation but Power has the dominant position.
We've seen a great period of action over the last minute or so - credit to both fighters for going all out!
Digdog is trying to slow down the pace in the clinch, to catch his breath.
That's three minutes gone in the round.
Power is trying to drag Digdog to the mat but Digdog just about manages to keep his footing. He used the cage to his advantage there.
A frustrated look appears on Digdog's face as he tries to break the clinch.
Digdog gets underhooks to prevent Power's takedown attempt.
Power prevents Digdog from breaking the clinch.
Digdog has a body lock and is looking for a takedown. Power is bouncing around trying to prevent the takedown and somehow he has indeed managed to stay on his feet.
Digdog tries to pull guard but Power won't allow it.
Power wants a takedown.
That's four minutes gone in the round.
Power drops to a knee looking for a takedown but Digdog gets the underhooks and prevents it.
Digdog tries to break the clinch but Power is controlling the position.
Power is pressed up against the cage. Digdog has hold of a leg and is looking to drag Power down to the mat. Power avoids the attempt though and has circled away. We're back to striking at a distance.
Digdog shoots in looking for a takedown but Power manages to keep the fight standing, pushing Digdog's face into the canvas for good measure before circling away.
Power shoots in for a double leg but Digdog sprawls well. That's going to sap some energy.
Digdog tries to clinch up.
As the round comes to an end the crowd are showing their appreciation for a great round of action.
Digdog tries to clinch but Power is having none of it.
Digdog lands with a slapping head kick.
This is a great period of action - very entertaining stuff!
Digdog displays good takedown defense there as he swats away a double leg from Power.
Digdog shoots for a double leg takedown but Power sprawls well. He's pushed Digdog's face into the mat and manages to get back to his feet relatively easily.
And thats the end of the round the fighters go back to their corners.
That was a close second round but I would say that Scott Power will probably get the nod.
The cut man is working on Scott Power's cut.
That's the end of the round. The referee orders the cornermen out of the cage so we can get back down to business. This is the final round!

Digdog scores to the head and body with a nice combination!
Power drives through with a takedown into Digdog's guard. Let's see what he can do from the top position.
Digdog really doesn't want to stay on the ground with Power. If he can't get it back to his feet, it's only a matter of time before he'll be tapping out.
Power gets to his feet and steps away from his opponent.
Digdog fails to land the takedown.
Power shoots in for a takedown. "Ole!" shouts Digdog as he jumps to the side.
Digdog stuffs a takedown. It's all about dictating where the fight takes place and Digdog wants it to stay on the feet.
Digdog shoots in for a takedown but doesn't get it.
Digdog fails with a rather predictable takedown attempt.
Scott Power has stuffed three takedown attempts in the round now. That's going to take a lot out of Bigdog Digdog.
Power shoots in with a takedown attempt and he has Digdog pinned against the cage. Digdog gets the underhooks and manages to circle away.
Scott Power is looking to throw some combinations by the looks of things.
Power avoids the clinch attempt nicely.
Both fighters are breathing heavily.
That's one minute gone in the round.
Power goes for a double leg but Digdog avoids the attempt and the two fighters end up clinched against the cage as Digdog continues to drive forward.
Digdog is working for a takedown up against the cage. He can't get it on this occasion though.
Power is working for a takedown up against the cage. He can't get it on this occasion though.
Digdog is working for a takedown up against the cage. He can't get it on this occasion though.
Digdog working hard to break the clinch.
Digdog misses with a punch to the body.
Digdog is looking for a takedown.
Power wants a takedown but no success here.
Digdog is looking to break free of the clinch but Power has double underhooks.
That's two minutes gone in the round.
Power drops down looking for an ankle pick but Digdog pulls his leg out and moves away.
Power displays good takedown defense there as he swats away a double leg from Digdog.
Digdog scores with a head kick. Power tried to block it but didn't get his arm up in time.
Digdog moves in looking to clinch but Power pushes him off.
The fight stays on the outside here - Digdog looks like he's thinking about clinching though.
Digdog fails with the takedown
and Power counters with a driving takedown into guard. Nice work there by Power.
Fantastic stuff here - a very entertaining period of action, which has drawn cheers from the crowd.
Power stands and steps away. Digdog gets to his feet too and we're back to the striking game.
Power fails to land the takedown.
That's three minutes gone in the round.
Nice takedown defense from Power. No joy for Digdog on that attempt.
Bigdog Digdog seems to be getting the better of the standup.
Power closes the distance and clinches up, looking for a takedown. He shifts his weight and gets a nice trip into half guard.
Digdog is trying to stand.
The fighters are battling for position here. Digdog manages to regain full guard. Nice work.
Digdog tries to land a sweep but no joy.
Digdog working a defensive guard but Power passes into half guard.
Power stands up out of the half guard.
Power changes levels and looks for a double leg takedown. Digdog tries to avoid it but Power manages to keep hold of a leg and drag Digdog to the ground. Digdog escapes though and pops straight back up to his feet.
Power misses with a takedown attempt. He shot from a bit too far out.
Digdog fails with an attempt to clinch.
That's four minutes gone in the round.
Digdog is trying hard to land a takedown here. Power sprawls well and keeps this one on the feet.
Nice sprawl there from Digdog as Power shoots in.
Fantastic stuff here - a very entertaining period of action, which has drawn cheers from the crowd.
No luck for Power with that takedown attempt.
Power has a takedown stuffed.
Power has his front leg slapped to the side - a nice low kick landing there from Digdog.
Digdog jabs Power to the body, keeping him at a distance.
Power goes for a double leg but Digdog avoids the attempt and the two fighters end up clinched against the cage as Digdog continues to drive forward.
As the round comes to an end the crowd are showing their appreciation for a great round of action.
Digdog is trying to drag Power to the mat but Power just about manages to keep his footing. He used the cage to his advantage there.
Power tries for a takedown but Digdog manages to get underhooks.
And that's the end of the fight!
Scott Power showed his dominance in that final round.
Well I reckon that's a shut out for Power, winning every round. Will the judges agree? They are the ones who matter, even if they are often depressingly incompetent. Over to the ring announcer for the scorecards.
Ladies and gentlemen, after 3 rounds of action, we go to the scorecards for a decision.
Judge Cecil Peabody scores the fight 30:27
Judge Tiny Johnson scores the fight 30:28
Judge George Francis scores the fight 30:27
In favor of your winner, by unanimous decision... Scott Power!
|
|
|
|
|
|
|
|
|
|
|
|
|
|
|
|
|
|
|
|
|
|
|
| S |
C
A |
G |
S |
C
B |
G |
|
S |
C |
G |
|
energy
A | B |
|
hype
A | B |
|
pop
A | B |
|
mgr
A | B |
|
FIGHT
RATING
79% |
|
|
|
|
|
|
