|
|
PBP Commentary |
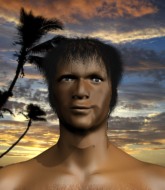
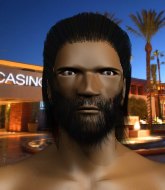
Coming up we have a middleweight MMA rules bout between Monte Holt (ranked 0 p4p, 0 weight class) and Kenzo Hiroshima (ranked 0 p4p, 0 weight class). Kenzo Hiroshima has the power to score a knockout today if he connects clean with Monte Holt's chin.
 |
|
 |
| 217 cm
19
193 lbs
2 - 2 - 0 |
|
185 cm
24
185 lbs
0 - 0 - 0 |
BJJ Blue Belt
Brawler
Cuts easily |
|
BJJ Blue Belt
Brawler
Determined |
|
| |
|
Ladies and gentlemen. This fight is 3 rounds, in the middleweight division.
Introducing the fighter to my left, fighting out of the red corner.
With a record of
2 - 2 - 0, fighting out of Tokyo, Monte Holt!
And introducing the fighter to my right, fighting out of the blue corner.
With a record of
0 - 0 - 0, fighting out of Tokyo, Kenzo Hiroshima!
The judges for this bout are Shigeki Sano, Yasuomi Hirokawa and Yukihiro Yamamoto.

The bell rings for round one and we are underway!

Holt gets caught flat footed, as Hiroshima shoots in with a quick takedown into guard.
Hiroshima wants to stand but Holt has a closed guard, so he can't escape.
Holt looking to hit a scissor sweep but Hiroshima is one step ahead there.
Hiroshima sitting in guard, not really doing much.
Hiroshima passes easily into side control. Nice work.
Holt tries to improve position but can't.
Hiroshima trying to control the action but Holt is working from the bottom.
A lull in the action here.

That's one minute gone in the round.
Holt struggling a bit here.

Hiroshima has had enough of the ground for now and decides to stand.
Hiroshima fails with the takedown.
Hiroshima fails with a takedown attempt from distance.
Hiroshima looks for a takedown but Holt sprawls well.
Monte Holt has stuffed three takedown attempts in the round now. That's going to take a lot out of Kenzo Hiroshima.

That's two minutes gone in the round.
Holt darts in looking for a takedown but Hiroshima gets double underhooks and turns Holt into the cage.
Good anti-grappling being displayed by Holt as Hiroshima tries to tie him up.
Holt is trying to pull guard but Hiroshima turns him against the cage and we stay in the clinch.
Holt displaying some good clinch control by pressing Hiroshima up against the cage.
Holt prevents Hiroshima from breaking the clinch.
Hiroshima is looking to take this one to the mat.
Holt blocks a knee to the body. He'll have a nicely bruised forearm in the morning.
Hiroshima stalling the fight.

That's three minutes gone in the round.
Holt is pressed up against the cage. Hiroshima has hold of a leg and is looking to drag Holt down to the mat. Holt avoids the attempt though and has circled away. We're back to striking at a distance.
Hiroshima scores with a sloppy punch to the body. Not much technique there but it did the business.
Holt shoots in for a double leg but Hiroshima sprawls well. That's going to sap some energy.
Holt throws a leg kick which misses Hiroshima's front leg but catches the back leg as Hiroshima tries to avoid it.
Hiroshima changes levels and drives through with a really nice takedown into side control. Holt looks really pissed at himself for not defending that better.
Hiroshima looks winded!
Holt tries to buck Hiroshima off but Hiroshima is having none of it.
Holt is not content to let Hiroshima control the position.
Holt is being controlled here.
Hiroshima trying to control the action but Holt is working from the bottom.

That's four minutes gone in the round.
The referee is pacing around the two fighters - he looks like he's thinking about a standup.

Hiroshima tries for a kimura. Not really close to a finish though.
Holt parries the strikes from Hiroshima easily there. Hiroshima is wary of posturing up too much because it might enable Holt to escape.
The crowd applaud the fighters efforts here as the round comes to an end.
Hiroshima in side control lands a nice looking series of punches and elbows.
Holt knows he needs to get back to his feet asap. He's simply no match for Hiroshima on the ground.
Fantastic stuff here - a very entertaining period of action, which has drawn cheers from the crowd.
Holt regains half guard there - taking advantage of Hiroshima's attempt to lay and pray for a moment.
And thats the end of the round the fighters go back to their corners.
Kenzo Hiroshima dominated that round.
The corners get their ten second warning. Both fighters stand from their stools and stare eachother down, ready to get back to the action.

Holt is looking to clinch.
Hiroshima thows a body shot but no joy.
Hiroshima looks for a takedown here. Will he get it? Holt is fending him off so far but Hiroshima persists. Nope, Holt circles away and we're back to standing.
Hiroshima looks for a takedown but Holt sprawls well.
Holt feints with a shoulder and throws a nice leg kick to Hiroshima's calf.
Hiroshima throws a head kick that looked like it stung.
Holt cracks Hiroshima with a good shot that sees him stumbling back into the cage.
Holt really does look like a pencil wearing a pair of gloves. Let's hope he has a gameplan to suit that ridiculous body shape.
Hiroshima throws a head kick that misses and slips in the process. He scrambles back to his feet and the fighters circle.
Hiroshima misses with a head kick.
Hiroshima changes levels and looks for a double leg takedown. Holt tries to avoid it but Hiroshima manages to keep hold of a leg and drag Holt to the ground. Holt escapes though and pops straight back up to his feet.
Monte Holt has stuffed three takedown attempts in the round now. That's going to take a lot out of Kenzo Hiroshima.
Hiroshima is breathing heavily.
That's one minute gone in the round.
A punch combination from Hiroshima misses.
Holt takes a step towards his opponent and connects with a left hand, before circling away.
Hiroshima shoots in for a takedown. "Ole!" shouts Holt as he jumps to the side.
No luck for Holt with that takedown attempt.
Holt changes levels and looks for a double leg takedown. Hiroshima tries to avoid it but Holt manages to keep hold of a leg and drag Hiroshima to the ground. Hiroshima escapes though and pops straight back up to his feet.
Holt darts in looking for a takedown but Hiroshima gets double underhooks and turns Holt into the cage.
Both fighters working to control the clinch.

Hiroshima breaks the clinch and we're back to striking at distance.
Holt throws a head kick that misses.
Hiroshima shoots for a double leg takedown but Holt sprawls well. He's pushed Hiroshima's face into the mat and manages to get back to his feet relatively easily.
That's two minutes gone in the round.

Holt closes the distance and pushes Hiroshima back into the cage.
Holt with a knee to the head.

It looks like Kenzo Hiroshima has been cut.
Holt fails to pull guard.
Holt goes for a takedown in the clinch but Hiroshima prevents it.
Holt gets double underhooks to prevent a takedown attempt from Hiroshima.
Hiroshima is looking to score with knees to the body. Maybe he'll change it up and go body then head. Holt is defending well for now.
Hiroshima gets double underhooks to prevent a takedown attempt from Holt.

Holt's corner calls for him to break the clinch, which he does.
Monte Holt is looking to throw some combinations by the looks of things.
That's three minutes gone in the round.
Holt gets taken down but at least he's managed to land in guard.
Hiroshima gets to his feet - Holt follows without any prompting.
Holt blocks a head kick by Hiroshima.
Holt moves in looking to clinch but Hiroshima pushes him off.
Hiroshima throws a body kick, spinning off balance
and Holt counters by clinching up.
Holt jumps guard but Hiroshima turns him against the cage and keeps the fight standing.
Hiroshima tries to pull guard but Holt won't allow it.
Hiroshima is defending well against a takedown attempt.
Hiroshima tries to take the fight to the ground by pulling guard but can't manage it.
That's four minutes gone in the round.
Hiroshima tries to pull guard but Holt won't allow it.
Hiroshima has hold of a leg and is looking for a trip takedown. Holt avoids it nicely though and we remain in the clinch.
Holt landing some nice looking knees to the body.
Holt is trying to drag Hiroshima to the mat but Hiroshima just about manages to keep his footing. He used the cage to his advantage there.
The crowd are loving this. Great action here.
Holt has dropped down and is looking to force the takedown but it's defended by Hiroshima after a bit of a struggle.
Holt has hold of a leg and is looking for a trip takedown. Hiroshima avoids it nicely though and we remain in the clinch.
As the round comes to an end the crowd are showing their appreciation for a great round of action.
Hiroshima stalling in the clinch.
The crowd are getting on Hiroshima's back here. They're not happy about his lack of aggression in the clinch.
Hiroshima is working for takedown but Holt is calmly controlling the position for now.
And thats the end of the round the fighters go back to their corners.
A close second round but Kenzo Hiroshima will probably get the nod - 10:9.
The cut man is working on Kenzo Hiroshima's cut.
The minute break is over - no more time for sponges and pep talks - back to the action! So, we enter the final round. Let's see if either fighter can bring us a finish, or whether we're going to the judges scorecards.

Holt moves into the clinch.
Holt breaks from the clinch.
Holt shoots and misses
and Hiroshima counters with a leg kick.
Holt gets taken down but at least he's managed to land in guard.
Hiroshima sneaks a leg through and gets to half guard. That was like a knife through butter how easily he passed Holt's guard.
Hiroshima trying to control from half guard but Holt is working away.
Hiroshima is working for a kimura but Holt is defending it quite comfortably.
Holt is trying to maintain the position but Hiroshima is very close to passing his half guard.
Both fighters are breathing heavily.
That's one minute gone in the round.
Holt is trying to get back to full guard.
Hiroshima seems content to maintain position for now, rather than mounting any offense.
Hiroshima decides to return to a standing position.
Holt keeps the fight standing with a nice sprawl.
That's two minutes gone in the round.
Holt looks for a takedown but Hiroshima sprawls well.
Hiroshima looks for a takedown but Holt sprawls well.
Holt dives in and grabs Hiroshima's left leg, looking for a takedown. Hiroshima pushes down on Holt's head and hops out.
That's three failed takedown attempts in the round for Monte Holt. That's going to take a lot out of him.
Hiroshima swats away the attempt to clinch by Holt.

Hiroshima clinches with his opponent.
Hiroshima is trying to pull guard but Holt has him pressed against the cage.
Hiroshima stalling against the cage.
Holt's corner calls for him to break the clinch, which he does.
That's three minutes gone in the round.
Holt shoots in with a takedown attempt and he has Hiroshima pinned against the cage. Hiroshima gets the underhooks and manages to circle away.
Hiroshima scores with a one two! Holt had his feet all tangled up there and couldn't avoid the strikes.
Nice sprawl there from Hiroshima as Holt shoots in.
Hiroshima slaps away a takedown attempt from Holt, before circling back to the center of the mat.
Hiroshima closes the distance and gets a double leg, slamming Holt to the mat! Holt manages to get full guard.
Hiroshima landing with the ground and pound.
Hiroshima stays in close to Holt's body and controls the position.
That's four minutes gone in the round.
Hiroshima prevents Holt from getting back to his feet.
Hiroshima showing good wrestling skills to control the position.
Holt trying to control the position.
The crowd applaud the fighters efforts here as the round comes to an end.
Hiroshima gets to his feet - Holt follows without any prompting.
And that's the end of the fight!
Kenzo Hiroshima comfortably won the final round on my scorecard.
I've got Hiroshima winning every round here. Surely the decision will go his way and he'll pick up a well deserved decision victory. Over to the ring announcer for the scorecards.
Ladies and gentlemen, after 3 rounds of action, we go to the scorecards for a decision.
Judge Shigeki Sano scores the fight 28:30
Judge Yasuomi Hirokawa scores the fight 27:30
Judge Yukihiro Yamamoto scores the fight 27:30
In favor of your winner, by unanimous decision... Kenzo Hiroshima!
|
|
|
|
|
|
|
|
|
|
|
|
|
|
|
|
|
|
|
|
|
|
|
| S |
C
A |
G |
S |
C
B |
G |
|
S |
C |
G |
|
energy
A | B |
|
hype
A | B |
|
pop
A | B |
|
mgr
A | B |
|
FIGHT
RATING
53% |
|
|
|
|
|
|
