|
|
PBP Commentary |
Coming up we have a lightweight MMA rules bout between Kato Munechika (ranked 0 p4p, 0 weight class) and Advice Mallard (ranked 0 p4p, 0 weight class). Munechika comes to the cage accompanied by Requiem for a Dream. Both fighters look fresh as a daisy as they make their way towards the cage.
 |
|
 |
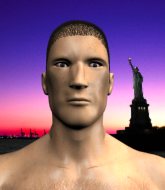
| 173 cm
35
160 lbs
26 - 11 - 0 |
|
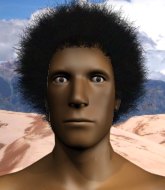
195 cm
23
165 lbs
6 - 1 - 0 |
BJJ Purple Belt
Decent elbows
KO power |
|
BJJ Purple Belt
Counter fighter
Knockout power |
|
| |
|
Ladies and gentlemen. This fight is 3 rounds, in the lightweight division.
Introducing the fighter to my left, fighting out of the red corner.
With a record of
26 - 11 - 0, fighting out of Sydney, Kato Munechika!
And introducing the fighter to my right, fighting out of the blue corner.
With a record of
6 - 1 - 0, fighting out of Sydney, Advice Mallard!
The judges for this bout are Hugh Johnson, Skip Squint and Damien Edna.

The bell rings for round one and we are underway!
Munechika is looking to take this fight into the clinch.
Munechika bobs and weaves and throws out a fast jab that snaps Mallard's head backwards.
Mallard closes the distance and clinches up with Munechika, looking for a takedown. Mallard pushes Munechika against the cage but Munechika circles to the side and manages to break the clinch.

Mallard changes levels and drives through with a really nice takedown into side control. Munechika looks really pissed at himself for not defending that better.
Munechika is positioning himself to get back to half guard.

Mallard thinks about going for a far side armbar but bails out and retains the dominant position instead.
Mallard tries for an arm triangle. That looks pretty tight to me. Is this one over!?! Possibly, maybe, no Mallard has let go of the choke. Obviously it wasn't as tight as we thought!
Munechika prevents Mallard from improving position.
Munechika is trying to improve his position.

That's one minute gone in the round.
Mallard looking for an arm triangle but it's way too loose to do anything.
Mallard tries for an arm triangle. That looks pretty tight to me. Is this one over!?! Possibly, maybe, no Mallard has let go of the choke. Obviously it wasn't as tight as we thought!
Mallard is trying to land an Americana. He has the arm isolated but Munechika is keeping cool and he's avoided the danger for now.
Munechika is trying to control Mallard's posture but Mallard avoids it.
Mallard looking for an arm triangle but it's way too loose to do anything.
Mallard is trying to land an Americana. He has the arm isolated but Munechika is keeping cool and he's avoided the danger for now.
Mallard thinks about going for a far side armbar but bails out and retains the dominant position instead.
The fighters are pressed up against the cage, both looking to find a bit of space to work.
Mallard is looking for a kimura. He might have it! No, Munechika has escaped the position, nice work there.

That's two minutes gone in the round.
Mallard is looking to finish here, going for an Americana. Munechika knows the correct defense though, so he's OK.
Mallard tries for a kimura but Munechika is defending well.
Munechika gets one leg under and gets the fight to half guard.
Munechika gets back to full guard.
Munechika keeping full guard, as Mallard tries to pass.
Mallard postures up.
The fans in attendance giving it up for the two fighters, who have really let it all hang out in the last minute or so!
Munechika keeping full guard, as Mallard tries to pass.

That's three minutes gone in the round.
Mallard pushes down on Munechika's leg and manages to get into half guard.
Mallard is thwarting Munechika's attempts to control the position.
Munechika might be looking to lock onto one of his opponent's long limbs for a submission, whilst we're on the ground.
Mallard is a painfully thin specimen of a man. You do wonder whether a good body kick would snap him clean in two.
Munechika makes his way to full guard. A much better position for Munechika.
Mallard drops back for a leg! It's a sloppy attempt though and Mallard jumps back into guard quickly, to retain the dominant position.
Both fighters really going for it on the ground here!
Mallard drops back looking for a leg! Munechika is in trouble here! The fighters roll with the hold and Munechika manages to kick Mallard off! Mallard jumps back into Munechika's guard.
Mallard thinks about going for a leg but decides against it, in order to maintain the position.

That's four minutes gone in the round.
Mallard postures up.
Mallard is trying to work a guillotine from the top, or something like that? Don't know how he thinks he's going to get a finish from there.
Mallard drops back for a leg! It's a sloppy attempt though and Mallard jumps back into guard quickly, to retain the dominant position.
Munechika pulls Mallard in close to prevent any damage.
Munechika looking to control.
Mallard drops back looking for a heel hook - he quickly realises he's not going to get it but Munechika manages to dive on top of him before he can escape and now Mallard has Munechika in his guard.
Mallard working from the bottom, still in full guard. He's managed to get a loose triangle. Munechika doesn't seem to be doing much to defend here, obviously he feels comfortable in the position. Munechika manages to throw the legs off his shoulder and he's back into guard - no problem.
The crowd cheering loudly, showing their appreciation for the quality fight we're seeing here.
As the round comes to an end the crowd are showing their appreciation for a great round of action.
Munechika avoids a guillotine attempt easily.
And thats the end of the round the fighters go back to their corners.
Advice Mallard dominated that round.
The minute break is over - no more time for sponges and pep talks - back to the action!

Mallard shoots in for a takedown from distance. He catches Munechika napping and manages to drive through into side control!
Munechika is trying to improve his position.
Mallard is looking to finish here, going for an Americana. Munechika knows the correct defense though, so he's OK.
Munechika is looking for a sweep.
Mallard is trying to land an Americana. He has the arm isolated but Munechika is keeping cool and he's avoided the danger for now.
Munechika tries to improve position but can't.
That's one minute gone in the round.
Mallard thinks about going for a far side armbar but bails out and retains the dominant position instead.
Munechika can't do much from the bottom here.
Mallard tries for a kimura but Munechika is defending well.
Munechika tries to work a leg under to get back to half guard but Mallard wriggles his own leg back out and remains in side control.
Mallard is trying to get an arm triangle but Munechika is defending well.
Munechika is positioning himself to get back to half guard.
Mallard is trying to land an Americana. He has the arm isolated but Munechika is keeping cool and he's avoided the danger for now.
Mallard working hard here to secure a kimura but he's not really in the right position for it.
That's two minutes gone in the round.
Munechika is putting a lot of effort into getting back to his feet here.
Mallard goes for an armbar! This could be all over! Wait, no, Munechika rolls with the submission and now he's on top in Mallard's guard! Nice work there by Munechika!
Munechika would like to get this fight back to the feet but can't get free from the closed guard.
Mallard is working actively off his back, looking to secure an arm or perhaps work for a triangle.
That's three minutes gone in the round.
Mallard looking for submissions from the bottom here. Moving his hips around, possibly looking for an armbar.
Mallard is looking for a guillotine. You can't force these things though and Munechika defends well.
The ref warns both fighters not to hold the cage as they work up against the meshing.
Mallard is working actively off his back, looking to secure an arm or perhaps work for a triangle.
Mallard is throwing his legs up, looking for submissions. Munechika is aware though and is defending well.
Munechika wants to stand but Mallard is controlling his posture from full guard.
That's four minutes gone in the round.
Munechika avoids a guillotine attempt easily.
Mallard is throwing his legs up, looking for submissions. Munechika is aware though and is defending well.
Mallard had isolated an arm as going for a kimura. Munechika defends it easily.
Mallard is looking for a triangle but Munechika pushes his legs off easily.
Mallard is breathing heavily.
The crowd applaud the fighters efforts here as the round comes to an end.
Munechika slows down the pace of the fight, as he sits in guard.

Munechika stands and steps away. Mallard gets to his feet too and we're back to the striking game.
And thats the end of the round the fighters go back to their corners.
Advice Mallard showed his class in that round. I'd imagine he'll take it on all the scorecards.
That's the end of the interval. I'm sure that seemed a lot quicker than a minute for our two fighters! Back to the action. Ladies and gentlemen, this is the final round!

Mallard misses with a takedown attempt. He shot from a bit too far out.
Munechika looking to take his opponent's legs away with the low kicks.
Munechika shuffles to his left behind two crisp jabs. Mallard eats them both and turns towards Munechika to reposition himself and eats a stinging right hand-left hook combo.
Munechika lunges in with swinging rights and lefts but Mallard circles away quickly and effectively.
Munechika scores with a sloppy punch to the body. Not much technique there but it did the business.
Mallard with poor footwork there. He got himself in a bit of a tangle, enabling Munechika to score with a decent uppercut.
Munechika throws a looping overhand right but Mallard ducks down to avoid it.
Mallard will need to close the distance a bit before he attacks - that leg kick was thrown from too far away.
That's one minute gone in the round.
Mallard takes a head kick and shrugs it off.
Mallard takes a punch right to his stomach. That took the wind out of him momentarily.
Munechika misses the jab.
Mallard dives in and grabs Munechika's left leg, looking for a takedown. Munechika pushes down on Mallard's head and hops out.
Mallard throws a body kick but he was well out of range there.
Mallard moves out of range as Munechika strikes.
Mallard fails with a takedown attempt from distance.
Kato Munechika has stuffed three takedown attempts in the round now. That's going to take a lot out of Advice Mallard.
A solid body kick from Munechika.
Munechika is looking to clinch.
That's two minutes gone in the round.
Mallard throws a looping left and ducks down for a takedown. He's got his arms around Munechika's waist but Munechika gets an underhook and avoids the takedown by throwing Mallard off to one side.
Mallard takes a big intake of breath there - he's definitely tired.
Munechika moving in and out of range nicely, whilst landing the scoring shot.
Mallard looks to throw the jab but Munechika is out of range.
Mallard throws a left and a right that both miss
and Munechika counters with an outside leg kick.
Munechika lands a nice looking body shot.
Advice Mallard is looking to throw some combinations by the looks of things.
Munechika tests Mallard's chin there with a solid looking shot.
Wooooo! Give it up for these two warriors! They are putting on a show!

Oooooh!!! Munechika has knocked Mallard down with a huge combo! Munechika steps away and waves a wobbly Mallard back to his feet! This one might not go much longer!

Mallard is rocked!

It looks like Advice Mallard has been cut.
Munechika fakes low and throws an overhand right that catches Mallard on the side of the head.
Mallard is still on wobbly legs! Can Munechika finish him?
That's three minutes gone in the round.
Nice jab there from Munechika.
Munechika misses with a head kick.
Mallard shoots in for a takedown - he's clinched up with Munechika but Munechika pushes him off and we're back to square one.
Kato Munechika is winning the standup battle so far.
Munechika comes forward and lands a shot to the body, then darts back out of range.
Mallard fails with the takedown
and Munechika counters with a lovely shot to the body.
Munechika lands a leg kick that knocks Mallard off balance momentarily.

Munechika gets in close and instigates a clinch.
A short left from Munechika.

Munechika breaks the clinch and we return to the middle of the mat.
A lazy body kick from Mallard
and Munechika counters with an inside leg kick.
Munechika moves into range and lands a nice leg kick.
Mallard doesn't react quick enough there as he takes a shot to the body.
That's four minutes gone in the round.
Munechika throws a head kick that misses.
The crowd are loving this. Great action here.
Good standup being displayed there by Munechika as he connects with a hook.
Munechika with a nice cross.
Kato Munechika has stepped it up - he knows he needs a finish here!
Munechika throws a monster overhand right that drops Mallard! Munechika follows up with more strikes from mount and the fight is all over!
Ladies and gentlemen, after 4:20 of round 3, we have a winner by way of TKO (Strikes). Kato Munechika!
Kato Munechika gave a mention to Hellbent in his post fight interview. That will please them (and hopefully generate some sales).
|
|
|
|
|
|
|
|
|
|
|
|
|
|
|
|
|
|
|
|
|
|
|
| S |
C
A |
G |
S |
C
B |
G |
|
S |
C |
G |
|
energy
A | B |
|
hype
A | B |
|
pop
A | B |
|
mgr
A | B |
|
FIGHT
RATING
51% |
|
|
|
|
|
|

