|
|
PBP Commentary |
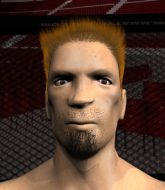
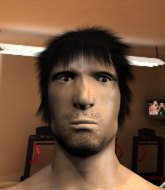
Coming up we have a welterweight MMA rules bout between Angel Mcknight (ranked 0 p4p, 0 weight class) and TikaKiyo Yoshiki (ranked 0 p4p, 0 weight class). These two fighters really are very evenly matched on the feet - it will be fascinating to see who can assert themselves in that aspect of the fight.
 |
|
 |
| 175 cm
24
178 lbs
0 - 6 - 2 |
|
170 cm
25
170 lbs
1 - 0 - 0 |
BJJ Blue Belt
Solid boxing
Experienced |
|
BJJ Blue Belt
Brawler
Determined |
|
| |
|
Ladies and gentlemen. This fight is 3 rounds, in the welterweight division.
Introducing the fighter to my left, fighting out of the red corner.
With a record of
0 - 6 - 2, fighting out of Tokyo, Angel Mcknight!
And introducing the fighter to my right, fighting out of the blue corner.
With a record of
1 - 0 - 0, fighting out of Tokyo, TikaKiyo Yoshiki!
The judges for this bout are Yukihiro Shimada, Yasuomi Hirokawa and Kenichi Hosakawa.

The bell rings for round one and we are underway!
A head kick misses from Yoshiki.
Mcknight looks for a takedown here. Will he get it? Yoshiki is fending him off so far but Mcknight persists. Nope, Yoshiki circles away and we're back to standing.
Yoshiki misses with a takedown attempt. He shot from a bit too far out.
A telegraphed takedown attempt from Mcknight is defended easily by Yoshiki.

Mcknight moves into the clinch.
Yoshiki jumps guard but Mcknight stands there with Yoshiki around his waist. Yoshiki gives up and drops back to his feet. We remain in the clinch.
Yoshiki drops to a knee looking for a takedown but Mcknight gets the underhooks and prevents it.
Angel Mcknight has stuffed three takedown attempts in the round now. That's going to take a lot out of TikaKiyo Yoshiki.
Mcknight missing with knees to the body.
Mcknight's corner are urging him to control the action in the clinch for a moment, rather than mount any serious offense. I'm sure the crowd appreciate those instructions... not.

That's one minute gone in the round.
Yoshiki blocks a knee to the body. He'll have a nicely bruised forearm in the morning.
Yoshiki is trying to pull guard but Mcknight turns him against the cage and we stay in the clinch.
Mcknight drops to a knee looking for a takedown but Yoshiki gets the underhooks and prevents it.
Yoshiki scores a nice knee to the body.
Yoshiki wants a takedown.
Yoshiki jumps guard but Mcknight stands there with Yoshiki around his waist. Yoshiki gives up and drops back to his feet. We remain in the clinch.
Mcknight managing to block the knees to the body from Yoshiki.
Yoshiki tries to take the fight to the ground by pulling guard but can't manage it.
Mcknight has Yoshiki pushed against the cage.

That's two minutes gone in the round.
Yoshiki is looking for a takedown up against the cage. Mcknight gets underhooks though and prevents the takedown attempt.
Mcknight can't break the clinch.
Yoshiki drops down looking for an ankle pick but Mcknight pulls his leg out and moves away.
Yoshiki shoots in looking for a takedown. Mcknight tries to sprawl out of it but Yoshiki keeps driving through. The fighters are pinned against the cage. Mcknight manages to get underhooks and after a bit of a struggle, circles away and we're back to standing.
Mcknight misses with a takedown attempt - Yoshiki sprawls well and throws a nice strike on the way out which just misses.
Yoshiki tries to close the distance and clinch up but Mcknight swats him away and circles back towards the center.
Yoshiki catches Mcknight with a nice straight right. He seems pissed - ooooh, it's on now! On like donkey kong!

That's three minutes gone in the round.
Yoshiki misses with a wild combination.
Yoshiki throws a head kick that misses.
Yoshiki misses with a takedown attempt. He shot from a bit too far out.
Yoshiki keeping at a good range here, avoiding a leg kick.
Yoshiki tries to clinch but is not successful on this occasion.
Yoshiki pivots, looking for a leg kick but Mcknight is out of range and Yoshiki settles back down.
Yoshiki throws a combination that misses
and Mcknight counters with a nice jab to the body that keeps Yoshiki thinking.
Mcknight throws a leg kick
and Yoshiki counters with a one-two to the body.
Yoshiki wants to clinch but Mcknight slips to the side
and Mcknight counters with a nice uppercut.
Yoshiki is looking to clinch.
Yoshiki misses with a hook
and Mcknight moves into the clinch.

That's four minutes gone in the round.
Yoshiki wants to stall.
Yoshiki missing with knees to the body.
Yoshiki looking for a takedown.
Yoshiki's corner are urging him to control the action in the clinch for a moment, rather than mount any serious offense. I'm sure the crowd appreciate those instructions... not.

Yoshiki gets a trip takedown into half guard.
The crowd cheering loudly, showing their appreciation for the quality fight we're seeing here.

Yoshiki seems to be working for a kimura but Mcknight defends the submission attempt.
The crowd applaud the fighters efforts here as the round comes to an end.
Mcknight is looking to control Yoshiki's leg but it's slowly edging free. Can Mcknight avoid being mounted?
And thats the end of the round the fighters go back to their corners.
TikaKiyo Yoshiki dominated that round.
The corners get their ten second warning. Both fighters stand from their stools and stare eachother down, ready to get back to the action.

Mcknight keeps the fight standing with a nice sprawl.
Mcknight defends well against a solid takedown attempt from Yoshiki.
Mcknight gets a clinch.
Mcknight tries to pull guard but Yoshiki forces him back to his feet, against the cage.
Mcknight tries to take the fight to the ground by pulling guard but can't manage it.
Yoshiki tries to take the fight to the ground by pulling guard but can't manage it.
Angel Mcknight has stuffed three takedown attempts in the round now. That's going to take a lot out of TikaKiyo Yoshiki.
Yoshiki can't get the takedown.

Yoshiki pushes off and circles away, back to the middle of the mat.
Yoshiki leaves Mcknight with his face pressed against the mat as he sprawls beautifully, defending against a solid takedown attempt.
Angel Mcknight is looking to throw some combinations by the looks of things.
Mcknight misses with a body kick.
Yoshiki connects with a leg kick. Mcknight looked like he was expecting something else and didn't defend it.
That's one minute gone in the round.
Yoshiki throws a sloppy head kick and Mcknight moves out of range easily.
Yoshiki wants to clinch.
Mcknight shoots in looking for a double leg takedown. Yoshiki defends it nicely.
Mcknight gets to the clinch - let's see what his plan is here.
Yoshiki goes for a takedown in the clinch but Mcknight prevents it.
Yoshiki tries a body shot but Mcknight blocks it.
A right hook to the body lands for Mcknight.
That's two minutes gone in the round.
Yoshiki drops down for a takedown but doesn't get it.
Yoshiki keeps the fight in the clinch, despite Mcknight's efforts to push away.
Yoshiki gets double underhooks to prevent a takedown attempt from Mcknight.
Yoshiki is trying to push Mcknight away but Mcknight has him pressed against the cage, so he's going nowhere.
Mcknight will no doubt start fighting again in a minute but for now he's just having a little rest, leaning Yoshiki up against the cage.
Yoshiki is working for takedown but Mcknight is calmly controlling the position for now.
That's three minutes gone in the round.
Mcknight stalling here - the referee won't stand for too much of that.
Yoshiki breaks the clinch.
Yoshiki tries to close the distance and clinch up but Mcknight swats him away and circles back towards the center.
Well, he's not going to score with shots like that. A lazy body kick attempt from Mcknight.
Mcknight shoots in for a takedown - he's clinched up with Yoshiki but Yoshiki pushes him off and we're back to square one.
Yoshiki closes the distance and clinches up with Mcknight, looking for a takedown. Yoshiki pushes Mcknight against the cage but Mcknight circles to the side and manages to break the clinch.
Mcknight throws a head kick that misses.
Yoshiki tries to clinch but Mcknight moves out of range.
Horrible takedown by Yoshiki or perhaps it was just good defense by Mcknight which made him look bad.
Yoshiki looks for a takedown here. Will he get it? Mcknight is fending him off so far but Yoshiki persists. Nope, Mcknight circles away and we're back to standing.
That's four minutes gone in the round.
Mcknight lands a jab, followed by a cross and another cross, as Yoshiki backs up against the cage.
Yoshiki dives in and grabs Mcknight's left leg, looking for a takedown. Mcknight pushes down on Yoshiki's head and hops out.
Mcknight stuffs the takedown.
Yoshiki is breathing heavily.
Yoshiki fails with a takedown attempt from distance.
Yoshiki wants to clinch up but Mcknight keeps it at a distance.
Yoshiki with a body punch. A glancing blow.
Yoshiki fails with the takedown.
Yoshiki fails with a takedown attempt from distance.
The fans in attendance giving it up for the two fighters, who have really let it all hang out in the last minute or so!
The crowd applaud the fighters efforts here as the round comes to an end.
No luck for Mcknight with that takedown attempt.
A telegraphed takedown attempt from Mcknight is defended easily by Yoshiki.
And thats the end of the round the fighters go back to their corners.
That was a close second round but I would say that Angel Mcknight will probably get the nod.
The fighters get back to their feet, the hooter sounds and we're back to the action! This is the final round!

Mcknight tries to clinch but Yoshiki is having none of it.
Mcknight tries to drive through with a takedown attempt but Yoshiki defends well and Mcknight ends up having to push Yoshiki into the cage where they will battle it out in the clinch.
Yoshiki putting his Muay Thai to good use. He has Mcknight in a tight clinch and is doing some damage with knees to the body.
Yoshiki tries to pull guard but Mcknight won't allow it.
Mcknight is looking to take this one to the mat.
Mcknight working hard to break the clinch.
Mcknight can't break the clinch.
Yoshiki has hold of a leg and is looking for a trip takedown. Mcknight avoids it nicely though and we remain in the clinch.
Yoshiki working hard to break the clinch.
Yoshiki is trying to pull guard but being pressed up against the cage enables Mcknight to keep the fight standing.
Angel Mcknight has stuffed three takedown attempts in the round now. That's going to take a lot out of TikaKiyo Yoshiki.
That's one minute gone in the round.
Yoshiki is trying to pull guard but being pressed up against the cage enables Mcknight to keep the fight standing.
Mcknight is trying to pull guard but being pressed up against the cage enables Yoshiki to keep the fight standing.
Mcknight can't break the clinch.
Yoshiki is working on a leg, looking for a takedown but Mcknight is defending well.
Yoshiki gets control of Mcknight's arms and successfully pulls guard. Yoshiki will no doubt be looking for submissions off his back.
Yoshiki working a defensive guard but Mcknight manages to pass into side control anyway.
Yoshiki takes a big intake of breath there - he's definitely tired.
Yoshiki is positioning himself to get back to half guard.
Mcknight throwing shots but missing, from side control.
Mcknight controlling from side mount.
That's two minutes gone in the round.
Yoshiki strikes from the bottom but Mcknight takes advantage and advances to full mount!
Yoshiki wriggling around on the bottom manages to avoid the strikes thrown by Mcknight.
Yoshiki tries to reverse the position but Mcknight maintains control.
Mcknight controlling from the full mount.
Yoshiki avoids a strike by Mcknight and manages to complete a very nice reversal in the process, to end up in Mcknight's guard! Fantastic escape!
That's three minutes gone in the round.
Yoshiki trying to control but Mcknight is working from the bottom.
Yoshiki tries to free his leg and advance position but Mcknight is retaining full guard.
Yoshiki throws a big right hand that misses.
Mcknight is working the butterfly guard. He manages to land a nice scissor sweep and is now in half guard on the top. Nice move.
Yoshiki wants to control but Mcknight is keeping busy and won't allow it.
Mcknight content to control rather than advance.
Yoshiki wants to control the action here but instead Mcknight manages to pass to full mount!
That's four minutes gone in the round.
Yoshiki wants to control but Mcknight is having none of it.

Mcknight swings around for an armbar but it's a sloppy attempt and Yoshiki is now in Mcknight's guard. A big mistake from Mcknight there, giving up the dominant position!
Yoshiki looking to sit in guard and control but Mcknight gets the butterfly guard and sweeps. He's now in the guard on the top.
The crowd applaud the fighters efforts here as the round comes to an end.
Mcknight throws a big right hand that misses.
And that's the end of the fight!
That was a close round. You could make an argument for either fighter but I would give it to Angel Mcknight.
I think Mcknight has won this one but let's see what the judges have to say. Over to the ring announcer for the scorecards.
Ladies and gentlemen, after 3 rounds of action, we go to the scorecards for a decision.
Judge Yukihiro Shimada scores the fight 28:30
Judge Yasuomi Hirokawa scores the fight 29:28
Judge Kenichi Hosakawa scores the fight 29:28
In favor of your winner, by split decision... Angel Mcknight!
|
|
|
|
|
|
|
|
|
|
|
|
|
|
|
|
|
|
|
|
|
|
|
| S |
C
A |
G |
S |
C
B |
G |
|
S |
C |
G |
|
energy
A | B |
|
hype
A | B |
|
pop
A | B |
|
mgr
A | B |
|
FIGHT
RATING
47% |
|
|
|
|
|
|

