|
|
PBP Commentary |
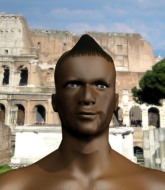
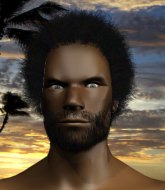
Coming up we have a bantamweight MMA rules bout between Kael Coleman (ranked 0 p4p, 0 weight class) and Tip Top (ranked 0 p4p, 0 weight class). We have two fighters making their debuts here, so let's see who comes out of this one with their first professional victory.
 |
|
 |
| 170 cm
25
135 lbs
0 - 0 - 0 |
|
167 cm
18
134 lbs
0 - 0 - 0 |
BJJ Blue Belt
Basic striking
Granite chin |
|
BJJ Blue Belt
Counter fighter
Very confident |
|
| |
|
Ladies and gentlemen. This fight is 3 rounds, in the bantamweight division.
Introducing the fighter to my left, fighting out of the red corner.
With a record of
0 - 0 - 0, fighting out of The Island, Kael Coleman!
And introducing the fighter to my right, fighting out of the blue corner.
With a record of
0 - 0 - 0, fighting out of The Island, Tip Top!
The judges for this bout are , and .

The bell rings for round one and we are underway!
Coleman fails with a takedown attempt from distance.
Coleman throws a quick inside leg kick.
Top displays good takedown defense there as he swats away a double leg from Coleman.
Coleman darts in and out, connecting with a jab.
Coleman dances in quickly and lands a nice inside leg kick on Top. That did some damage!
Coleman closes this distance looking for a takedown but Top circles away.
That's three failed takedown attempts in the round for Kael Coleman. That's going to take a lot out of him.

Coleman darts in and lands a nice takedown into half guard.
We may be looking at a referee standup if the pace doesn't pick up soon.
Coleman is looking to take a break and control but Top is keeping him honest, looking to work from the bottom.
Coleman has decided to stand back up but his arm is trapped. Whilst he's worrying about his arm, Top works to full guard.
Top is working an open guard here, looking to improve his position. No doubt that will leave him open to counters but at least he's being more offensive.
Coleman looking to pass the guard.

That's one minute gone in the round.
Coleman wants to control from the top but Top keeps moving.
Top punching from the bottom.
Top working the defensive guard well to avoid strikes from Coleman.
Coleman pressing down on his opponent's thigh, looking to pass guard. Top is keeping the position for now.
Coleman trying to pass the guard. He's being very persistent here but Top manages to land a sweep and now he's on top!
Top trying to control but Coleman is working from the bottom.
Top throwing elbows and punches but not connecting, as Coleman works some decent striking defense from the bottom.
Top trying to pass the guard but can't manage it just yet.
Top has the superior BJJ but he's also working some ground strikes into his gameplan.

That's two minutes gone in the round.
Top throws an elbow that misses. Coleman uses the momentum to reverse the position. He's now in Top's guard. Nice move by Coleman!
Coleman wants to control from the top but Top keeps moving.
Top lands a beautiful switch and he's in full mount! That could spell trouble for Coleman!
The fighters are pressed up against the cage, both looking to find a bit of space to work.
Top thowing shots but they're missing.
Top controlling from mount.
Top lands a heavy elbow.

That's three minutes gone in the round.
Coleman regains half guard.

The fighters are starting to get a bit slippery now, which will make submissions a bit more difficult.
Top seems to be working for a kimura but Coleman defends the submission attempt.
Coleman wants to get back to full guard.
Coleman moves into full guard.
Top throws a big elbow that misses.
Top lands a couple of digs.
Top lands a couple of decent looking shots.
Top wants to control from the top but Coleman keeps moving.
Coleman looking to control.

That's four minutes gone in the round.
Top postures up and lands some nice ground and pound.
Top trying to control the position from guard on top but Coleman is wriggling around, looking for whatever he can.
Top trying to move into half guard but instead Coleman has managed to sweep!

Coleman drops back for a leg but he's not going to get it - he lets go and Top dives on top into guard.
The fans in attendance giving it up for the two fighters, who have really let it all hang out in the last minute or so!
Top is looking to work some ground and pound but Coleman has wrist control.
Top trying to control the position from guard on top but Coleman is wriggling around, looking for whatever he can.
As the round comes to an end the crowd are showing their appreciation for a great round of action.
Coleman manages to sweep nicely, so he's now on top. Top manages to get himself to full guard.
Coleman scoring with some ground and pound.
And thats the end of the round the fighters go back to their corners.
That was a close round but I would say that Kael Coleman will probably get the nod.
Well, the break between rounds is over. Let's get back to the scrappin!

Coleman shoots in and drives through. Top sprawls well.
Coleman fails with an attempt to clinch.
Top gets caught flat footed, as Coleman shoots in with a quick takedown into guard.
Top trying to control the position.
Top is working the butterfly guard. He manages to land a nice scissor sweep and is now in half guard on the top. Nice move.
Top wants to take a breather but Coleman is having none of it.
Top trying to control the pace.
Coleman trying to control but Top postures up.
That's one minute gone in the round.
Top is stalling here. Coleman is in no mood to hang around though. He's locked up a kimura from the bottom! Top seems to be keeping calm but he's forced to roll out of the hold and Coleman has ended up in side control on the top. Nice work.
The ground and pound from Coleman seems to be hitting the mat more than his opponent.

Coleman decides to take the fight back to the feet.
Coleman is looking for a takedown here. He's shot in and has managed to get it, finishing up in Top's half guard.
Kael Coleman overall seems to be getting the better of the ground position in the fight so far.
Coleman wants to lay and pray for a moment but Top keeps working.
Coleman is stalling here. Top is in no mood to hang around though. He's locked up a kimura from the bottom! Coleman seems to be keeping calm but he's forced to roll out of the hold and Top has ended up in side control on the top. Nice work.
Top looking to punish the body of his opponent here but Coleman is avoiding damage well.
That's two minutes gone in the round.
Coleman is trying to escape the position but Top is controlling the position.
Top working the ground and pound but Coleman is defending the strikes.
Top with the ground and pound but Coleman regains half guard under the barage of strikes.
Ground and pound from Top.
This has been an exciting period of action!
Coleman wants to control but Top is keeping busy.
Top scoring with strikes to the body and head.
Coleman wants to control but Top is keeping busy and won't allow it.
Top trying to control from half guard but Coleman is working away.
Coleman wants to get back to full guard.
That's three minutes gone in the round.
Top is working for a kimura but Coleman is defending it quite comfortably.
Top throwing shots but Coleman is blocking nicely.
Top is working for submissions here but there's nothing on.
Top is breathing heavily.
Coleman trying to control here.
Top thumps the canvas. Not on purpose obviously - he just missed Coleman's head.
Top trying to pass the guard but Coleman defending well.
That's four minutes gone in the round.
Coleman is trying to control but can't.
Top is looking for a kimura here.
Coleman is trying to get back to full guard.
Coleman wants to control but Top is keeping busy.
The crowd applaud the fighters efforts here as the round comes to an end.
Top is working for submissions here but there's nothing on.
Top is looking for a kimura. It's going to be difficult to finish that from half guard though and Coleman defends it well.
And thats the end of the round the fighters go back to their corners.
A close second round but Tip Top will probably get the nod - 10:9.
That's the end of the round. The referee orders the cornermen out of the cage so we can get back down to business. The crowd applaud as we get ready to start the final round!

Coleman fails to land the takedown.
Coleman looks for a takedown here. Will he get it? Top is fending him off so far but Coleman persists. Nope, Top circles away and we're back to standing.
Coleman shoots in for a takedown and gets it. Let's see what he's got on the mat.
Coleman tries to free his leg and advance position but Top is retaining full guard.
Coleman wants to get up but he can't break Top's closed guard. He needs to be careful trying to break the legs open, as he's open to submissions here.
Top pulls Coleman in close to prevent any damage.
Coleman wants to stand but Top is controlling his posture from full guard.
Top trying to strike off his back.
That's one minute gone in the round.
Top is looking to stand up but Coleman isn't so interested in that idea.
Coleman won't allow Top to sweep him here.
Top keeping moving, preventing Coleman from controlling successfully.
Coleman looking to pass the guard.

The referee has ruled that neither fighter is active enough on the ground and has stood them back up.

Coleman forces Top back against the cage and clinches.
Coleman jumps guard and drags Top to the mat. He's obviously going to be looking for submissions off his back.
Coleman is trying to stand up but he's not managed so far.
Both fighters are breathing heavily.
Coleman trying to control the position.
That's two minutes gone in the round.
Top trying to control the position from guard on top but Coleman is wriggling around, looking for whatever he can.
Coleman is working from a closed guard but he's struggling to control his opponent.
Coleman preventing the ground and pound from doing any damage.
If this pace continues, the referee will definitely step in and force a standup.
Coleman is working from a closed guard but he's struggling to control his opponent.

We're going to have a standup here because Kael Coleman wasn't active enough for the referee's liking.
Coleman shoots in looking for a takedown. Top tries to sprawl out of it but Coleman keeps driving through. The fighters are pinned against the cage. Top manages to get underhooks and after a bit of a struggle, circles away and we're back to standing.
That's three failed takedown attempts in the round for Kael Coleman. That's going to take a lot out of him.
Top wants to clinch up but Coleman keeps it at a distance.
That's three minutes gone in the round.
Coleman has his takedown stuffed

and Top counters with a nice double leg into side control. Coleman won't be happy with that.
Coleman is working to avoid the ground and pound but Top connects with a decent elbow.
Top misses with an attempted head punch from side control.
Top controls the position from side control.
Top in side control, throwing shots but Coleman defends.
Top is looking to finish here, going for an Americana. Coleman knows the correct defense though, so he's OK.
You can see the frustration on Coleman's face, being in this tough position on the bottom.
That's four minutes gone in the round.
Top throwing strikes but missing, from side control.
Top throws a strike aimed at the side of Coleman's head but Coleman avoids it well.
This is a great period of action - very entertaining stuff!
Top throwing strikes but missing, from side control.
Top thinks about going for a far side armbar but bails out and retains the dominant position instead.
Coleman is trying to control Top's posture but Top avoids it.
As the round comes to an end the crowd are showing their appreciation for a great round of action.
And that's the end of the fight!
Tip Top comfortably won the final round on my scorecard.
I think Top has won this one but let's see whether the judges agree with me. Over to the ring announcer for the scorecards.
Ladies and gentlemen, after 3 rounds of action, we go to the scorecards for a decision.
Judge Andi Peters scores the fight for Tip Top!
Judge Gordon Ramsey scores the fight for Tip Top!
Judge Frank Skinner scores the fight for Kael Coleman!
Tip Top wins by split decision!
|
|
|
|
|
|
|
|
|
|
|
|
|
|
|
|
|
|
|
|
|
|
|
| S |
C
A |
G |
S |
C
B |
G |
|
S |
C |
G |
|
energy
A | B |
|
hype
A | B |
|
pop
A | B |
|
mgr
A | B |
|
FIGHT
RATING
57% |
|
|
|
|
|
|
