|
|
PBP Commentary |
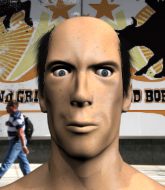
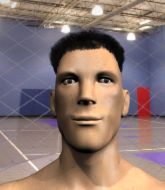
Coming up we have a lightweight MMA rules bout between Karl Pilkington (ranked 0 p4p, 0 weight class) and Jeremy Henderson (ranked 0 p4p, 0 weight class). Fingers crossed for an exciting fight - I'm sure both fighters are looking for a nice under the table bonus!
 |
|
 |
| 172 cm
29
160 lbs
4 - 1 - 0 |
|
176 cm
32
168 lbs
12 - 11 - 0 |
Good wrestling
Excellent boxer
Cardio machine |
|
Good wrestler
Excellent boxer
Heavy handed |
|
| |
|
Ladies and gentlemen. This fight is 3 rounds, in the lightweight division.
Introducing the fighter to my left, fighting out of the red corner.
With a record of
4 - 1 - 0, fighting out of New York, Karl Pilkington!
And introducing the fighter to my right, fighting out of the blue corner.
With a record of
12 - 11 - 0, fighting out of Las Vegas, Jeremy Henderson!
The judges for this bout are Gwen Towbar, Frank Dennis and Chris Downing.

The bell rings for round one and we are underway!
Henderson fails to land with a series of punches.
Henderson misses the shot to the body.
Henderson swings and misses with a hook to the body.
Henderson lands a nice looking body kick.
Pilkington lands a nice shot that snaps Henderson's head back.
Henderson looks to score with a jab to the body but Pilkington is just out of range.
Pilkington throws a hook to the body but it doesn't connect.
A bone on bone clash there as Pilkington blocks the leg kick.
Henderson is looking to chop away at Pilkington's legs.
Henderson thows a left - swing and a miss!
Pilkington cracks Henderson with a good jab.
Pilkington shoots in but Henderson avoids the takedown attempt easily.
Jeremy Henderson seems to be the more aggressive standup fighter in this bout.
Pilkington misses with a wild body shot.
Henderson scores with a jab to the head.
Henderson chopping away at his opponent's legs.
Henderson feints a straight left to the body, then turns around with a flashy move and hits Pilkingtons jaw with a dramatic spinning back fist!
We've seen a great period of action over the last minute or so - credit to both fighters for going all out!
Henderson tries a head kick but it misses.
Henderson moves into range and lands a nice leg kick.
Good shot there by Henderson.
We can't be sure of the tactics at this early stage but we have heard that Henderson has been working on his takedowns a lot in the buildup to the fight and we can only assume he's going to look to take this to the mat.

That's one minute gone in the round.
Henderson displays some good footwork, moving neatly out of range as Pilkington throws out the jab.
Henderson is the aggressor but that punch slipped nicely by Pilkington.
Henderson misses the shot to the body.
Pilkington moves out of range of the body kick from Henderson.
Henderson misses with a wild combination.
Henderson throws a body kick that misses.
We've been hearing reports that Pilkington has been drilling takedowns in recent sessions so let's see if that has an impact on the result of this fight.
Pilkington takes a punch to the jaw and another one to the bread basket.
Henderson slips under a jab.
Henderson is the aggressor but that punch slipped nicely by Pilkington.
Henderson fakes with the hands and throws a leg kick but Pilkington is out of range.
A nice inside leg kick there by Henderson. That's going to slow Pilkington down.
Pilkington dodges the punch combination from Henderson.
Henderson misses with a left hand
and Pilkington counters with a three punch combo that has Henderson backing up. Henderson nods at Pilkington to acknowledge the strikes.
Henderson turns his hip over beautifully as he lands a nice leg kick.
Pilkington thows a left - swing and a miss!
Pilkington scores with a three punch combo!

That's two minutes gone in the round.
The fans in attendance giving it up for the two fighters, who have really let it all hang out in the last minute or so!
Pilkington moves out of range of the body kick from Henderson.
Some wild striking there from Pilkington.
Nice jab there from Pilkington.
Henderson connects with a single shot there.
Henderson keeping his hands up high there, blocking the jab from Pilkington.
Henderson throws out a powerful jab.
Henderson throws an off balance right hand

and Pilkington holds on and brings the fighters into a clinch.
Pilkington tries for a takedown. No joy.
Henderson misses with a hook to the ribs.
Pilkington blocks an uppercut.
Pilkington tries to score a body lock takedown but Henderson shows good agility there to stay on his feet.
That's three failed takedown attempts in the round for Karl Pilkington. That's going to take a lot out of him.
Pilkington has hold of a leg and is looking for a trip takedown. Henderson avoids it nicely though and we remain in the clinch.
Henderson taking a break, stalling in the clinch.
Henderson is pressed up against the cage. Pilkington has hold of a leg and is looking to drag Henderson down to the mat. Henderson avoids the attempt though and has circled away. We're back to striking at a distance.

That's three minutes gone in the round.
Henderson throws a sloppy head kick and Pilkington moves out of range easily.
Henderson lands with a straight right. Pilkington didn't see that one coming.
Jeremy Henderson is looking to keep the fight on the feet at all costs.
Pilkington blocks a leg kick.

Henderson gets caught napping as Pilkington dives in and scores a takedown. Henderson manages to retain guard.
We've had a lack of effective grappling in the last minute or so, which could well see a referee standup.

Henderson is working actively off his back, looking to secure an arm or perhaps work for a triangle.
Pilkington stands up and looks to throw the legs aside to pass to side control. Henderson swivels though and keeps the full guard.
Pilkington is pushing down on Henderson's leg trying to pass to half guard. Henderson is fighting to maintain full guard but Pilkington has managed to sneak the leg through.
Henderson looks like he's trying to stand up.
Henderson is using up a lot of energy trying to get back to his feet. Perhaps he should improve his position first.

That's four minutes gone in the round.
Henderson actively working from the bottom here.
Henderson has hold of Pilkington's hands but Pilkington slips his arm to the side and lands an elbow.
The crowd are loving this. Great action here.
Henderson gets full guard.
Pilkington controlling from the top position.
Pilkington has to be careful here, sitting in the guard of a superior BJJ player.
The fighters are going at a pretty good pace and they're both starting to sweat now.
Henderson has his foot on Pilkington's thigh. He's trying to push off and get in position for a triangle, I think. Pilkington works his way back into a safe position though.
Pilkington landing with the ground and pound.
Pilkington scoring with punches to the head and body.
The crowd are going absolutely nuts as the round comes to an end - what a fantastic round of action!
Henderson doesn't do any damage with a couple of strikes from the bottom.
Pilkington working in close now, lands a nice elbow to the side of Henderson's head.
Pilkington trying to control but Henderson is working from the bottom.
And thats the end of the round the fighters go back to their corners.
That was a close round but I would say that Karl Pilkington will probably get the nod.
The fighters' corners scream their final instructions, as the referee calls time. Here we go, back to the action!

Pilkington looks to score with a jab to the body but Henderson is just out of range.
Henderson looks to land a combination but Pilkington avoids it well.
Henderson throws a sloppy head kick and Pilkington moves out of range easily.
Pilkington falls off balance throwing a combination
enabling Henderson to counter with a crisp jab.
Henderson throws a head kick that misses.
Henderson scores with a decent looking hook.
Henderson scores with a sloppy right hand. Pilkington should have avoided that one.
Sloppy strikes from Pilkington. Those never looked like landing.
The fighters circling - Henderson throws out the jab but it was never going to land.
This fight brought to you by 5M nutrition - it's mmmmm tasty. Nice jab by Henderson.
Pilkington throws a low kick but his opponent is out of range.
Pilkington throws a lazy right hand but Henderson sees it coming a mile off and sidesteps it easily.
Nice defenses there by Henderson.
Pilkington fakes high and shoots in for a takedown but Henderson avoids it really well and circles away.
Henderson connects with a slap. Keep your fist closed son.
That's one minute gone in the round.
Henderson looks to land a left hand but Pilkington moved out of range nicely.
Pilkington takes a shot to the nose. Hopefully that hasn't broken it.
Henderson throws a hook to the body but it doesn't connect.
Jeremy Henderson seems to be getting the better of the standup.
Pilkington shuffles to his left behind two crisp jabs. Henderson eats them both and turns towards Pilkington to reposition himself and eats a stinging right hand-left hook combo.
Pilkington cracks Henderson with a hook to the jaw. Both fighters smile at eachother and high-five before getting back down to business.
Pilkington staying out of range there.
Henderson throws a leg kick but Pilkington sees it coming and moves out of range.
Pilkington slips a jab and a cross from Henderson.
Henderson slips a jab and a cross from Pilkington.
Pilkington shoots in looking for a double leg takedown. Henderson defends it nicely.
Henderson dodges the punch combination from Pilkington.
Henderson throws the left hand but Pilkington avoids the punch easily.
That's two minutes gone in the round.
Pilkington misses the shot to the body.
Pilkington misses with a hook. Henderson ducked under it nicely.
Pilkington scores with a one two! Henderson had his feet all tangled up there and couldn't avoid the strikes.
Pilkington scores with a jab to the body.
The crowd are loving this. Great action here.
Pilkington ducks under a wild hook from Henderson.
Henderson cracks a nice hook into Pilkington's ribs.
Henderson throws out a loose jab but Pilkington uses good head movement to avoid it.
Henderson motions for Pilkington to come forward. Henderson throws a leg kick but it misses it's target.
Karl Pilkington is looking to throw some combinations by the looks of things.
Henderson lands a leg kick that knocks Pilkington off balance momentarily.
Pilkington fails to land with the punch combination there - jab, cross, hook, miss, miss, miss.
Pilkington scores with a body shot.
Henderson lands a nice looking kick to the body. Pilkington takes a step back to recover.
Pilkington throws a hook to the body but it doesn't connect.
Henderson connects with a lovely jab that went straight through the gap between Pilkington's hands.
Henderson throws a combination but comes up with nothing but fresh air.
That's three minutes gone in the round.
Henderson throws out a loose jab but Pilkington uses good head movement to avoid it.
The fighters circling - Pilkington throws out the jab but it was never going to land.
Henderson throws a body punch but Pilkington moves out of range.
Pilkington swinging wildly here.
Pilkington throws a hook to the body but it doesn't connect.
Henderson will need to tighten up his combinations if he doesn't want to gas himself out, swinging at thin air.
Henderson throws a decent looking leg kick but it doesn't land clean.
Henderson throws out a loose jab but Pilkington uses good head movement to avoid it.
Pilkington tests Henderson's chin there with a solid looking shot.
Pilkington tries to bum rush Henderson with a series of wild strikes but Henderson uses good footwork to avoid the assault.
Pilkington looks shocked there as he takes a right hand to the temple.
Henderson misses with a body shot. Nice footwork from Pilkington.
Pilkington looks to score with a jab to the body but Henderson is just out of range.
That's four minutes gone in the round.
Henderson throws a low kick, looking for Pilkington's leg but Pilkington calmly moves out of range.
Henderson throws a sloppy head kick and Pilkington moves out of range easily.
Pilkington defending well as Henderson loads up on a big left hand.
Henderson connects with a slap. Keep your fist closed son.
A punch lands to the side of Pilkington 's head but he takes it in his stride.
A big left from Henderson misses.
Pilkington cracks Henderson with an open hand slap.
A slapping leg kick lands for Henderson.
We've seen a great period of action over the last minute or so - credit to both fighters for going all out!
Henderson lands a leg kick that knocks Pilkington off balance momentarily.
Pilkington tries a switch kick but it misses it's target.
Henderson avoids a lazy jab quite easily.
Pilkington ducks down and throws a hook to the body but Henderson moves away.
As the round comes to an end the crowd are showing their appreciation for a great round of action.
Henderson tries a head kick but it misses.
Pilkington connects with a jab.
Henderson tries a switch kick but it misses it's target.
Henderson does a little shimmy and throws a leg kick. The leg kick missed by a considerable margin though, making him look a little bit silly for doing the shimmy.
And thats the end of the round the fighters go back to their corners.
A close second round but Jeremy Henderson will probably get the nod - 10:9.
That's the end of the interval. I'm sure that seemed a lot quicker than a minute for our two fighters! Back to the action. This is the final round!

Pilkington takes a shot to the body in his stride.
Henderson throws a poor cross that misses
and Pilkington holds on and brings the fighters into a clinch.
Henderson trying to stall but Pilkington improves his position.
Pilkington blocks an uppercut.
Henderson misses with a punch to the body.
Pilkington blocking some punches.
Henderson goes for a body shot but it's blocked.
Henderson lands with a short punch from the clinch.
Henderson trying to land knees to the body.
Henderson wants to break free. God knows he wants to breaaaak freeee.
Henderson is trying to maintain a safe position but Pilkington gets an underhook and turns Henderson into the cage.
Henderson misses with a hook to the ribs.
Henderson has had enough of the clinch but Pilkington keeps him there for the moment.
That's one minute gone in the round.

Henderson pushes off and circles away, back to the middle of the mat.
Henderson will need to tighten up his combinations if he doesn't want to gas himself out, swinging at thin air.
Pilkington swinging wildly here.
Henderson ducks down and throws a hook to the body but Pilkington moves away.
Henderson throws a looping overhand right but Pilkington ducks down to avoid it.
Henderson is looking to chop away at Pilkington's legs.

Pilkington drops Henderson with a right and a left! Pilkington comes rushing in but Henderson regains his composure and manages to keep Pilkington in guard.

Henderson is rocked!
The ref warns both fighters not to hold the cage as they work up against the meshing.
Wooooo! Give it up for these two warriors! They are putting on a show!
Pilkington is frustrating his opponent with some stalling tactics from top position.
Henderson is still in real trouble! Can Pilkington finish him?

Pilkington is trying to work a guillotine from the top, or something like that? Don't know how he thinks he's going to get a finish from there.
Pilkington is in close to Henderson's body, working some short punches and elbows.
Pilkington scoring with punches to the head and body.
Henderson working away from the bottom but not quite defensive enough there because Pilkington has passed into half guard!
Henderson is looking to sinch up a guillotine here but Pilkington pulls his head out easily.
Henderson takes a big intake of breath there - he's definitely tired.
Pilkington scoring with strikes to the body and head.
Pilkington drops an elbow to the side of Henderson's head.
Pilkington working the head and body with strikes.
Pilkington passes to side control.
A big shot lands for Pilkington! That's hurt Henderson! Will he recover? Pilkington fires away with more strikes and the referee has to step in to stop the fight!
Ladies and gentlemen, after 2:56 of round 3, we have a winner by way of TKO (Strikes). Karl Pilkington!
|
|
|
|
|
|
|
|
|
|
|
|
|
|
|
|
|
|
|
|
|
|
|
| S |
C
A |
G |
S |
C
B |
G |
|
S |
C |
G |
|
energy
A | B |
|
hype
A | B |
|
pop
A | B |
|
mgr
A | B |
|
FIGHT
RATING
100% |
|
|
|
|
|
|
