|
|
PBP Commentary |
Coming up we have a light heavyweight MMA rules bout between Lavern White (ranked 0 p4p, 0 weight class) and Sam Stone (ranked 0 p4p, 0 weight class). Over to our ring announcer for the fighter introductions!
 |
|
 |
| 201 cm
22
215 lbs
2 - 0 - 0 |
|
185 cm
21
200 lbs
0 - 0 - 0 |
BJJ Blue Belt
Counter fighter
Cuts easily |
|
BJJ Blue Belt
Brawler
Tends to cut |
|
| |
|
Ladies and gentlemen. This fight is 3 rounds, in the light heavyweight division.
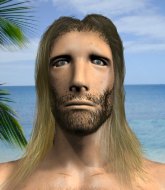
Introducing the fighter to my left, fighting out of the red corner.
With a record of
2 - 0 - 0, fighting out of Las Vegas, Lavern White!
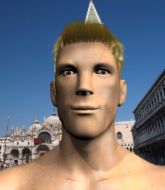
And introducing the fighter to my right, fighting out of the blue corner.
With a record of
0 - 0 - 0, fighting out of Las Vegas, Sam Stone!
The judges for this bout are George Francis, Cecil Peabody and Robert Twigg.

The bell rings for round one and we are underway!

Stone moves into the clinch.
White stops a takedown attempt from Stone.
White tries to pull guard but Stone holds him up against the cage and eventually White drops back down to his feet.
White is trying to pull guard but Stone turns him against the cage and we stay in the clinch.
Stone is working for a takedown up against the cage. He can't get it on this occasion though.
White tries to jump guard but he falls flat on his backside. Stone smiles and moves away.
That's three failed takedown attempts in the round for Lavern White. That's going to take a lot out of him.

White drives through and clinches with Stone against the cage.

Stone has dropped down and is working for a takedown. White is trying to keep an underhook but Stone manages to get the takedown into half guard.
White tries to roll over but Stone keeps him under control.
White is working hard here to advance position.
Stone really doesn't want to stay on the ground with White. If he can't get it back to his feet, it's only a matter of time before he'll be tapping out.

That's one minute gone in the round.

Stone seems to be working for a kimura but White defends the submission attempt.
Stone wants to lay and pray for a moment but White keeps working.
Stone is trying to work for a kimura. This could be trouble! No, White has managed to free his arm - good work.
The ref warns both fighters not to hold the cage as they work up against the meshing.
White trying to control here.

White is looking to sinch up a guillotine here but Stone pulls his head out easily.

That's two minutes gone in the round.
Stone seems to be taking a bit of a break to think of his next move. He lands a short punch in the meantime.
White wants to get back to his feet.
White trying to control but Stone postures up.
White makes his way to full guard. A much better position for White.
White is working actively off his back, looking to secure an arm or perhaps work for a triangle.
White is working the butterfly guard. He manages to land a nice scissor sweep and is now in half guard on the top. Nice move.

That's three minutes gone in the round.
White is controlling the pace.
Stone trying to control here.
White seems to be working for a kimura but Stone defends the submission attempt.
White is controlling the pace.

That's four minutes gone in the round.
White tries to stand but his arm is trapped.
Stone wants to control the action here but instead White manages to pass to full mount!
White avoids the attempt from Stone to control.
White content just to control the position here.
White's ground tactics aren't going to win him many fans. Let's hope he's got fireworks for us if he gets back to his feet because he's not doing much on the ground.
The crowd applaud the fighters efforts here as the round comes to an end.
And thats the end of the round the fighters go back to their corners.
Lavern White dominated that round.
OK. That's time! The bell goes and we're back to the action.

Stone misses with a jab and misses with a cross straight after too.
Stone shoots for a double leg takedown but White sprawls well. He's pushed Stone's face into the mat and manages to get back to his feet relatively easily.
Stone fails with the takedown
and White counters by moving into the clinch.
Stone is working on a leg, looking for a takedown but White is defending well.
Lavern White has stuffed three takedown attempts in the round now. That's going to take a lot out of Sam Stone.
Stone is trying to pull guard but being pressed up against the cage enables White to keep the fight standing.
White softening up his opponent with strikes, against the cage.
Stone wants to strike at distance but he can't break free of the clinch.
Stone pushes White back against the cage and lands a hook to the side of the head.
That's one minute gone in the round.

White jumps into guard, dragging Stone to the mat.
Stone connects with a couple of short punches.
Stone wants to stand up, so he's looking to wriggle free of White's closed guard. He's half up but White has locked on to an arm! Uh oh! White pivots and extends the arm, Stone falls face first to the mat and taps??... does he?? YES! He's tapping! Excellent counter grappling there by White! Well done that man!
Ladies and gentlemen, after 1:32 of round 2, we have a winner by way of Submission (Armbar). Lavern White!
|
|
|
|
|
|
|
|
|
|
|
|
|
|
|
|
|
|
|
|
|
|
|
| S |
C
A |
G |
S |
C
B |
G |
|
S |
C |
G |
|
energy
A | B |
|
hype
A | B |
|
pop
A | B |
|
mgr
A | B |
|
FIGHT
RATING
61% |
|
|
|
|
|
|

