|
|
PBP Commentary |
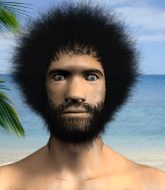
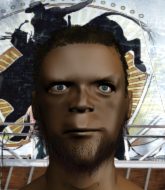
Coming up we have a middleweight MMA rules bout between Eddie Mendoza (ranked 0 p4p, 0 weight class) and Shinobu Hayabusa (ranked 0 p4p, 0 weight class). Mendoza comes to the cage accompanied by Dr green thumb by C ypress Hill. Shinobu Hayabusa will no doubt be trying to keep this one on the feet, where he has a distinct advantage.
 |
|
 |
| 191 cm
21
197 lbs
1 - 0 - 0 |
|
184 cm
22
193 lbs
1 - 0 - 0 |
BJJ Blue Belt
Brawler
Prefers ground |
|
BJJ Blue Belt
Good kicks
Determined |
|
| |
|
Ladies and gentlemen. This fight is 3 rounds, in the middleweight division.
Introducing the fighter to my left, fighting out of the red corner.
With a record of
1 - 0 - 0, fighting out of Tokyo, Eddie Mendoza!
And introducing the fighter to my right, fighting out of the blue corner.
With a record of
1 - 0 - 0, fighting out of Tokyo, Shinobu Hayabusa!
The judges for this bout are Tatsuya Matsuyama, Shirou Masuda and Yukihiro Shimada.

The bell rings for round one and we are underway!
Mendoza fails with a takedown attempt.
Hayabusa looks for a takedown but Mendoza sprawls well.
Hayabusa avoids the head kick by Mendoza.
Mendoza is looking to score with low kicks.
Hayabusa goes to the watering hole and comes back with a big thumbs up from the judges as he scores a three punch combo.
A head kick from Hayabusa lands but Mendoza takes it in his stride.
Hayabusa moves out of range as Mendoza strikes.
Eddie Mendoza seems to be the more aggressive standup fighter in this bout.
We've had a slow start to the round here - hopefully the action picks up.
Hayabusa throws a looping left and ducks down for a takedown. He's got his arms around Mendoza's waist but Mendoza gets an underhook and avoids the takedown by throwing Hayabusa off to one side.
Mendoza throws a low kick but his opponent is out of range.
Hayabusa fails with the takedown

and Mendoza counters with a nice double leg into guard.
Eddie Mendoza has stuffed three takedown attempts in the round now. That's going to take a lot out of Shinobu Hayabusa.

That's one minute gone in the round.
Hayabusa avoiding any damage from the ground and pound.
Mendoza wants to control from the top but Hayabusa keeps moving.
Hayabusa being controlled here, momentarily.
Hayabusa is looking to get back to his feet but can't, whilst Mendoza is controlling him.
Mendoza thows a big elbow that misses.
Hayabusa tries to land a sweep but no joy.
Mendoza throwing strikes from guard but Hayabusa blocks nicely.
Mendoza lands a couple of decent looking shots.

That's two minutes gone in the round.
A lull in the action here being met with boos from the crowd.
Mendoza chips away with some ground and pound.
Mendoza pressing down on his opponent's thigh, looking to pass guard. Hayabusa is keeping the position for now.
Mendoza loading up with the ground and pound but he's missing more than he's landing in this flurry.
Mendoza pressing down on his opponent's thigh, looking to pass guard. Hayabusa is keeping the position for now.

Mendoza drops back for a leg! It's a sloppy attempt though and Mendoza jumps back into guard quickly, to retain the dominant position.
Mendoza stands up and looks to throw the legs aside to pass to side control. Hayabusa swivels though and keeps the full guard.
Mendoza is breathing heavily.
Mendoza trying to land body shots but he keeps hitting the mat.

That's three minutes gone in the round.

It looks like we're going to have a standup here. Neither fight is doing enough on the ground.
Hayabusa fails with the takedown.
Mendoza throws a head kick that misses
and Hayabusa counters with a head kick.
Hayabusa throws a body kick but he was well out of range there.
Mendoza looks for a takedown but Hayabusa sprawls well.
Hayabusa thuds his shin into the meat of Mendoza's side.
Hayabusa lands a kick to the ribs of his opponent. Nice work there - in and out in a flash.
Mendoza misses with a combination
and Hayabusa counters with a nice body kick.
Hayabusa tries for a takedown but Mendoza sees it coming a mile off and avoids it easily.

That's four minutes gone in the round.
Hayabusa tries a head kick but it misses.
Mendoza throws a sloppy head kick
and Hayabusa counters with a nice body kick.
Mendoza throws a head kick that misses
and Hayabusa counters with a two punch combo.
Hayabusa shoots in for a takedown but Mendoza shows good takedown defense.
Mendoza throws a sloppy head kick
and Hayabusa counters with a kick to the head that grazes his opponent. Mendoza is lucky that one didn't land flush.
Mendoza takes a kick to the body and keeps moving.
Mendoza throws a left and a right that both miss
and Hayabusa counters with a flying knee. Nice.
Hayabusa looking to take his opponent's legs away with the low kicks.
Mendoza throws an uppercut from half a mile away. Hayabusa sees it coming and avoids it easily.
Mendoza throws a lazy head kick
and Hayabusa counters with a low kick, right behind Mendoza 's knee.
And thats the end of the round the fighters go back to their corners.
Eddie Mendoza dominated that round.
The fighters' corners scream their final instructions, as the referee calls time. Here we go, back to the action!

Hayabusa misses with a takedown attempt
and Mendoza counters with a left and a right that stings Hayabusa.
Hayabusa has a takedown stuffed.
Mendoza throws a head kick that misses
enabling Hayabusa to counter with a crisp jab.
Hayabusa shoots in for a takedown - he's clinched up with Mendoza but Mendoza pushes him off and we're back to square one.
Eddie Mendoza has stuffed three takedown attempts in the round now. That's going to take a lot out of Shinobu Hayabusa.
Hayabusa uses good head movement to avoid the hook from Mendoza.
Shinobu Hayabusa is looking to throw some combinations by the looks of things.
Mendoza shoots in and bounces Hayabusa off the cage to secure the takedown into guard.
Hayabusa not looking particularly offensive just at the moment.
The fighters are starting to perspire pretty heavily.
Mendoza stops Hayabusa from standing up.
Both fighters are absolutely exhausted here.
That's one minute gone in the round.
Mendoza trying to land body shots but he keeps hitting the mat.
Mendoza is taking a break and basically stalling. The referee will not allow him to do that for long.
Mendoza drops back looking for a leg! Hayabusa is in trouble here! The fighters roll with the hold and Hayabusa manages to kick Mendoza off! Mendoza jumps back into Hayabusa's guard.
Mendoza looking to pass the guard.

Hayabusa uses the cage to get back to his feet.
Mendoza closes the distance and lands a one-two.
That's two minutes gone in the round.
Hayabusa shoots in and drives through. Mendoza sprawls well.
Mendoza closes the distance and gets a double leg, slamming Hayabusa to the mat! Hayabusa manages to get full guard.
Mendoza throwing elbows and punches but not connecting, as Hayabusa works some decent striking defense from the bottom.
Mendoza stands up and looks to throw the legs aside to pass to side control. Hayabusa swivels though and keeps the full guard.
Mendoza is looking to work some ground and pound but Hayabusa has wrist control.
The ref warns both fighters not to hold the cage as they work up against the meshing.
Mendoza loading up with the ground and pound but he's missing more than he's landing in this flurry.
Mendoza stands up from guard. Let's bang!
A head kick by Mendoza misses
and Hayabusa counters with a kick to the head that grazes his opponent. Mendoza is lucky that one didn't land flush.
Crunch! Hayabusa slams his shin into Mendoza's torso.
That's three minutes gone in the round.
Mendoza throws a leg kick
letting Hayabusa counter with a right hand.
Hayabusa lands a front kick.
Hayabusa connects with a solid leg kick.
Mendoza decides to change it up a bit and drives through with a nice takedown into half guard.
Hayabusa is trying to stand.
Mendoza throwing shots but Hayabusa is blocking nicely.
Mendoza looking to pass the half guard. Not this time.
Hayabusa keeping his head moving to avoid the ground and pound.
Mendoza looking for a kimura but he'll have to free his other leg if he wants to finish that. Perhaps he's just using it as a distraction technique.
That's four minutes gone in the round.
Mendoza missing with the ground and pound from half guard.
Mendoza seems to have lost interest with the ground game and is thinking about standing back up.
Mendoza is trying to work for a kimura but Hayabusa is defending well.
The referee decides to stand the fighters back up.
Mendoza takes a body kick right on the floating rib. Ouchie.
And thats the end of the round the fighters go back to their corners.
Eddie Mendoza dominated that second round.
The corners get their ten second warning. Both fighters stand from their stools and stare eachother down, ready to get back to the action. Let's get this one finished - here comes the final round!

Hayabusa throws a left and a right that both miss
and Mendoza counters with a leg kick.
Mendoza throws a leg kick
and Hayabusa counters with a two punch combo.
Hayabusa throws a head kick that Mendoza semi-blocks.
Mendoza shoots in for a takedown and gets it.
Hayabusa looks like he's trying to stand up.
Mendoza is working for submissions here but there's nothing on.
Mendoza scores with a couple of good hammerfists.
Both fighters are breathing heavily.
Hayabusa blocking the ground and pound attempt from Mendoza.
That's one minute gone in the round.
Mendoza throwing punches and elbows but they're not doing any damage.
Hayabusa wants to get back to his feet.
Mendoza thows a wild elbow that connects with the canvas.
Mendoza prevents Hayabusa from improving his position.
It looks like we're going to have a standup here. Neither fight is doing enough on the ground.
Hayabusa lands with a kick to the temple. Mendoza shrugs as if to say "is that all you've got?"
Hayabusa throws a series of punches but Mendoza moves out of range.
Mendoza throws a head kick that misses
and Hayabusa counters with a lovely straight right hand!
A head kick from Hayabusa lands but Mendoza takes it in his stride.
That's two minutes gone in the round.
The crowd are starting to boo a lack of action.
Ooooh, nice body kick lands from Hayabusa. Mendoza shrugs it off though.
Mendoza throws a head kick that misses and slips in the process. He scrambles back to his feet and the fighters circle.
A head kick by Mendoza misses
and Hayabusa counters with a solid body kick.
Mendoza showing good head movement there, avoiding the strikes from Hayabusa.
Hayabusa lands a head kick!
Hayabusa lands a high kick!
Mendoza throws a body kick the misses
and Hayabusa counters with a flying knee. Nice.
Mendoza throws a looping overhand right but Hayabusa ducks down to avoid it.
That's three minutes gone in the round.
Mendoza ducks right into an uppercut from Hayabusa.
Hayabusa looks to score with a combo but nothing lands.
Hayabusa throws a combination but comes up with nothing but fresh air.
Hayabusa shoots in and drives through. Mendoza sprawls well.
Mendoza throws a lazy head kick
and Hayabusa counters with a nice body kick.
Mendoza throws a leg kick that is checked
and Hayabusa counters with a solid body kick.
Hayabusa avoids the head kick by Mendoza.
Hayabusa avoids a lazy jab quite easily.
Mendoza shoots in for a takedown! He's got it and he's managed to land in full mount! That's better than Mendoza was expecting from the takedown attempt, I'm sure!
Mendoza wants to control the pace but Hayabusa is squirming around nicely.
That's four minutes gone in the round.
Hayabusa wants to hold on but Mendoza pushes him away.
Hayabusa is looking to get back to his feet - it's going to be hard from this position.
Hayabusa takes a big shot to the head but keeps on trying to improve his position.
Hayabusa tries to hold on but Mendoza pushes him away.
Hayabusa taking shots to the head.
Mendoza wants to control the pace but Hayabusa is squirming around nicely.
The crowd thankful this round is nearly over.
Mendoza looking to ground and pound but Hayabusa is blocking nicely.
Shinobu Hayabusa has stepped it up - he knows he needs a finish here!
Eddie Mendoza is fighting for a decision here - he's started to take the cautious approach.
Hayabusa is in a horrible position here, under a barrage of strikes, he's managing to avoid any damage.
And that's the end of the fight!
Eddie Mendoza showed his dominance in that final round.
Well I reckon that's a shut out for Mendoza, winning every round. Will the judges agree? They are the ones who matter, even if they are often depressingly incompetent. Over to the ring announcer for the scorecards.
Ladies and gentlemen, after 3 rounds of action, we go to the scorecards for a decision.
Judge Tatsuya Matsuyama scores the fight 30:27
Judge Shirou Masuda scores the fight 30:27
Judge Yukihiro Shimada scores the fight 30:27
In favor of your winner, by unanimous decision... Eddie Mendoza!
|
|
|
|
|
|
|
|
|
|
|
|
|
|
|
|
|
|
|
|
|
|
|
| S |
C
A |
G |
S |
C
B |
G |
|
S |
C |
G |
|
energy
A | B |
|
hype
A | B |
|
pop
A | B |
|
mgr
A | B |
|
FIGHT
RATING
32% |
|
|
|
|
|
|
